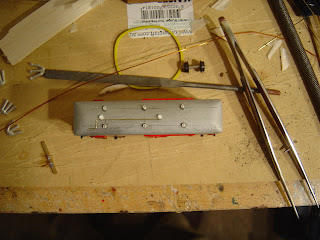
This week I've been doing roofs and stuff. After gluing the shot into the van bodies for weight, I glued the pre-shaped balsa roofs in place.

Once the glue had set I then carefully cut down the ends (well, as carefully as it gets) and then gave them a bit of a sanding to complete the shape.

The ventilators on the roof are courtesy of Trackgang. I marked in pencil where i wanted them to be, then attached them with 5 minute araldite. I also added the small circular bits which I assume hide the interior lighting bits, and the power supply lines for them as well ( gas or electricity, I'm not sure which).

So here is where we are up to at the moment. Almost finished apart from some details, the underframe bits and some bogies.


2 comments:
uote-'I also added the small circular bits which I assume hide the interior lighting bits, and the power supply lines for them as well ( gas or electricity, I'm not sure which).'
These are gas lines for the gas lighting. Generally the line runs up the wall, to the right of the entrance door on the platform end of van. Now you need to add gas cylinders to your underframe, instead of battery boxes. Piece of 3-4mm dowel would do.
Russell
I've used old paint brush handles which are about the right size :v)
Its supposed to be a plough van, which probably means I've got it wrong again. Having said that, from the pictures I've looked at during my research into NZR in the early 60's, I think I could safely state that there appears to be a prototype for almost anything short of the most ham fisted modeling you could imagine :v)
Post a Comment