Showing posts with label Others models. Show all posts

Thursday, July 17, 2014

Link of the week: impressive modeling from India

DB says:

Greetings, Antipodeans, from the homeless International Nomadic Branch of Motorised Dandruff Inc.

I was recently sent a link to some Chinese steam pics on Vikas Chander's website and as one does, I had an explore. By Jiminy, I stumbled upon some impressive modeling detailed in there that is really pushing boundaries.

While we all have our weaknesses, why he models German prototype is beyond me... but, for example, check out his layout lighting in the link here. That is just the coolest thing. subtly different colours in lit windows, dusk doloured skies behind buildings. Wow.

He also has laser marked cork road bed (derived from 3rd planit files) for laying out his staging yard, clever module mating and track alignment ideas, resistance solders his feeders to tracks to avoid melting sleepers, and details some of the most impressive (if bewildering) electronic implementations.

We can only dream... but it's well worth a browse!

Warning: avert your eyes if you're on a limited budget


Saturday, February 08, 2014

Saturday morning

Well, its raining here at La Casa Dandruff, which means that gardening duties are taking a back seat this morning.

On Waitangi day a group converged on Grant Morells place in the Wairarapa to look for lost modeling mojo. Grants layout has featured in the journal ( and the book of faces), but I may as well add a few shots.
Grant has a rather salubrious railway room off the main house

  A rarity in this country is a full NZP layout that runs well and is fully sceniced. The time taken just to assemble kits tends to leave little for the lineside items

'Carterton'
'Logging and Booths landing'
Several other modelers had brought along items. However I believe that these are Grants and the concrete pad is part of a loco depot that's under construction.

As well as a wee bit of modeling, bollocks was talked and the borax was poked.
Most amusing site was the solution to pickup problems with Cabbages dubs A with sound. This involved being pushed/dragged around the layout by Quentins B class Fairlie
I have come away a bit more inspired than I was, and with some better ideas on what to fit into the room. The roundy roundy idea has been dropped and A point to point idea is forming. I just have to work out the track plan to provide enough running/shunting interest.

Saturday, May 28, 2011

Co-opted in

Last weekend, At the invitation of another modeler, I took a bit of a road trip. After passing through 3 of the longest speed bumps in the country (namely Masterton, Carterton and Greytown), I arrived at my destination, Featherston and more accurately the Fell museum. I've been co-opted to help with completing the N gauge model of Summit by B 0-4-4-0 of this parish. He has put quite a bit of effort into the scenery and another local modeler has built some nice houses for the railway settlement. My job is to sort out the rolling stock (apart from the locos). I've been presented with a large amount of old rolling stock that ,while domiciled in a box labeled NZ120, is actually built to a scale of 3mm to the foot. This is the 'British' TT scale. Why, I've got no idea. Unfortunately, so is the model. We 'proved' this by placing some of the 3mm rolling stock on the layout, and then some of my 2.5mm rolling stock. The smaller scale stuff just looked completely wrong, and was lost in the yard.

So, squirreling the boxes of stuff home, and inspecting it in the cold light of day.
First up, Its all made of balsawood and card, and its very well made.


4 Vr refrigerated wagons. Impressively well made ladders and nicely detailed ice hatches.


A collection of Uc wagons. Wood tanks with paper and card details.


4 S sheep wagons. these are very impressive, even down to the wires. The roof walks are a bit bendy, but I'll replace those with strip wood


T callte wagons, a Ua gas holder wagon and Zp vans.


A 47' car-van.The detailing is especially fine around the windows, and its all square as well.


47' van.


This demonstrates how much larger these models are than Nz120 models. End on view of 2 47' vans.

There are also some locos.


Dg's, again all card and balsa wood. The bogies are from old Lima models which are best used for stationary models.


A De sans bogies. I'm torn as to which loco to use as the De gives a 3 year time window, where the Dg's are only really 6 months in 1955.

There are also some Lc-2's, a few 4 wheel vans and some other bogie wagons.

B 0-4-4-0 has also been busy, working on the Fell vans. He has made a master and gone a bit nuts casting them.


I think this is the total number of Fell vans ever built. For a first attempt at casting its very good.

So, what I have to do is tidy the wagons up and sort out the running gear. Fortunately its to be a static display so nothing needs to work.

Sunday, February 20, 2011

An update from the front

Just back from the Whanganui show. Once again it was a great chance to catch up with some fellow modelers and meet some readers (Hi to Zane and Quintin).

The show was interesting (coal smoke from the traction engine outside added to the flavour), in a good location. However (and for once) there was not really anything that caught my eye layout wise. Well, apart from the Marks Model works (and friends) stand.

First up is an N gauge layout built as a layout for kids to play with, by a modeler that has created some well executed 'left field' models in the past(I wish I could find pictures of his Wellington railway station in wood, complete with trains). The big kids gave it a good run today as well.


The thing I really like about this layout is that it can be folded in 1/2 for transport/storage. The 9' radius curves were a bit limiting for my Nz120 models but 1410 soldiered on for the whole afternoon. This layout provoked a lot of discussion during the day and many ideas were kicked round. Another astounding fact is that the layout is powered by 2 sets of 8 AA batteries! this seems to be quite happy running locos for long periods of time (and I'm told that the batteries have not been changed in 3 years). This also provoked a lot of discussion, with much centered around the possibilities of running a layout on DCC from a laptops USB port.

Also present was the S scale Kai iwi /Rimu flats layout. This is an 1880's period layout which again fiolds in 1/2 for transport. The Rimu flats side is a work in progress, and while not having any prototype at least one punter claimed to have gone to school there.


The other side is a deceptively simple single track through some rolling countryside. However its the small details that set this layout apart from others. I'm told that the Birds etch is one of the most popular etches sold by MMW.

Saturday, February 12, 2011

Local sights

On our touring today I came across the main reason what Kiwirail doesn't wash its locos

'Hmm, must have shrunk in the wash again....'

This local attraction is just 5 minutes bike ride from the Schloss. I was quite impressed. The loop of track seems to be quite long.


'Ladies and gentlemen, the Overlander will be a bit late in Wellington on Monday as its only 1/10 the size...'

Monday, December 06, 2010

Pick up line

At the monthly support group meeting I had a chat with teach about putting some more pickups on some of his S scale steam locos. Several of his locos have the archaic 'one side of loco, other side of tender' system, which I think was invented as a medieval form of torture.

So yesterday I sat down with the first victim, an Online J. A first examination revealed a split frame mech, which was a pleasant surprise pick up wise. However since I was there 'we' decided to fit some more pickups to the tender anyway.
The first step was to solder some phosphor bronze spring wire to some thin PCB strips (well OK, sleepers). I then through a series of origami moves managed to fit the damn things and get them to work (well, rub without seizing the wheels up). Unfortunately we didn't have any thin flexible wire on hand (it was at home) so a full test was out of the question.

I should have got a photo....

One thing I did notice was just how much space there is on an S scale model to fit these sort of things. They are absolutely huge. I'm now looking forward to have a crack at some of the other locos.

Friday, August 20, 2010

layout tours

As part of the Trainz weekend Saturday afternoon was devoted to having a look at some local layouts. For some odd reason I got to play driver to 3 other lucky modelers. We then set foot off into the wilds of Cashmere. As a bynote, Marks model works product list is unlikely ever to be graced by a GPS unit ('At the next intersection, go thataway').

First up was Peter Ross' layout.


His currently completed scene is the Amberly Lime works. This is a nice piece of modeling, but for some reason it just didn't 'do it' for me. I think mostly as it is a nice uncluttered scene, but it takes up far too much space. Maybe I'm just bias against S scale. Maybe because I'm not quite sure that the colours are correct (well to my eye) and that there needs to be a bit more green in the base.


Next up was Neil Andrews 9mm layout (the GPS was OK with this). This is huge and features an enormous number of trees made from almost any material you can think of. This layout had atmosphere that I did like. Then again I do have a soft spot for 9mm (I think most 9mm modelers do indeed have a soft spot..)


Finally, and for something completely different, we visited Glen Anthonys garden railway. I've never been impressed by these (maybe cos I've only seen them in magazines). However Glenn has produced a charming layout with some very nice rolling stock and structures. Hes an ex Nz120er who made the jump to the largest scale he could find, skipping all the inconveniently small ones along the way.


The C and old style train in among the plants are just great. Don't forget this is in winter as well.

And I just had to take this shot.

'It scales out to 9" gauge'

Saturday, June 26, 2010

HO....Why Not?

Again at great personal risk of being excommunicated (especially on a Sunday morning when the righteous are afoot), Am_Fet ponders:

I must admit to being surprised at the turn the comments section took after my last post on the planned "SaltWorks" layout...until I actually reread the post and realised I had made the mistake of not actually making it clear that I HAD dropped the idea of modeling in HO and was reverting back to doing it as an Nz120 showpiece.

However, the comments made me pose the question...Why Not?

The first thing to investigate here (working on the fact that I have already got a baseboard dimensions in mind) is size. If I take an Nz120 DXB plan and scale it up by a factor of 1.379, I get this:


And thanks to Magikan (who once flirted with such things), a comparison shot between an HO RoadRailer and an Nz120 ZK which in real life are roughly the same size:


So immediately we are looking at locomotives and rolling stock that are roughly bigger by half again with all the size constraints that entails. For instance, if SaltWorks was going to be in HO I would have to make it longer and wider to fit in what I would like to see. For those interested, the scaling factor to get from HO to S is 1.359...so HO fits effectively between S and Nz120.

Okay, so if thats palatable (which I'm not sure about), then how would I go about addressing all the issues of modeling our local trains in HO?

Wheels: Sure, TT wheels (12mm gauge) are available from Europe, but personally I think any canny kiwi would simply be able to order some finescale NWSL 16.5mm gauge wheels, chop in half, remove a section of axle, then rejoin with a brass sleeve. Or even get some new axles turned up on a CNC lathe that would help set the essential back-to-back dimension into the bargain:


Instant 12mm wheel with a finescale profile, and in lots of different sizes to boot. Which lead us nicely into....

Bogies and underframes: Lets face it, if you model the 1950's and in need of some 4 wheel underframes in HO, your stuffed....you might be able to get away with some of the long wheelbase European stuff for a 13' underframe, but the springs and brakes will all be wrong blahblahblah....simpler just to model those new fangled roller bearing bogies and flog a half decent looking sideframe from the Yank market, set on a scale width bolster and cast (with the right wheels of course)....which is exactly what Magikan has done here:


Wagons: Once the bogies are done, the wagons are easy. Just take the IA drawing and expand, much like I did with this 1:32 one.

Locomotives: As Magikan pointed out, the Aussies sometimes come up with some usable stuff, like this QR1460 by K&M Engineering (which just shouts "DQ" at the top of its lungs)


Theoretically (and without any actual investigation in the real world), I would look at re-gauging existing N (spreading) or even HO locomotives (squeezing) with new wheelsets and axles to get the correct gauge....if a bogie with the correct wheelbase can be found. We've proven (through KiwiBonds DXB and Magikans DFT) that the tops are easy thanks to laser etching...

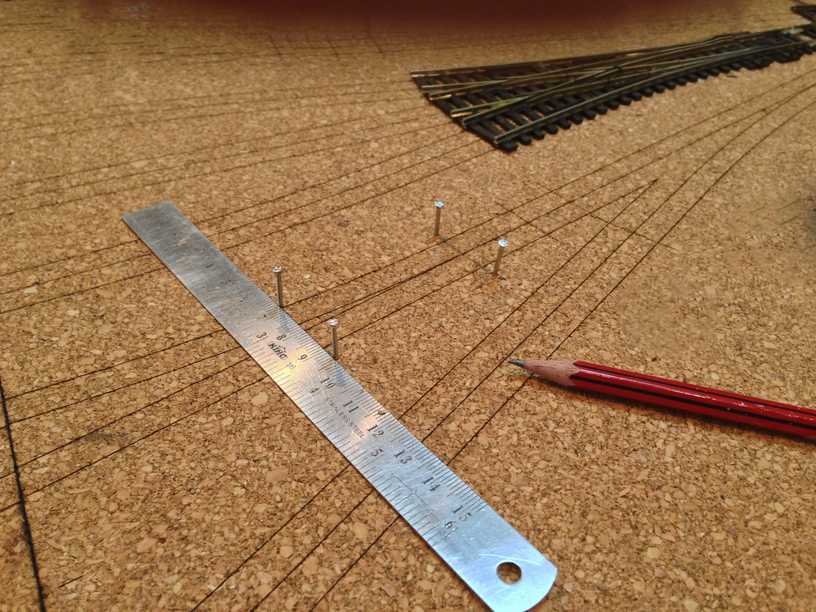
Track: Why do people always stress about hand laying track? If you take your time and are careful, its easy. If you arent, simply recycle and try again. If you follow the correct procedure, even points arent as hard as what some people try and convince you they are.

Buildings: In my opinion, sourcing from overseas is a waste of time...Saltworks requires buildings that will need to scratchbuilt anyway. For those wanting to try the scale, I cant quite see any of the HO manufacturers doing NZ "vernacular" buildings (NZ Railway Houses, Bay Villas, California Bungalows or State Houses) any time soon. Even the shop fronts dont look right to NZ eyes. Plus you'll have to build your railway buildings anyway for the same reason ("Dear Mr Walthers, Can I please have a 30' Goods Shed?"). Not all doom and gloom though; Doesnt the Car and Wagon depot at Napier look like a Pikestuff kit? And hasnt that just given me another idea for a shelf layout?


Vehicles: Okay, maybe....I think I need a bus and thats it...But even thats proving problematic, all american buses either seem to be those ugly yellow school buses that some firm has had a monopoly on building since the 1960's, or a 1950's "Greyhound"...the doors all open on the wrong side anyway.

People: Availability of figures is not a good argument, fellas, especially if those figures all look vaguely "foreign" (a man with a hat and a suitcase? A HAT?????) By the time I've handbuilt all my locomotives and wagons, laid the track, scratchbuilt the station infrastructure, and sceniced the thing, I'll be on my deathbed being given the last rites by a priest who looks suspiciously like Father Jack and wondering if English OO would have been so much easier. Honestly, when was the last time you visited an NZR layout that had people on it? In fact, when was the last time you visited an NZR layout that was finished??

Okay, so where does this leave us? In my opinion, modeling in HO is harder than Nz120 as the supposed "benefits" of buildings and figures are made null in void anyway by the uniqueness of the New Zealand environment. Having said that, IT IS POSSIBLE if you have access to the new technology (like I do) as that removes the argument of mechanisms and track....and quite tempting as the layout you build will be a one of a kind, not just a facsimile of any others.

SaltWorks will probably stay Nz120 (unless I can be convinced otherwise...and lets face it, I'm easily bribed, a fact which has kept me in chocolate biscuits at work for years)...but who knows what scale the next layout may be??

Saturday, June 19, 2010

Can the 2mm scale guys teach us some stuff?

While watching some 'train porn' with Teach last week, I came across some real gems. The DVD was the 2mm society's 60th anniversary DVD with some footage of various layouts. 1 to me really stood out. This is Chee Tor, built 20 years ago by the Manchester model railway club. I think its supposed to be in the midlands somewhere on the old LMS route.


Its a beautiful model to look at.

The second, and even more interesting video is this one, which is a layout called Welton Down.
At first it looked like a pretty average modern British roundy roundy layout. then we got a look behind the scenes.


The most interesting part starts at about the 2:55 mark.
No, its not the fact that there is a woman operating a layout, its the amazing cassette storage system and its use. Place the cassette into position, attach the hair clips, run the train round, move cassette to other end, collect train, place back on the rack. Repeat until you get dizzy. Its much simpler engineering wise than a sector table spiny thing, in fact I think I could almost build one. I can see there will be some problems to be addressed like some sort of stop so that the trains don't take a header onto the floor, and some sort of padding so that they don't fall over every time they get moved, but nothing that's insurmountable.

It's just dawned on me today that I could use this for Paekakariki. I had been contemplating a couple of return loops with fiddle yards, and not really liking the idea much at all. this seems to be a much cooler idea, simpler, and could cut down on the number of operators required. in fact, I could probably get away with doing it single handed, as the train frequency isn't going to be that great.
the length could be varied depending on the location of the layout (I'm a bit pushed for space currently and I could probably do 3' either end in the garage, and 4-5 feet in a hall). The tables to base the ends on could also double as sides in the transport box.

Thursday, March 11, 2010

An eye opener

From the 'what can you fit in there?' files.

I've met a fair few Europeans in my time, and found them to be by in large fairly level headed practical people. I am a scientist , so I tend to like that sort of thing (Its very annoying when you have a little lab fire and people just go into a panic, but I digress). However you can imagine my surprise on discovering that some German model railway scratch builders have discovered the true secret to powering small scale loco's, and it involves fitting the largest possible motor and flywheel into the locos tender that you can.


'Does my flywheel look big in this?'

Mayne its just the way my brain works, but this suggests all sorts of possibilities to me. Getting a 1628 can motor into a Ka tender, or into an old Df chassis (that would indeed pull the skin off a rice pudding and then some) would be great for pulling power.

Have a look round the rest of the site, there's some very good modeling and it will give your high school German a leg stretch in places (unless you are German in which case you will be be in the same boat understanding this)

Tuesday, February 16, 2010

News from the front

Posted a couple of days ago over at nz120.org, but just thought I would link to it ( I like riding on others coat tails).

Here is the mk3 versin of the J sheep wagon (pre assembly). Appart from a minor do-do with the doors, the rest looks exceptionally good. (photo by cabbage)


The holes on the ends are a nice touch, and are technically correct (photographic evidence suggests that there was no set pattern for the boards with holes and so, as with anything else on the NZR in the 5's and 60's, anything goes).

I'm looking forward to getting a train of these together and casting some sheep up for them, though it will cover up those loverly gratings.

Monday, July 06, 2009

You've come a long way, baby...

(With apologies to Fat Boy Slim...)

AmFet writes: After reading through Kiwibonds article on his superlative DFT build, I thought the readers would love to see where the state of the art was back last century.

This DFT was the first one built by the Head Druff back in the days when Otaki and Cass were just a few feet apart rather than in seperate islands, and was used as a master for a few more, some of which may still be around earning their keep on railways around the country. It arrived at the Waihaorunga Model Railway Club (Northern Branch) headquarters via KiwiBonds, who is currently in the country terrorising passenger trains from low flying helicopters and perfecting his gurning ability via skype.

Sunday, May 03, 2009

Guest post

Tonights guest is Worzel.

"I'm building a NZ120 layout using hand-made pointwork. Something I had always pretty much taken for granted with Peco points is that they have a throw bar with spring built in, so now I had to come up with something to throw the points with and keep them in position. I wasn't keen on fitting out every point with a Tortoise or solenoid so set about producing some manual linkage systems. After a bit of googling I came up with a couple of designs - one based around a slide switch and another around a toggle switch. Both use a vertical rod going up through a slot in the roadbed to move the throwbar on the points from below - much like a Tortoise or solenoid switch machine does. Maybe it says a lot about my lack of mechanical prowess but neither of these worked as well as I would like - too much flex in the vertical bar and/ or adjusting the amount of throw was fiddly. The other thing was that in order to get the vertical rod stiff enough it had to be big and that required a large hole in the throwbar, and the PCB sleeper would break where the hole was.

Fast forward a few months and I found another design described in the September 2008 Model Railroader. Fast forward to this month and I have finally got around to collecting the various materials and putting one together. In this design the vertical rod going through the roadbed doesn't slide sideways, it rotates and an arm moves the throwbar. I've just finished installing this and it seems to work pretty well. It is more complicated to build but is easier to install and works better. You end up with the arm being visible above the ties but I think that's a small price to pay for better buildability and reliabilty, and hopefully not too noticeable from 2 feet when the track is ballasted. This design also has two advantages over the other systems. The main one is that the control bar (that comes out to the fascia with a knob on the end) and the switch don't have to be in line with the throwbar. The other is that the switch can be positioned so that the knob on every point can be in against the fascia when in the main position and pulled out when set for the secondary route.

This might be old news to most of you, but this is all new to me. I've attached a couple of pics - one from above and one from below."


Saturday, April 25, 2009

Guest workbench.

They just keep coming. This from Russell.

"In the workshop I've been working on this Dx body kit. It had been partially built, so it was a case of finishing the build including headstocks, sandboxes, all pipework and handrails. Last finishing touch is to fit the grill over the radiator, which has been pre-painted. Thanks to a loan chassis, it temporarily has wheels. Now, to decide on which paint scheme to paint it! Probably 'fruit salad' unless I change the front window."

When the Railways went to two man crews, they basically cut the center pillar out with a griding wheel (well, thats what it looks like close up) and none to neatly either.

Wednesday, April 08, 2009

More models

Todays models come from the anonymous 'Russ'


"This weeks effort has seen the (near) completion of two Lb's with tarp covers. Using castings for Lc's, I added the underframe from the Ks to creat the Lb wagons. Used some fine wire to create handgrabs and airhoses. Ran out of time to do the couplers, but will do that next week. I mainly built 2 wagons to try different ways of assembling these kits, to improve my own ability for soldering these small parts without the meltdown. Have to have a look at what I'll move onto next, maybe something with bogies? "

Send in some photo's and your modeling too can be imortalised in electrons

Wednesday, April 01, 2009

Guest layout

Tonights blast from the past comes from Glen Anthonys Tranzalpine layout.
It has featured on the blog before, but here it is with text and more photo's by Glenn.


"The layout was inspired by Rhys and Darryl's layout which was displayed in Chch. My layout was started November 1994. The first display was at the first Timaru Model Train Show, held in the Pleasant Point Railway shed in Feb 1995. As it was only 4 months after starting, it was
missing some details like ballast, but all the scenery was done! The scenery was built first and track added as the last step. Due to careful design the whole 4.2m x 1.8 metre layout could fit in my Honda Civic car if I took the front passenger seat out!


There was a crossing loop on one side (Staircase) and large station on the other (Springfield) and it was designed for two trains running in opposite directions crossing at each station. Relays triggered by a push button at each station swapped the controllers over on the block
sections doing all the hard work for you. Points were all manual. There were colour light signals which detected which way the polarity was on the track and displayed a green light in the direction of travel, and red light for opposing direction.


The layout never had fine details finished. Storage became a problem so after about two or three years I sold it to David Wolff in Timaru. He added fully automatic signalling, a bungy jumper on the Broken River bridge and a new module with Addington Station and Chch gondola. About a year ago he indicated that he had purchased some of John Rappard's old
modules and was reworking them into my ones and they might be displayed some time in the future."

More models

Sent to me last night from ECMT.

'Also included is a pic of my latest model - Ea 543. The original is featured in the rolling stock section of Kiwibonds site.'

Friday, March 27, 2009

Friday night; Guest workbench.

Fresh from the corners of dingy rooms, cold garages and back sheds everywhere, here's this weeks collection of others models.

First up, from Woodworks comes a conversion of a Japanese model.


"Hauled out the beginnings of two 50' steel cars that I have had hanging around for Donkey's, with a view to getting them finished off. They came from a set of five Tomix Japanese passenger car bodies of various styles. It is a fairly major chop-job - rounding sides and corners off, new roof, vestibules and chassis, not to mention bogies, but at least the windows are near enough with just a little bit of carving with sharp knife - slightly better than starting from scratch. Original example at top, and sides in various states of modification below."

Next up, Russell ventures from the safelands of S scale and has a crack at his first Nz120 kit.


"Well my project on my workbench isn't as difficult as yours, but I've completed the construction phase of my first nz120 kit. Had a bit of spare time before work (evening shift has an upside), so decided to put together a 40' container. Hey presto! Low melt solder later, and its together in about 20 minutes. Longest task, cleaning parts ready to solder. It ain't pretty but its a start. Now off to the paint shop over the weekend."

And last but definitely not least, from the magic workbench of David Weedon, just to show once again how it really should be done.


"I have one of Pats railcar kits. It's assembled to the point of the drive installation. I haven’t found anything suitable yet for the drive as I want a full interior. I have attached a photo of my scratch built railcar which has working head, tail and interior lights. I am thinking of adding sound to it as there’s plenty of room underneath for a speaker."

It should be pointed out that the scratchbuilt railcar was the inspiration for the Trackside version.

Gentlemen, thank you for letting me use your pictures. I'd pay money, but until the blog gets a sponsor (hopefully a brewery :v) then you just have to take gratitude.