Showing posts with label Passenger Trains. Show all posts

Sunday, March 16, 2025

More 3D moaning with Wooden Carriages, but it all works out in the end.

DB rails on from a post that was going to be yesterday's which will probably appear out of order in the next day or three, but since I've started on these carriages:


My next frustration with 3d prints is strata. When I dipped back into NZ120 about 15 months ago, I bought a set of 3D printed wooden carriages:

I didn't realise they were this bad until I had primed, painted, dulcoated, and then started washing them with some weathering. They certainly don't look great with a light shining off them that's for sure. Had I noticed this earlier I'd have sanded them down a bit. Which I did with the roofs, as there is a pronounced 'ridge' along the roof centreline and on the rounded ends. Fairly easily dealt with using a long thin fine file for the centre ridge (so as not to knock the roof ventilators which are nicely done, and fine sandpaper for the roof ends to give them a smoother-flowing shape where the curves join.    

These are fairly old prints now I guess, and new ones from higher resolution printers will be smoother... but having said that, I've paid for them, and there is now a much better one available. A bit like every camera and computer I've ever bought I suppose. 

My next grumble is is warping. It seems most 3D printed things that are shaped like a bathtub will warp - wagon sides and locomotives bow out like the below, and often they have a minor 'humpbacked' longitudinal bend. 

While most prints seem to have relatively fine supports inside in an attempt to counter this during printing and curing, they tend to snap and break off due to the warping forces. So why not make them stronger and more numerous? These carriages have this feature already, with some good thick cross pieces under the crown posts that tie the sides together. If there were two more located here (red arrows) the whole side would be nice and straight, and the truss rods wouldn't splay out and then pull apart: 

These structural tie-pieces would be welcome on my ZAs, and even the Wb loco (as the user can remove them many months later when applying a chassis - I note the DM print has these, which is sensible).

And my last frustration with the 3D printed stuff, and then I promise I'll zip-it (other than tomorrow's post), is the sagging of fine detail. This sometimes manifests itself in hanging edges becoming curved or scolloped (compare the scalloped underframe of the car-van in the foreground vs the ruler-straight sides of the car because I have overlaid its bendy bits with styrene, although this pushes them out closer to the red 'wooden' sides than I'd like:

Fine unsupported rodding often sags too, such as on these Shapeways Z tanktainers:

Presumably this is from a lack of supports, or maybe it happens during curing. 

So you have to cut off the offending bits, and then due to the material's brittleness, even more bits snap off. Maybe its time to accept that 3D isn't yet ready for this type of fine detail yet and it could be omitted, with slots or holes left instead so that we can put these details in ourselves using straight plastic or brass rod. 

I used .030x.030 plastic square rod to replace the broken and bent truss rods to match the existing printed rodding, but in hindsight, looking at some prototype pics afterwards,  I should have used much thinner brass rod and done all six carriage sides.


Enough moaning. These carriage bodies look ok from 2-3 feet away. Arguably the finescale MMW ends and bogies make everything else - carriage bodies, couplers, track, buildings, other rolling stock, ballast and scenery, look horribly chunky.

Bogie screws and couplers are yet to be figured out. I added battery boxes to one of the cars and immediately took them off because they looked silly. Now after dredging up some prototype pics, I wasn't actually that far off so will re-add them. I also need to do something about glazing the guards ducket. Or replacing it with the modern pressed steel pattern.

-----The next day:

I pulled out some Microtrains and Peco couplers to fit the cars with, but with the bogies having cross pieces at the ends that I didn't want to fiddle with, couplers would have to stick out a long way to clear these.

So I started playing with the 'sprue' of the MMW parts, cutting an L out of the corner and putting a slot in the end of it. This was three small holes joined up with the help of a knife and some files. 


And this made up a simple hook-and-eye arrangement:


Note also the white .040x040 rod bearers added to the bolsters of the cars to encourage upright running in the above pic. These were added at one end of each carriage.

In testing, the cars negotiate the tight curve behind the roundhouse and the 'S curves' of the pointwork at Studholme whether pushed or pulled. Those are large radius turnouts, so perhaps they would struggle on medium radius crossovers, but I'll leave that for some future experimentation. 

There is also a tiny bit of play in the bogie mounts too which can't hurt. After wondering how I was going to attach the bogies, I ended up using small flat-headed nails that are about an inch long - the points of which have been liberally contact-glued to the underside of the carriage roofs! Seems to work...

The below was a first cut at carriage steps - a plastic one glued to the underframe, and bits of MMW steps attached to the corners of the bogies.

These didn't last long and were replaced with folded up MMW ones attached to the frame, shortened and mounted a fair way outboard to clear the swing of the bogies on curves.

A little weight was added underneath using nails. Keepin' it classy, NZ120. Bogies have been mounted, and steps are in place.


As afterthoughts, I 'painted' a loo in using some white styrene behind the windows, added the centre (ventilator?) (top-middle of that red sides) which might also be loo-related, and steps under the baggage door on the van. I should have done the rain strip on the roof above the baggage doors, but that would have upset the weathering that I'm pretty happy with.
Battery boxes were re-added - these had to be very thin styrene because the truss rods are so far outboard. Painting everything 'weathered black' helps disguise the inaccuracies.
And as a final touch, the circular number and class plates were also carefully painted weathered black. These are quite prominent on most of the pictures I've seen, so I painted little yellow 2s to signify second class. This was done with yellow that had a touch of dark included. Then to further lower the contrast, a blob of Tamiya 'smoke' was placed on top. Another blob may yet be applied...

You can see how far the Microtrains couplers had to stick out on the ends to clear the bogie frames, but my homemade couplers give a really nice 'close coupling' effect between the cars.

I don't know much about carriages, but I assume these are 47-6 ones. Not even sure if they operated on the Coast or on the Waimate Branch, but most importantly, they are red, so will look the part behind a DJ or a tank engine or at the end of a mixed train. When viewed from the rigorously-enforced mandatory minimal viewing distances.

Friday, March 14, 2025

Mark's Model Works (MMW) bogies and railings for carriages

DB bought a set of 3D printed wooden carriages when he dipped back into NZ120 about 15 months ago: 

This was to be a post on 3D printing, but I've decided to break that into three parts, so more on the carriages soon, but this post is about some roundy feet for them.

Options include nice plastic bogies with superchunky wheels from some olde-timey carriages (Ibertren?) as seen under that 30-foot van; or Kadee passenger car bogies (a little small, but these 1017s don't look terrible after the removal of some superfluous brake and stabilisation detail; plus they have a bonus coupler. 1014s might be better but I've never seen any in the wild); or these scary-looking Mark's Model Works etched bogies. Eek.
I've seen a completed MMW set before and they look lovely, but there's no way I could ever make those up with my fuzzy eyes, wobbly hands and 1940s-era welding axe and matching skills. 
But why not give them a crack... so I studied the instructions with an intensity and frequency that no male has ever employed studying instructions before.
To my surprise, they came together fairly quickly. After about one and a half hours I had the six made up, including bearings, wheels and soldering. About twenty minutes of that was spent cutting the ends off some petrified clothes pegs (as recommended in the instructions) to make clamps that are perfect for holding things together while you apply the solder that locks everything together. The hardest part is arguably the first step, crimping the leaf springs.

The eagle-eyed may note that there are three subtly different models of bogie here (different numbers of leaf springs among other details. 

I bought some Dundas DP09 brass top hat bearings from Trackgang a while back and they coincidentally fitted the MMW bogies perfectly, indeed being recommended in the instructions.  

The wheels are some pricey Bachmann/Farish BR coach bogies from Ironhorse, purchased randomly a few months ago, and their axle length happens to fit perfectly too. They are a nice broad diameter, but are discs, not spoked, if that matters.  And oddly they come in a pack of ten. Just the perfect amount for... two and a half carriages. Shrugs shoulders. The sixth bogie was filled with two Peco plastic wheels, which are a tad short in axle length, but with the frame bent inwards a smidge, they roll ok.


In summary: as long as you follow the well-illustrated instructions, the bogies are not hard to fold up and solder. They are etched in phosphor bronze, which is nice and stiff and springy, but is a forgiving material if you do start folding something the wrong way, as it doesn't fatigue as fast as brass. As also noted in the instructions, I needed to separately put a splash of solder in to affix about half the bearings in place. This requires slightly more finesse than I possess, but my efforts didn't hinder their operation or looks. Even my neanderthalesque soldering skills had the main soldering job (one line across the top of each bogie side) come out quite neat.

Speaking of looks, the bogies really look stunning. With this success, I must have a crack at those MMW brass IA wagons that I've had stashed away for a dozen years. 

Keeping the story on MMW, the carriages were topped off with his etched end railings which are insanely pretty:


These are just gorgeous. I use a Sharpie black marker to tediously colour them in before cutting and folding. This gives a much 'finer' effect than painting them with goop after they have been installed (as if you could get a paintbrush in there to do the inside faces anyway). I decided to not add the steps, as they didn't quite fit the stepwells. I may put them on later. I also inadvertently omitted the curved handrails on the red carriage ends. It seems that one (obviously, in hindsight!) should do this before glueing the end cages in place that prevent future access... 

More on the carriage build in the next one.....

Monday, December 16, 2013

AO Milestone

DB notes:

I needed to find a pic of some AO cars to continue my journey and had a read of when this all began and subsequent episodes.

The 12 year old mentioned in there turned 16 yesterday, so I guess this has been a long slog towards nothing. And I note that the real Tranz looks a little different now.


Finally some progress!

Reflector interiors and tinted windows were added on the 4 cars that were furthest advanced and somehow I managed to cobble up 8 sets of Tranz Scenic decals (some made up of 4 bits of scratched up decals) and here we are.

Its enough for a basic train - obviously there's still a bit of work to be done but few of the Americans will notice the lack of undergubbins and inter-carriage connectors (which I've subsequently had a go at and you'll see in the pics below).


These were surprisingly popular with the locals at the Long Island open house today, especially that they were all created from scratch (more or less). I also had a copy of a NZ Railfan handy with some pics of the real (previous) Tranz so they could see the prototype in a more appropriate setting.

Sunday, November 18, 2012

Foaming

So, there's an excursion from Fielding to taihape and back hauled by Ab663. Now I have many failed attempts under my belt to actually photograph excursion trains, and this one started no differently. I keep forgetting that to go west out of Palmerston North, one first has to traipse across Palmerston North. To cap it all off the chariot demanded fuel. So, the plan is to get to the Rangitiki bridge the other side of Halcome. I had previously scoped out this spot, and it seemed like as good a time as any to try it out. The train is due at Marton at 4:15, and Fielding at 4:40. So, at 4:15 I'm at Fielding with the target location being the other side of 1/2 way to Marton, and the sky a selection of shades of grey. Optimistically I continue, but decide to take a back road that follows the railway just in case. an interesting drive and I pull up at a commanding spot and ponder waiting here. No sign of any smoke so I decide to push on. The kilometers wind off with no sign of a train round any of the road corners and so I make it too the bridge. Wonder if I have missed it somewhere in passing. . The plan is to walk down the west bank and onto the river flat. Its so windy that I can't hear anything train like coming down the hill.

1st problem.... theres a bit much water around

'Its flat, but....'
 However I do notice a track down onto the flat from the other side. Away we go.

 As I'm crossing the bridge, I notice a car ahead of me pull off the road. A guy hops out of the car with a camera the size of a small south pacific nation. So, I'm not too late. I barrel down towards the river past them, and turn off. Some bastard appears to have blocked the access way. There's nothing to it but walk.

 OK, so here's the view.

Walking a bit closer gives me this.


 I decide on a spot about 1/2 way between the 2. All the time I can hear the train moving down the hill. These steam excursions do not make much noise and suddenly here it is.


In retrospect Its a bit far away, but at least the suns out.


 Returning to the car, I find this spot which could well have resulted in a far nicer picture, if only I had looked behind me.

The decision is then made to head back to Fielding and catch the train along the railway reserve at some point. And this works too.


'Classic leaving shot there'

 Down at the station the train is moved off the main line. I was going to write quickly, but by the time its headed down to the far end of the yard and back a good 20 minutes have passed.


 The sound of crossing bells announces another train, this time an express freight from Dorkland that barrels through at a great rate of knots.

'Its OK, I'm standing in a carpark'
I decide to try something arty, despite the fact I only have a 1 in 5 chance of shooting at the right time between moving 40' containers

'Ta Dah'
 Finally the loco gets put away, and I head home.


Friday, September 24, 2010

AO8: Reflecting on.... windows

DB finally gets back to the workbench:

Just before setting sail for NZ a month ago, some grey and blue paint was slapped onto two AO carriage castings in a feeble attempt to make visible progress while I pondered a window conundrum.

The big-windows in the big big-window cars are made by the Hogwarts Glass Department. They are smokily transparent when you stare right through them; often they look black (especially if viewed from an angle); and sometimes they look like mirrors if they are reflecting something bright, like the sky, or the eye of a Newt.
A commenter on this blog suggested using mirror-tinted boy-racer window film which sounded like a good idea to me, but my schedule and that of the local purveyor of Rice Rocket Enhancements never seemed to match up.

Without this vital ingredient, I began experimenting with some clear plastic washed with varying coats of Rhys's magic Tamiya Smoke (which is a clever mix of 'clear' and 'dark grey'). I found 2 coats looked pretty decent and the slight vertical unevenness of the brushed coating makes it look a little less perfect and not dissimilar to the inevitable vertical streaks of weathering on the real thing (although it looks a little less subtle in these pictures). FYI the paint is applied on the inside of the window so it's nice and smooth on the outside when viewed from an angle, except for some panel separation lines applied on the outside with a thin-tipped permanent marker to complete the look.Now to put something behind my 'glass' since I have a solid casting. I held it up against the white resin of the coaches (too bright), I tried black paint (too dark) and various shades of smoke and grey (meh...). Hmmmm.

The very next day, I happened to flag down a passing art supplies shop and found some thick shiny silvered craft paper that could do the trick. Its almost like a mirror, but not as perfect in its reflection. A strip of this is visible in the window slot on the 56 foot car pic above and with glass in place below.

Noice. From an angle the thing looks dark and shiny, and when viewed from more side-on it has a subtle reflection. I think this low-tech (but also low-effort, low-risk and high-speed) experiment looks pretty decent and am almost at the 'commitment' stage of gluing it in place...

Friday, July 30, 2010

AO7: Good Morning Vietnam

Its hot, damn hot.

DB says: That might sound appealing if you managed to buy Otira and are reading this from its cold and miserable bowels. Over here, its been 30 degrees C in the kitchen for the last week ...at night. Personally, I'd rather be sitting under the damp veranda of the Otira hotel with a ham and cheese toastie in one hand and a cider in the other, watching three banker locos idling away by the station, their exhaust rolling lazily up to the still misty heavens...

But I digress.... I managed to sweat a few minutes away in the train room last Sunday evening in a feeble attempt to progress the passenger train a little. My first thoughts were to throw some blue paint on carriage sides, but then something sensible in my head thought it might be best to do some work in their nether regions first because getting the bogies mounted might require the use of paint-damaging power tools.

You may recall from the earlier application of these Kato bogies, that the bolsters of these things are oddly stepped down in the middle, and literally on top of these, the nice pinpoint copper bearings/current collectors stick up as you may see below on the stock bogie at left.

To get around this, I crudely applied sidecutters to the task of removing the tabular protrusions from the copper pickups (will paint or permanent-marker what's left later on), and used two small washers per bogie to lift the bolsters away from the resin bodies. To deal with the 'downstep' in the middle, I removed the edges of the lower washer so it would fit within the step, and to stop it spinning around and making everything crooked, I lightly contact glued it in place per the item on the right of the above pic.

The application of a power drill, washers and screws later had me staring at the following:It's all a bit hard to see in the pic because of the masses of white, but they look fairly decent. I'm ok with the coupling distance and will make up some sort of concertina/bellows between the cars later on to fill this in and hide the Rapido couplers. I think the ride height is ok, but I can always unscrew things and slip another washer in there later on if I want to jack them up a bit.

Thursday, July 15, 2010

AO6: Eight is Enough

DB has no fond memories of that ancient TV show, which probably only us oldies in the crowd will remember anyway, and that's only if we've put our zimmer frames away for a moment to connect our wireless to the intertubes for the perusal of this spacious and homely blog:

Speaking of which, and not that we were, but isn't it unsettling how one minute you're young and the next minute, you're not so young any more? I well remember the first time I saw U2s "Where The Streets Have No Name" video... that was twenty three years ago. I was made aware of this fact by one of my work colleagues' 12 year old son. I keep forgetting that in his presence, bringing up anything that happened before about 2005 is pretty much a waste of time. Fortunately I've been blessed by managing to avoid the scourge of the worldwide breeding epidemic that seems to have been going on for the past few billion years. Not that kids aren't fun, but it's nice being able to hand them back when their nappies need changing, or they cry a lot, or need a loan for a car etc. That's not fair - he's a great wee guy and if Claudia ever puts him up for sale (maybe not the other son) I might put in a bid.

Anyway, with that blog equivalent of freshly applied PolyFilla now behind us, I can report that I have finally recovered from my AO resin crisis. A fresh batch of 30-minute-cure stuff arrived and I got stuck into casting, using the whole 1L batch up in just a few days. One in the morning before work, one when I got home, another mid evening or before bed. That's one of the nice things about resin casting - instant gratification.

As feared, the first few of these will probably be junked because there were a few bits of residual stickiness in the nooks and crannies of the mold that took some cleaning out.

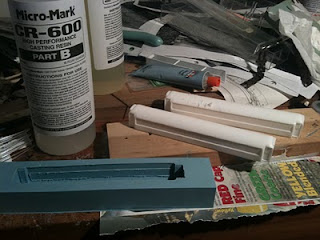
Yes, they are solid block castings. I had expected to put a 'plug' of rubber into the bottom of them, which would make them hollow to save resin and weight, but elected not to because this resin isn't that heavy, and I'm lazy. Excuses listed in reverse order. I want to get these things done and move on.

They are also cast in white resin rather than transparent as suggested by Steve4painting - an excellent idea, and one that I did consider, but my pusher of resins doesn't carry truly clear stuff, so for reasons of impatience and laziness and envy, greed, gluttony etc, I took the quick and easy route - so white they are.

The other nice thing about casting one-piecers like this in resin as that I basically have carriages now. No fiddling around trying to assemble sides and ends and roofs square and fill in the gaps. In theory I could plop on some bogies and paint and be done.


Yes, another crappy cameraphone pic in bad light... The AO front right is yet to have some fine sandpaper applied to the putty filling some air holes along the roof edge. When I remembered to run my stirring stick along those ledges in the mold (mid-pour) to free up the air bubbles I got very clean castings. On this one I obviously forgot...

And finally, it seems we won't be running anywhere near a full-strength-Tranz afterall - a quick recount of the Kinki Kato bogies I ordered from Japan last year, reveals that I only have enough left for 8 cars rather than the 10 I had thought. Did I mention that I studied accountancy at university?

Saturday, July 10, 2010

AO5 : A Sticky Situation

Goddamit.

DB recalls: Now that I have a nice blue mold, I poured my first AO car last week with the dregs of some lumpy 30-minute resin clearly stamped "Use by April 2010." Whatta-mistakea-to-makea.

It came out moderately well at first glance, but to the touch there were a few sticky bits on the roof and ends. Dammit. The lumpy bits in 'part a' obviously didn't mix well with 'part b' and that consigns the casting straight to the bin (along with the leftover resin) as paint will never set on them.

The next attempt was with the 18-hour resin (all I had left, and similarly stamped although unopened). Don't know what happened here but the stuff didn't set in 3 days. Yuck. Not only is this a pain because you have to dump the globby, sticky mess of a casting, but it's also bleedin' hard to clean that gunk out of all your crevices. Eeeek. Thus your next one and a half otherwise-perfect castings might end up with gunky residue in the corners as well.

Nonetheless, after those two disasters and one possibly recoverable, I'm left with the first decent casting.


Yay!

Saturday, July 03, 2010

AO4: All drama and no action

DB says:

Well what a few weeks we've had.

My elderly bumbling neighbour inadvertantly burned out my other neighbour's house while attempting to fix her plumbing with a blowtorch (after falling down our stairs two years ago, slipping into his pool, falling off a ladder, writing off his car in an unusual accident in front of the post office last year and driving down one of the divided motorways for 9 miles in the wrong direction three months ago. But be that as it may).

All this excitement, coupled with an overdose of work, visiting rellies, the soccer, and the oppressive heat and humidity of an early-running summer has meant things have been pretty quiet in the train room of late.

From time to time I've applied some Testors filler and fine sandpaper to my AO car master, which has slowly been evolving towards acceptability. This model seems to have been going on forever, which for a modeller as impatient as me is both rare and frustrating, especially as this isn't exactly a fancy schmancy item.

My modeling runs on momentum. Once I stop it's hard to get me started again, so best not to stall even when burbling along in first gear. With that in mind I stuck the thing in an old Kato clear plastic box and poured some rubber over it yesterday. It will be interesting to see how a resin copy comes out as I haven't made something this big since my first dabbles in NZ120 molding way back in the Crustacious Period.


Apologies for another cameraphone pic, but as they say "The best camera there is? The one you have with you when you need one!"

Thursday, June 17, 2010

AO3: Goooooooooal!

DB contemplated a few days ago: As well as being a fine excuse to have a glass of wine at 2pm on a Saturday and do nothing much else, the thing I like the most about the soccer world cup is the opportunity to completely escape the world for 90 minutes. I think that's why some people go to church, and why the rest of us heathens play with toy trains.

Once the game is done, any thoughts of gardening, painting, carwashing and house cleaning couldn't be further from the woefully inadequate forefront of my mind, so one might as well pay a semi-conscious visit to the peaceful haven that is the train room, where there is nary a vuvuzela within earshot.

My AO passenger car master continues to slowly take shape. I've cast a few ends (which have come out superbly (as well as their masters would allow anyway) and made up some side bits to stick together.

As I write this, I have the sides, ends and and roof stuck together, with the big lump awaiting sanding and finishing. Apologies for the crappy cameraphone picture, but sometimes the best camera is the one you have at hand (or in your pocket) !

[update before posting: NZ scores a goal! In the world cup! Against another team! And not an own-goal either! The crowd goes wild!]

Tuesday, June 08, 2010

AO2: False starts and tube tops

DB Says:

It seems like forever since I made a worthwhile post here. Ahhh, it has been forever.

One of my last dips into the blogstream was this catchily titled start to an AO big-window passenger car for the TranzAlpine.

Things started with a hiss and a roar, but I struggled with the roof. You may recall that I started back then with a piece of balsa, which was carefully carved, sanded and paper-topped. Nice job too, but all very uncleverly to the wrong roof radius so it wasn't a great fit with the end I'd made. Close but no banana.

No worries. Bung some filler on the ends and sand to shape. Erk. OK... try again. Now that looks pretty decent up against the roof curve built into the end... but as the pumped up ends are now a smidge taller, it looks like there's a sag in the roof. Because there's a sag in the roof. That won't do. Throw more filler onto the middle of the roof then. Oooo, ugly. More filler, more sanding, more filler. Oooo, ugly. Rinse and repeat over the course of two weeks. Talk about getting 'bogged' down.

As NZ120 is supposed to be the nice easy scale, surely there has to be an easier way...

Just then, (obviously not "just then", but it adds a sense of drama, no?) I stumbled upon an appropriately sized tube at the hardware store that might just do the trick: let me introduce you to Schedule 80 one inch dia plastic pipe for in-ground lawn sprinklers and the like:
[you may have to hum to yourself while I spend the next half hour dremeling, cutting and sanding]

Now that's more like it!

Wednesday, March 03, 2010

AO. A-a-a-a-O. Daylight come and me wan' go home

DB says: I'll head back to DX 5293 for some final cleaning up at some stage, but today, in my first visit to the train room in a week, I thought I might jump into something different. The two obvious candidates are building another module to keep Moana company, or building out that Tranz Alpine passenger train with some AO cars.

I figured I'd better get on to the latter given the real Tranz is getting replaced this year. Don't know why - the guts of those gross fenster 56 foot cars are only about 70 years old...

I want to have 8 of these puppies in my train so I'm going to cast them in resin. I think. I also think, that if that goes to plan, I'll need an end piece (2x required per car of course), and a central tubular section, and probably some underbits. Maybe. Perhaps with some stuck-on big windows. We'll just see how we go shall we?

I began by cutting some end sections out of plasticard, and joining them with some blocky 'doors'. This isn't going to be a terribly sophisticated model, as I'm relying on the 'whole train being more impressive than the sum of the parts' effect, so I somewhat embarassingly stuck-on squares of plastic to represent the door windows, which I'll later paint a dark gray colour rather than cutting out window holes. There'll also be no end doors either, as the corridor connections will hide those except for one at the far end of the train. I'm a bit red-faced over all this, but as long as you promise not to tell anyone, who's going to know?

The roof-end was then carved out of thick styrene block, stuck on top of the other assembly, and some time was expended sanding and filling this to shape as the real thing is quite complicated. While doing this I remembered an offer to buy some bits off Trackgang, but I figured the whitemetal roof and sides would take so much mucking around to fit the big windows, that it was probably easier to build it from scratch. An hour of sanding later and not even having proper windows to show for it, I'm kicking myself...
As I write this (post-picture), the guts of the central section's roof is pretty much done as well - being balsa wood covered in paper.

This may be the only modeling blog in the world where one is led down a meandering path that passes rapid prototyped, laser etched, fancy-dancy models one week and balsa wood and paper ones with no windows the next. Yes folks, there's something in NZ120 for everyone.