So, how did my demo session making track go?
The main question was, so why do you make your own track? the three answers were (in no particular order)
1) There's nothing that looks close to the local prototype (apparently micro engineering code 55 isn't too bad, on a dark night)
2) Its cheap, I can build 3 points and a scissors crossover for a total of $40. That's about a 3rd of the price of the scissors crossover.
3) I'm not limited by commercial track geometries. Trying to force a prototype track plan to fit the limited range of points is always a pain.
Most were impressed, Some asked when I was making track for them (and the answer, Mike, is still no, until you move to a decent scale). One guy claimed that he didn't have steady enough hands, till I demonstrated that mine were worse than his (early mornings will do that to you). The Journal editor expressed his approval in that I had moved on from Peco.
I hope that I managed to de-mystify the process for some. I have had an invite to do a talk (which I'll probably have to turn down due to transport problems),and will probably wind up being tapped to do something at the convention. and how far did I get?
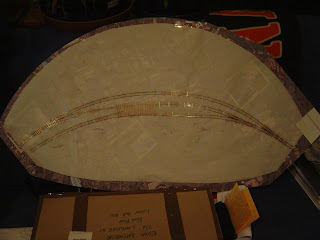
well, starting from here

Doing the sleepers sped things up quite a lot on the day. Saturday night at home we have...
The lower track is straight, its just a optical delusion.

A bit of a closeup. I have not put the throw sleepers in yet. One thing I immediately thought after taking this was that it looks like S scale code 70, which it essentially is scale wise. However I have found that its right on the lower limit of what I can work with. Its getting hard to see just how far through I have filed things. And before anyone suggests it (as Teach did last night) I don't do magnification as I can't get it to work for me (maybe when I need glasses) and I have tried all sorts. It just annoys me.
Finally we get to tonight. with the lady of the house safely out of earshot in Melbourne the sounds of fret saws and files echo through the living room.

I'm 1/2 way through the scissors crossover, but for a variety of reasons its being a real pig. I've tossed the rule book out the window and I'm just winging it at the moment.


