Showing posts with label Wharf. Show all posts

Saturday, January 14, 2023

Wharf V

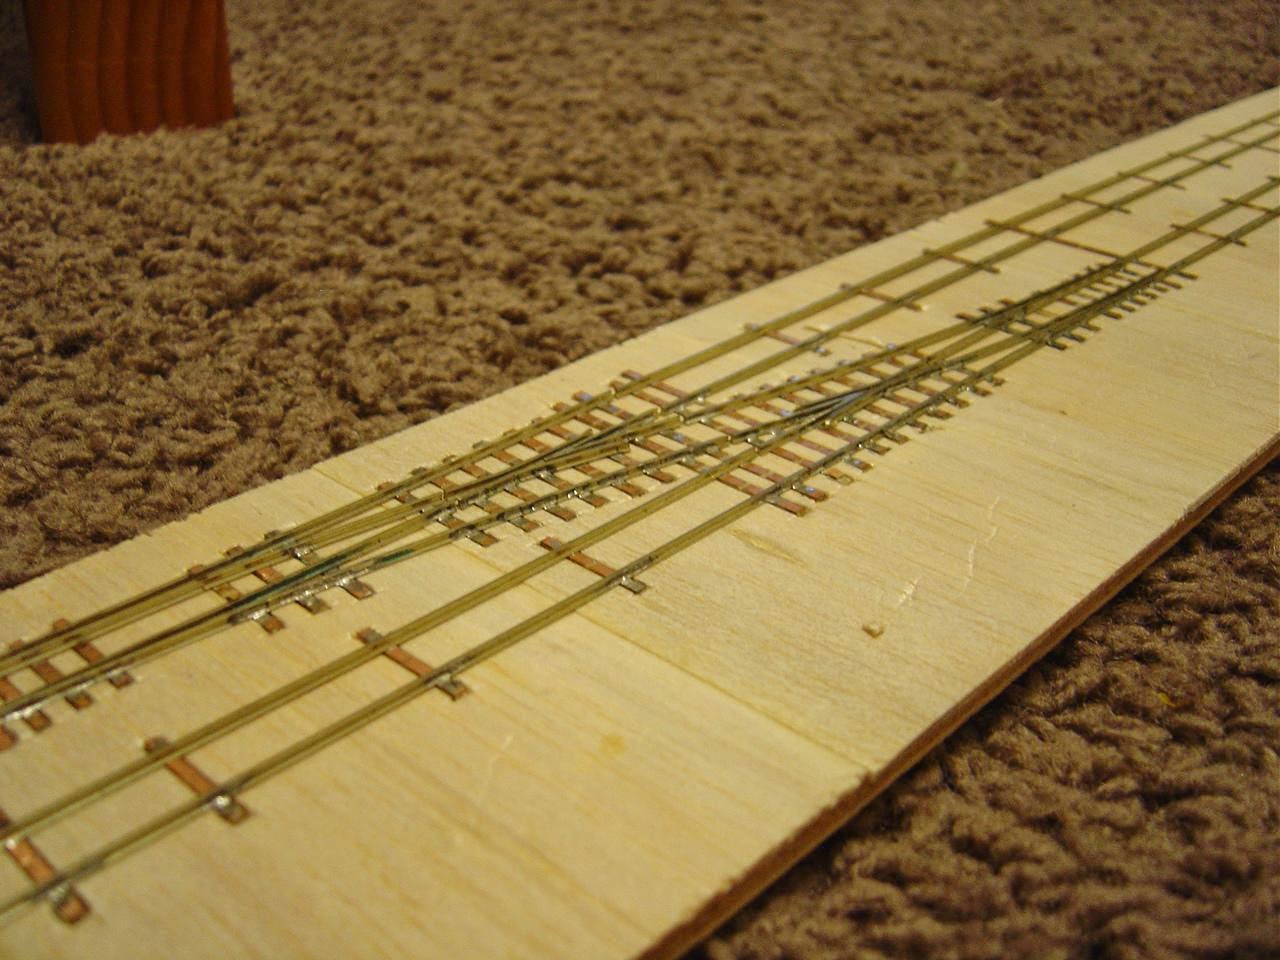
 As well as doing some thinking (out of the boxes again) there has been a tiny bit of modeling. I've started doing the weathering on the wharf. A drybrush of white followed by a wash of dilute black (I couldn't find a local source of Winsor Newton inks) started to age the wood but I feel that I will need to do some more. The rails got a coat of a Tamiya brown follewed by an Italeri rust wash. This is something I picked up in the local model shop thinking it was something else (ie not reading the "wash" part of the lable). From looking at it in the bottle and using it, it appears to be a thin suspension of a pigment that is corser than normal paint. When dried it does replicate the look of rusty surfaces nicely. I've possibly overdone the runoff onto the wood underneath but the sea tends to be a rather harsh climate for iron.

Not worn enough but a start

I've also quickly assembled the key scenic items on a piece of extruded polystyrene to see how it all fitted.


It possibly needs to be a bit longer and the edges need to be round. I will need to work out how I want to model the water.


Sunday, July 02, 2017

Sunday evening.

After a bit off woodwork I've made a start on the shipboard derricks. These are just a 6mm main mast, with 4mm booms pinned to the mast with short bits of bras rod.

Its looking a bit more boaty.
Now to answer the question in the last posts comments.
I'm not planning to have is visible from the backside as I have a plan to put the point throws in the guts of the ship and run the wire through to under the wharf.

Now, if I could just find a local supplier of 3-4 bags of Pecos track pins (they are useful for so many more things than pinning track).

Saturday, July 01, 2017

Saturday morning.

The ships slow assembly process continues, but I've now got one of the sides on. Rather than use the bits in the kit, I opted for a single large sheet, which seems to have worked OK.

Its starting to look quite impressive. I would have hated to have done it in S scale....


And a view from a bit lower down.....

Sunday, June 11, 2017

Man your knives

I've picked up the other 3 sheets of printing for my steamship.

No idea why it continues to load this way
I wish that the guy who drew this was a bit tighter with his placement of bits as theres a lot of wasted space which, while not important at A4, does grate a bit at A1.

so, just as a running cost for the model, so far I have $15 (or so) for the basic download, 3 80g sheets at $4.50, 2 160g sheets at $5.50 and $7 for the heavy card (glue and knife not taken into account) which give $36.50 which I think is quite cheap for a model of this size. I dread to think what it would be worth in plastic (assuming that there is a market for them).

Saturday, June 10, 2017

Saturday morning

Before I head of into the great outside for my 1:1 projects, here's a progress report on the ships.
Plonking the wharf down on the work bench gives a sense of scale to the whole thing


I had worried that the new ship might be a bit big, but its actually spot on as far as things thrown together can be.
And looking along the wharf
Right, off to get the other 3 A1 sheets printed.

Tuesday, June 06, 2017

Wrists of steel


The first job with the kit was to glue it to some 1/16 card stock, as it was printed on the cheapest paper I could get. I took the opportunity to cut some of the pieces out and make more optimal use of the space on the card sheet. Again my other boat for scale.


 Then comes the physically hard bit. All the pieces have to be cut out accurately which was a couple of hours work made hard work by the thickness of the card. I also had to take into account that while I didn't want a full display model, I didn't want a ship at full load either. After a bit of thinking about how much I could cut out of the lower frames of the ship, I came up with a height which would allow part of the propeller out of the water.

I then put it together to check that everything fit OK.


The bends will vanish as more parts are glued together. In think picture I've added a 30cm ruler to give a better idea of just how big this model will be.

Sunday, June 04, 2017

Scaling it up.

Previously on the blog I've discussed paper models as a cheap source of ships for modeling a port.

A long time ago I purchased an online model of the SS Californian (for $10 US), a ship who's main claim to fame was not coming to the aid of the Titanic until it was far too late. Despite this, it is a good example of a turn of the century general cargo steamer. The model scale is 1:400. A bit of calculating gave me an approximate increase from A4 to A1 (283% giving a  scale of 1:140 or thereabouts). Since I don't have ready access to an A1 capable printer I trekked off to the local warehouse stationary. I wasn't sure how much it would cost I opted to print out the 2 sheets with the basic structure (there are 5 total). A couple of hours later (and 1/2 a greenhouse rebuilt) I had them back, for the princely sum of $4.50 a page (about 1/2 of what I was expecting). I was happy to see that the PDF had scaled very well with no pixelation that you would expect to see in a photocopy.

And how big is it? The Californian was ~5000 tons (so not that big) and 136 m long. That is not going to mean much to the blogs readership, so I thought I would show you visually. Here is a
re post of the picture of the ship that's been sitting on the workbench for a long while sitting next to the wharf with some wagons for scale. Its 50 cm long.
.

Here's the same ship sitting on the printouts.....
It looks as though its going to be about 1m long.


Now some of you will be asking "Isn't this just a bit too big?"

I'll re post this picture of Timaru. Note the large steamer at the back. The wharf at the front is approximately 200m long (judging from google maps) and the steamer at the back is roughly 2/3 of that length (and looks remarkably similar in basic design).


I'm planning to use it as a backscene for the wharf module.

Friday, November 06, 2015

Two in two

A day off work (how can I have a head cold when its 20 odd degrees outside, maybe I'm just worn out?) gave me some time to do a few jobs. as well as having a bit of a sort out of the train room (clearing out all the house tools was an amazing start), I finished gluing down the track on the wharf.
This was then taken outside and spray painted, which revealed that my choice of colour could have been better.

'Blue, init"
Never mind, its a good base colour and a fair bit of dry brushing with a lighter grey will soon sort that out. Painting the rails will be another thing entirely though......

Thursday, November 05, 2015

Treading water

Well, a long time between posts (which seems to be the sentiment every time I write at the moment).
Things have been quite busy at work, and seem to be about to get even busier. Again theres no energy left for hobbies in the evenings (after the garden is attended too). Theres also no easy jobs to do, which tends to lead to the " sit down at the bench (if we make it that far), look at some bits for a few minutes, get up and turn the light off on the way out". Its just something that you can't force by timetabling modeling time.
One thing I could face doing was gluing down the track onto the wharf. I've been putting this off for months as I've been assailed by doubts about the next steps.Finally I just though "stuff it" and went ahead anyway.

'A varied selection'
It was all far easier when I had lower standards and could just enjoy making things. I was even considering taking up the shapeways free shipping week to buy a few bits to work on.......

Tuesday, March 31, 2015

Wharf III

picked the wharf up tonight and got on with the job I had been avoiding, scribing the planks.
This went better than I had expected and in no time (well about an hour) I had the job done.


I then sanded the edges down, added holes for the point actuation switches to work and then added balsa strips to the edges.


The weights are to try to solve a slight warping problem. when glued to the baseboard it should be fine.

Sunday, February 22, 2015

Wharf part II

Well, a bit of progress this week.

I've decided to add a 3rd track to the wharf as it just didn't look busy enough. this was just in the form of a long siding with the extra point laid in front of the ones that were already there.

'From the dry end'
'From the wet end'
This looks much better than what was previously there. I will use at least part of the new siding to model so activity scenes with wagons being unloaded etc. maybe even a couple of small steam cranes.

Thursday, February 12, 2015

A start on a wharf

(And we are back. Work and summer got in the way).

I've made a start on the wharf. The base is a bit of 6mm ply 100mm wide and about 4' long. 2mm thick balsa wood sheet has been laid across this so that I can scribe the planks in. The track has come from my aborted layout in a box file (one of may bits of track I've 1/2 built over the years)


The extra width of the wharf has meant that I can lay another siding to add another shunting track and provide some more space for a scene or 2.
To get it inlaid was a bit of a mission. I've decide to model an old style wharf (pre-WW2) with the rails on top of the planking.
The balsa wood sheet was glued at the sides of the ply sheet. I then traced out the positions of all the sleepers and cut them out. It really didn't take that long, honest.


The track was then positioned to check that everything sat in the right places.


Once I make sure everything is running OK and I come up with a point throwing system that I can hide (and after I have scribed the planks) then I'll glue everything down.