Showing posts with label Scenery. Show all posts

Saturday, May 03, 2025

Elmer Lane 25 - Module End

 DB returns:


A little progress has been made in recent days at the north end of Elmer Lane. I finally made the decision to install the 'Greymouth platform-to-loop' turnout here. The original thought was to have this on the next module, thus keeping the 'Hokitika line' track, which runs in front of the depot and then circles around behind it, clean and clear of complications.

After a bit of measuring of my current, and extrapolating out to my 'desired' TranzAlpine, I reckon it might have been a bit tight. Moving the turnout onto this module probably gives me two extra car lengths if required. You can never have enough storage space.

Installing a turnout at this late stage also requires putting in a control rod after all the other tracks are well in place and ballasted. The rod runs just beneath the surface of the baseboard in a plastic tube and seems to work fine in tests, although I haven't attached the spdt switch to power the frog yet.

But I did cut a strip of copper-clad PCB, scored and drilled it in the right places, and attached it to the edge of the module. The platform road, loop and depot access track were then soldered down to it, and some feeder wires put in place. With the extra track, the track spacings are a little tighter than I like, but there is plenty of room in tests with my largest vehicles (SpaceRacer, GT, DM)

With that done, and the last of that track paint squeezed out to cover the new sections of rail, the last of the visible tracks could be ballasted.

The day ended with me 'pottering in the garden' to the west of the Hokitika line, planting a few trees, bushes and grasses.  While a few of us have bemoaned the closure of various 'local hobby shops', it seems that a slight salvation seems to have come with a resurgence in wargaming and kitmaking. There are now three or four gaming or art shops in Dunedin that now carry paints, glues, decalling supplies, tools and scenic materials. I've picked up a few packs of 'Gamer's Grass' recently. Its like the old Silflor tuft stuff, (I still have about 80% of that Silflor left) and Gamer's Grass available in a reasonable variety of realistic, plus a few fantasy shades, and different lengths too. Its a lot cheaper than Silflor used to be too, at between $12-15 Pacific Pesos for a section a little less than 20x10cm.

I like being able to mix the various shades and lengths in a given area. I believe you can make these blobby grasses yourself on a piece of wax paper if you have a static grass machine, but for the rest of us, the occasional visit to the hobby shop can't be beat.

I like using these tufts to make cabbage trees too, using old twigs, or in this case, bits of a Woodland Scenics brown plastic tree armature with bits of blobbygrass attached to the ends. As was learned on Moana many years ago. Four little cabbage trees were added, and here's the worst of them:

Wednesday, April 23, 2025

Elmer Lane 23 - A little scenery...

DB exhales:

I've been working on a couple of model trainy things over the past week or so, but one relatively quick task that has been a long time coming, was to ballast the loopy track that does a short cameo as 'the Hokitika Branch' between Greymouth station and the roundhouse. This has now been done, as well as some basic scenicking either side of it.


I've ballasted back to where the truncated workshop sticks out the back of the roundhouse:


And now with a few more shrubs and grasses planted:


Some blobs of grassy stuff are still drying (hence the patches of light gluey colour) and there will likely be further plantings as the scenery progresses. At the moment, greenery and ballast have made it past the railcar shed. Soon I'll have to decide on putting a point in just beyond where the ballast ends to service the Greymouth platform. I fear if I leave it until the next module a loooong TranzAlpine won't be able to sit at the station. But that's a story for another day.

In the second pic you might have noticed there has been some prep work done on the 'staging/workshops' tracks behind the fence, and the preview of an upcoming post on some trial roundhouse smokestacks...

In the last two pictures are some coal wagons that have featured in posts over the past few months, and recently on the NZ Model Railway Guild website 

Sunday, March 02, 2025

Elmer Lane 17 - scenery unfolding

 DB says:

A basic scenery layer has continued to invade Elmer Lane.  But before ballast could hit the roundhouse tracks, they needed to be wired up and a few joints soldered. I've now wired 9 of the 15 roundhouse tracks, heading clockwise from the one next to the boiler house. This includes the tracks opposite the four arrival tracks on the other side and the two little stubs by the foreman's office if that makes sense. 

This is ugly, but it works, most of the mess is is hidden by the roundhouse, and its so much easier than drilling individual droppers down to below. I'll paint the wires the same Harvard Grey as the floor. I've also fixed up those two little stub tracks over beside the office that I'd inadvertently only wired up one rail on.

There was a plan to have on-off switches allowing power into two clumps of three tracks each for the remaining six stalls. This would enable three or six tracks to be electrically isolated - to display non-DCC locos, or even to give DCC locos a rest 'off-the-grid'. I'm not sure I have the energy to do this but we shall see. I might just leave a few completely dead. I will at least power the track inside the end 'wall of windows' as things will look pretty good going into that stall visible through the end wall. 

Another thing we noticed on the modelling day was that on the real Elmer Lane, the sleepers aren't really visible, there are ballast fines everywhere. Here the sleepers stand out, being dark black. 
I tempered this slightly by putting a wash of light grey+brown over them and think this looks a little better. The yard will also be weathered once the ballasting is completed.

Having a bunch of ballast between the rails can get messy in the flangeways, and the few tracks I have here with plenty of ballast on the outer sides and little in the middle look odd, so I'll probably keep the main approach tracks looking tidy as in the pic above.

Ballast has spread far and wide and some green is going down:


Although this isn't a 'countryside' module, there is a little green about, beside the Hoki line, around the back of the roundhouse, and in a few spots in the depot itself. Some low-relief 3d greenery and maybe even some static grass will make an appearance. I think the little hut visible at the end of one of the wee stub tracks was a RhysCasting. It was once on my Moana module.

I even discovered a well-traveled mini-cabbage tree from Moana in a box of scenery bits, so it has been installed too.

Here it and the hut as they were on Moana:

And now further west along the rails at Elmer Lane:

A pile of lighting-up wood was started on one of the stub tracks, made from offcuts of that basswood. Some had grey on one side, some black, so that gives a little variety through the pile. Its been added too since.
Then some soldering of fishplates enabled the strips of 'concrete' to be laid between the tracks and ballast laid:
And some overall views as ballasting has progressed and some of these locos have seen the forst sun in many a year.


Thursday, August 15, 2013

Masterton show update

Just a couple of things to finish up from last weekend.

I've been insanely busy at work the last couple of weeks, but things seem to have sorted themselves out this week. So I had the inclination to nip out to the mansion for a photo or 2.

First up, the module as its stands at the moment. The mainlines are protected by foam to stop accidents. I like the concentrated simplicity of the track plan, with plenty of shunting in a small area. I have to add a fidddle yard at the right hand end to use it as a stand alone layout.


 I also did some shopping for scenic material. First stop was Scenic Textures, where Brian was able to hook me up with some foam slab. As good as the woodland scenics stuff, and locally made (oh and only $15 a bag. I grabbed 2 and I'm looking forward to trying it).


On the right there's is a different type of scenic texture, this time from Kelmara loco depot. Its similar to the Busch sheets I had already used (of which I picked up another roll), but its on a mesh backing rather than a paper backing. It looks good for weed patches or possibly house lawns (with a bit of a trim).


Monday, March 04, 2013

Getting Stoned: Ballasting 101

DB returns briefly:

Apologies for my absence, I've been away playing in American N. But after sending an Aussie some NZ120 pics yesterday, this particular dimension of my modeling mind - which seems inhabited by more and more personas these days - was awakened.

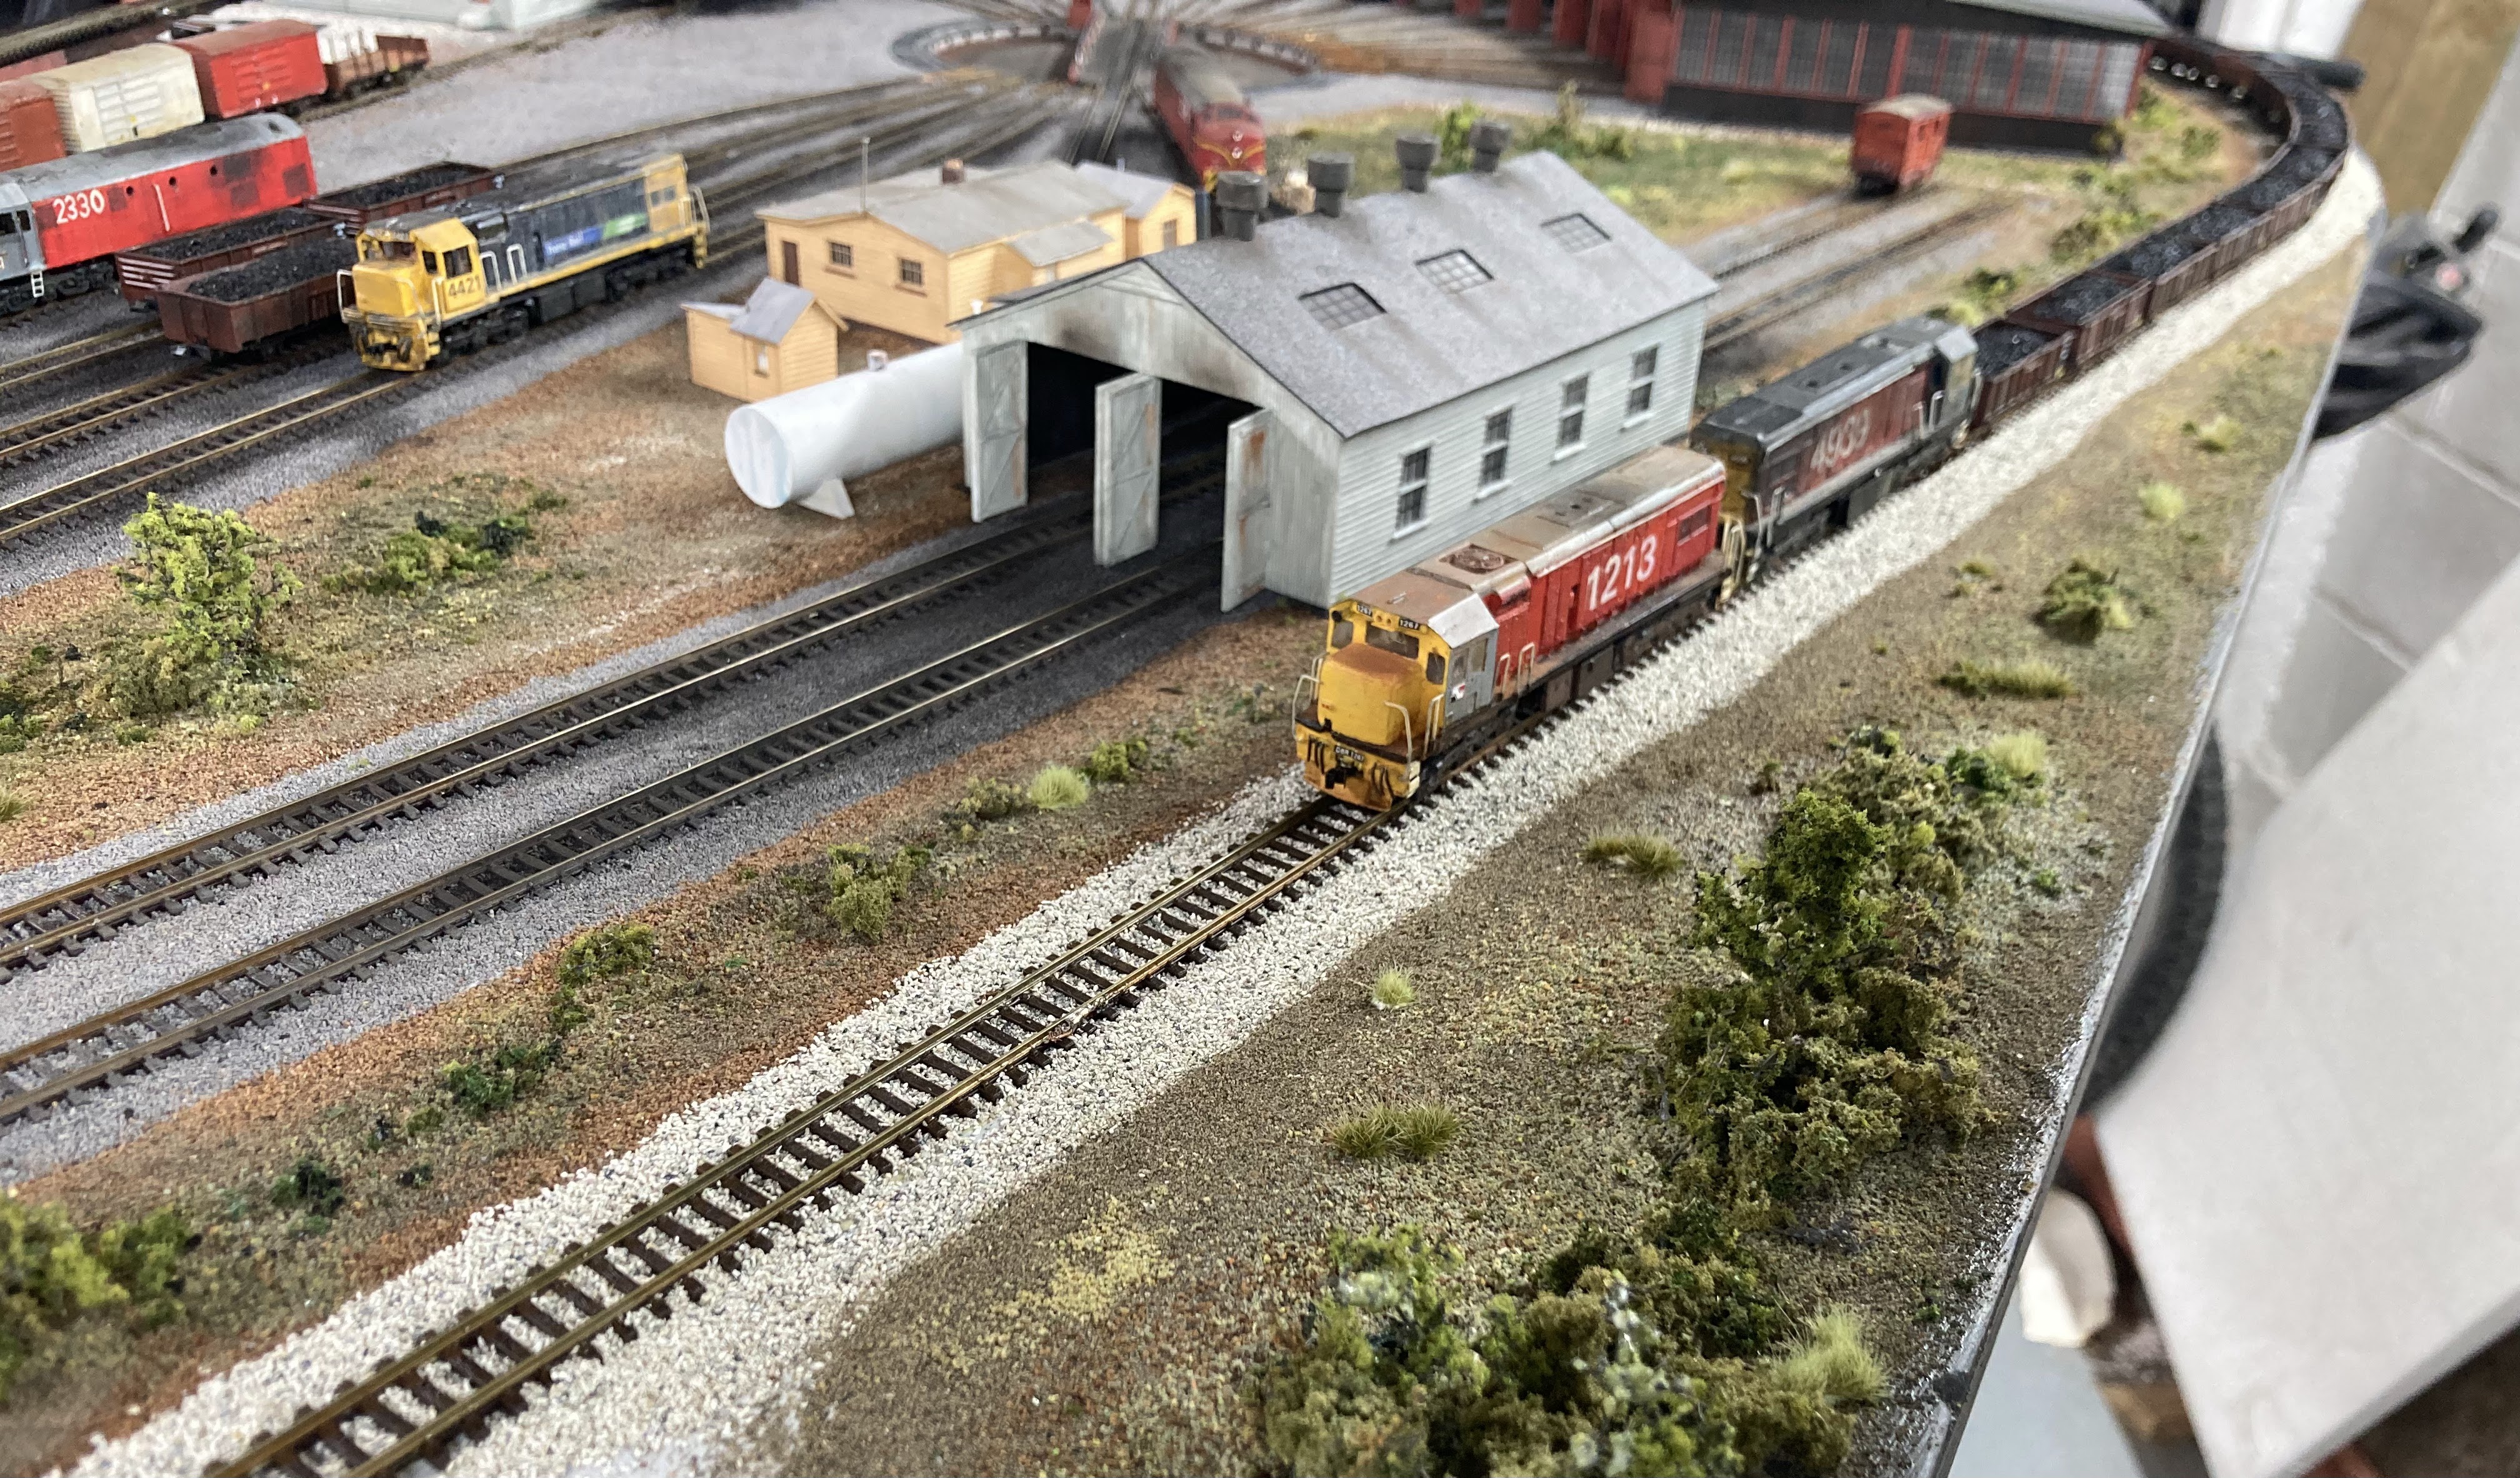
So why not get around to ballasting that nasty Broken River section of track and take a few pictures while I'm at it. We used to do these 'how to's quite a bit on the blog, not only for those starting out, but also as a way of sharing tips and tricks via comments left by far better modelers..

A lot of people hate the job of ballasting, but not I. It's one of those things that once done, suddenly makes your layout seem more real, so it's worth doing; but it's also one of those things the can really bugger up smooth running track and expensive points so it's worth doing well.

I like to ballast late in the cycle. If you ballast before doing a lot of your other scenery, no matter how well you protect the tracks, you usually end up with plaster, paint and bits of greenery on your ballast which is almost impossible to get out. The only thing you have to worry about if ballasting last, is that you have to be careful not to flick ballast all over your scenery into to places it shouldn't be.


So for the ingredients:

  • Ballast - as fine a grade as you can get. I prefer grey to this brown for mainlines, but I seem to be out of it and I never really expected anyone to see this abomination anyway.
  • Glue - dilute some PVA with water and a few drops of liquid soap/dishwashing liquid to break the water's surface tension. Woodland Scenics also make this nice pre-diluted scenic cement, but it's not cheap. I went through a stage of using latex carpet glue rather than PVAmany years ago, as it leads to quieter running, but it can remain sticky enough to attract dust over time. Be interested to hear what others use...
  • Wet Water - (as opposed to Ice or Steam I guess) - water with some of that soapy stuff in it as above. You can also use isopropyl alcohol which sneaks into ballast really well.
  • Tools - a brush to corral your ballast and something to apply liquids with. 


OK, on with the show...

1. The first step is to prepare your track. Finish your soldering, paint the rails, replace any sleepers that are missing where you joined sections of track together. I've done a sloppy job here on this recycled flextrack on all of the above because I hoped nobody would ever see it. Damn and blast this blog.

2. Dump some ballast on your track with a spoon or a small section of card with a V folded in it, or however you prefer. I suppose the 9-mill guys actually dispense ballast from scale YC wagons. Use a brush to tame the wild ballast. I like to apply ballast between the rails and use a brush to move it along the track - some will spill out to cover the sides. I like to go back and forth with the brush to get the ballast level below the tops of the sleepers as I find this to be prototypical on all but the dingiest of old sidings. This also ensures your flangeways are clear. Running a small screwdriver or pointy item fairly quickly along the 'spikes' of the inside of the rails tends to vibrate the ballast away from the flangeways too. You are now left with:

3. 'Wet' everything. If you put glue onto dry ballast, it will often blob up and do all sorts of unfortunate things to the stones you have neatly arranged. Dampening the ballast first lets the glue to meld and flow into this wetness without upsetting your fine work. I use a sprayer for big swathes of scenery, but for ballasting, I've become fond of these little pipettes as a sprayer can blast your nice tidy ballast all over the place. It might seem slow and painful but it isn't, even if you have some ground to cover. I applied ballast, wetness and glue to this 8 foot section in about 10 minutes.


4.  Apply glue. Either by dribbling it from your diluted PVA bottle or with your pipette - which I find easier to be more precise with. If you squirt the glue too hard or apply it from a high altitude, you'll create troughs and craters in your nice ballast. If you apply too much glue at once, you can end up with glue lakes and rivers which will relocate your ballast all over the tops of the sleepers, into flangeways, and down any slopes. Better to apply liquids moderately and come back to apply more rather than dumping a glue monsoon all at once. At this stage you might apply additional ballast if required to touch up tiny areas - sometimes if you have a sloped ballast shoulder, ridges of scenery might show through. Hmmm... I could have done this pic in Photoshop by making the above pipette white now couldn't I:

5. A final task is to clear flangeways of any errant ballast - much easier to do it now than after it sets. I like to use a fingernail run along the inside edges of the rails for this so you can 'feel' if there is ballast in the wrong places (clean your fingers when you've picked up some mini stones). Some people use an old wagon for this (don't: you'll end up with ballast and glue all over the wheels and they will just traipse this all over your rails) or a screwdriver.

A note on points - I tend to not ballast underneath moving point rails and keep some distance from moving tiebars. I'd rather paint the baseboards underneath these black before laying track. I do ballast up to the frogs at the other ends though and along the sides. Be extra careful of flangeways and to keep water and glue away from seeping into anywhere that moves or conducts electricity (point rail joints and where they touch the outside rails. I'm sure Pointmaster Druff has the correct technical terms for these - I slept through all those Hutt Valley Club pointwork discussions)


6. A final-final thing I like to do for aesthetics is to remove any ballast that has relocated itself onto the top of sleepers during the gluing process. If you find a misplaced rock, dab it with a finger and you'll lift it right up. You can then wipe your fingers on your best jeans to ruin them, or use some other place for your ballast deposits. This pic also looks suspiciously like the one above, although an expert examination should note me probing between the rails rather than clearing flangeways:


7. And there you have it. Once things have set you can:

  • Pull out any track staples (I often use a staple gun rather than gluing or spiking track down. 
  • Weather the ballast with some thinned acrylics if you desire  - either using an airbrush or a soft paintbrush. Sometimes this can be quite effective - you can run oily dribbles down the middle of the track (DJs) or the outside of the track (DEs) or all over the place (DGs, loco depots). You could use a grey colour to represent areas of heavy sanding (the lift out of Otira) or brown for brake dust or black beside curve greasers.
  • Do a final flangeway check with fingernail and/or something metal like a small screwdriver, a dental pick or the pointy bit of a screw works well too.
  • Gently vacuum up any errant stones that flicked onto scenery.
  • Clean the tops of the rails and play trains. 
Anyone else got any tips to share?

Friday, October 16, 2009

Moana 8: Little Green Tufts of Silflor Everywhere

As a public service to the blog's vast viewership, I ordered some silly-expensive Silflor Prairie Tufts and Buffalo Grass a while back. They come in a fancy packages just like iPods do, although these are marginally cheaper at $21~25 USD. Cough cough.

Inside the package are two 'sleeves' of clear plastic, coated with blobs of sticky stuff, to which fibres of a grasslike appearance have been attached. Hmmm. So to install these grassoids, you 'wear' a sleeve of them around one hand, and in the other, use fine pliers or substantial tweezers, to pull off a clump (some are singles, some are clumps of clumps depending on how their glue landed on the clear stuff - you can break these multiclumps apart if desired), dab them in PVA, and add them to the layout. I like em. A lot.

I used one sleeve of "Late Summer Buffalo Grass" to do the scene shown here (maybe 2x3 feet) and its made a big impression on these eyes. As with most scenery products, you'll want stick to the more muted colours and avoid the bright-radioactive-green spring and summer editions of their products.

A couple of mocked up pictures...
.As an aside on the finer points of photographic technique, the picture of the sleeve and pliers above was taken with my camera hanging around my neck on 2 second self-timer, with a flash on top, pointing up at a 70cm long foamboard reflector held between my teeth. I must detail how more of these exquisitely crafted pictures are taken... :)