Saturday, July 30, 2011

Saturday

Another 2 hrs in the shed, a bit more progress made.

I started off by painting the PCB sleepers that I had put in last week. I then asked the fatal question "I wonder what it looks like from the other side?" After managing to shimmy up the backside of the layout, I was greeted by a sea of shiny nickel silver looking back at me. Off with the paintbrush again then...

Getting back to sleepering the mainline, I remembered that I had some Woodworks stripwood of the right size. I cut this to length in a card jig then glued it in place. Once it is painted it will be fine.


On another note, next weekend (all things being equal), I will be making trackwork and other soldering stuff at the Masterton show next weekend. Drop by and say hi. One thing I can't seem to find is a list of who or what will be there. Any English exhibition will have a list or the layouts attending, though I suppose that the Brits have a larger pool of famous layouts that people have seen in the model press before. A google search turns up the fact that the Wairarapa layout will be there, and that its 6.5m buy 3.5m. there are also layouts from Tauranga and Wellington there. Apart from that, zip. At least I now know where its on....

Thursday, July 28, 2011

Trackmaking XXXIII

Its always the little things isn't it.

A closer examination of the humble NZR point in a standard yard situation shows us that while the rest of the trackage is buried up to the railhead, there are 6 sleepers visible where the point blades move.

And I suppose I have to replicate this on the model, which does take a bit of time.


In retrospect I'll have to go back and fix these as the sleepers are too bunched. Unsoldering these is going to be fun. I also have to sleeper the mainlines as most of those sleepers can be seen as well. This is definitely not a fun job. Its slow and meticulous, which is something I normally associate with work.

(This is why I have not been making many new toys lately. There's still too much track to lay and tweek.)

Sunday, July 24, 2011

Trackmaking XXXII; a bit of a milestone

At 3:10 this afternoon, Da 1431 traversed (almost) the entire 12' of baseboard. I had hooked up the 'Up' mainline for the occasion. This then lead to running Ed's from the Wellington end and 'reversing' through the crossover down to the electric storage siding. Da 1410 was then run onto the down main and reversed towards the loco depot while the electrics moved back out onto the main.


This play has revealed that I need to do a bit of work on the track and also wheel back-to-backs. The Ed's have developed a very nautical roll in some places.

Connecting the track up could also lead to a loss of productivity as its too tempting to run locos up and down rather than sitting down at the modeling desk.

Saturday, July 23, 2011

Saturday Morning

3rd cup of tea on the go. My saw blades have arrived from Geneva Importers ( go and have a look at their website. There are all sorts of hidden gems in there) so this week I might get the track for my boxfile layout done. This might even be sort of complete for the Masterton show on the 6th and 7th of August, where (if MMW allows me the space) I'll be disclosing the black arcane art of trackmaking. That is assuming I escape all the domestic jobs laid out in front of me (make cheese, bottle beer, lunch and the movies etc).

Also, Its good to see a sudden cascade (well 2) of modeling steam locos going on at NZ120. to those of you reading, get over there and post a picture of what you are doing...

Tuesday, July 19, 2011

More Half-life Pondering

DB returns briefly to comment on Senor Druff's post, which quietly snuck up and struck me about the head from several angles, like an ambidextrous ninja:

The world is your oyster

I don't think it's common for train-players to model the same thing over our lifetimes because there is always the desire to be creating. Once something is done, I can only enjoy it for a wee while before another quest calls me onward as my interests evolve. To quote from Top Secret, one of the highest peaks in the world cinema landscape: "Things change, people change, hairstyles change, interest rates fluctuate..."

I have many raw materials waiting to start several future dream layouts – another, bigger, N Tehachapi ; a 3x6 foot HO-tops-on-N-track Chinese narrow gauge layout; a 2x8 foot Z scale Arizona themed layout… At some stage I’d like to do a couple of small West Coast late-steam era layouts in NZ120 and 9mm. I wouldn't mid doing another Wellingtony themed modular effort either.

But time is of the essence for all of us. Building smaller layouts that are finishable in shorter timeframes is a very sensible approach, as is the modular form. Otaki to Cass enabled us to build small sections in focused bursts, and because we only operated it a few times a year we never got bored with it and its ever evolving form. Earwicker's efforts of the past while show how much can be done in a relatively short time and how impressive an modular layout, that can be added to over time, can be.

Disposables

Alas, unless you live in the Playboy Mansion, you're unlikely to have enough room for physical manifestations of all of the dreams we collect over the years. And if you do live there, you probably don't get a lot of railway modeling done.

Despite being in hibernation for a while. I'm slowly (and occasionally) plodding along on my Waimak gorge scene. All the while fully understanding that it might be thrown out before it ever sees a train run on it. It's likely we will move within a year so it will be binned, and I will salvage what I can. But all will not be lost, because it's recently become cool to…

Recycle

Obviously we save whatever track we can, as well as powerpoles, bridges and buildings if it makes sense. For this module (and Moana) I'm also using loads of recycled scenery – some items have seen service on up to 5 previous layouts (many of my Woodland Scenics foliage clusters date back to Otaki to Cass and interestingly, they don’t make em like they used to these days). I just pluck off what I can before binning and put it in a clear plastic tub for use in some future project (the tattier items as undergrowth or background items). You want to do your harvesting before breaking things up rather than after, as plaster dust is impossible to get off this stuff.

If you don't go mad and over-ballast the first time, much track can be saved. I never seem to get around to ballasting yards these days so I can recycle 99% of them later. Spraying yard baseboards before attaching track a-la David Barrow of Cat Mountain and Santa Fe fame is a nice trick.

Interesting previous post. It certainly got me thunking. I'll go back to sleep now.

Saturday, July 16, 2011

Learning from Others

Am_Fet writes:

Well, my work-imposed 6 months of purgatory are close to coming to an end with the complete replacement of the North Island Radio Processing systems within Train Control here in Wellington. Not that it all ends there of course; The Otahuhu signal box then gets migrated south, a separate booth to control Wellington Suburban gets set up, then time for a quick holiday to visit Nana and Grandad Druff before the Rugby World Cup. For me, RWC 2011 means being at work whenever there is a game at Wellington or Auckland in case I am needed to fix breakages effecting the lives of hundred of rugby mad commuters, so that's September and October shot....and on days when there is a game in each centre, it could mean a 3pm start then not getting home until after midnight...on a Saturday!

Still, I'll have a lab to curl up in and sleep, as well as all my tools....

Anyway, the real purpose of this post. A good friend has left the police to join us in Train Control and despite all of his superb traits (having me for a friend for a start), he is intent on modelling Gore (where he grew up) in 3/16ths. Discussions ensued and a SouthHead Models Ab kit is now in my hot little hands. I've been going through it (and even made a tentative start) and its made me think about the good and bad stuff that's foisted on kit builders these days and what we should try and emulate/avoid for Nz120.

First of all, the good: The boiler and tender are all one piece WM castings. Superb! Just make sure they are still round and you are good to go.


Apologies for the blurry boiler shot, but you get the drift.

I think the material of choice for a similar foray in nz120 would be resin, similar to what the 2mm association in England get up to. A one piece resin boiler with suitable cutouts for a decoder and motor would be a great start in building a steam locomotive (maybe with the funnel and domes on as well?) And to quieten the fundamentalists yelling "If its not brass I'm not interested!", I would contend the cab could indeed be folded up from etch.

A good illustration of this point is the Bob Jones "9F" in 2mm. A resin one piece boiler over an etched chassis and cab. Sure, the tender is etch, but a resin one piece would save you hours at the workbench.


And now for my pet hate with 3/16ths, and one I hope with careful thinking we can eliminate from Nz120 (once we get serious about it). Why O Why do people still base their lives on the standard NY RP25 wheel and pinpoint bearings? With the width of the tyre and the standard axle length (to lazy to go and measure one) followed by then mating it to a couple of pinpoint bearing, there is no way in hell that you are going to be able to achieve anything close to a scale width over solebars/bogie sides.....which is annoying, especially when the stretchers included in the kit (NY again) set the distance between the side frames anyway...wrongly, might I add!


Sure, you can get it all to fit by bending the crap out of the sideframes, but you shouldn't have to....If I could find a decent Ab size main driving tyre I'd be tempted to completely rewheel the beast (Might have to visit NWSL line and look for some suitable /88 tyres)....Anyway, while doing some boring testing yesterday on the new system, I did this....and man, are those castings crap or what...


Anyway, the Head Druff is keen to start this debate as he will need several steam loco's for his "Paekok" layout (and I've furnished him with the 1964 locomotive allocation list, so now he can start choosing which ones). So the idea is one piece resin boiler/tender, etch chassis and cab, and either resin or WM for detail?

Thoughts?

Tuesday, July 12, 2011

Thunking

Something I came across in my hunts is something from American Lance Mindheim. While he has some decidedly odd views on some things, there is no doubt that he knows what he is talking about when it comes to model making and building layouts. This passage from his blog made a lot of sense, and is something that most of us can aim for.

'Here's where I'm going with all of this. For many of us, consideration should be given to layouts with shorter life spans, say three to five years. By keeping the layout size and complexity manageable, we can get it up and running quickly, flog every ounce of fun out of it, and then move on to a new and exciting theme. Such an approach will keep us energized and excited. Shorter term layouts will be put together with a more consistent look because they represent a narrower band of our skills progression. Turnouts, trees, bench work, and electronics can generally be salvaged keeping the cost down. To be clear, I'm not talking about getting two months into a layout and then constantly changing your mind and never getting anything up and going. I'm talking about driving a manageable model railroad purposely towards completion in a medium time span, and then re-stoking the fires with a new project.'

This is something that does make sense to me. there are nights when I look at the monstrosity and wonder ' just WTF were you thinking'. It does tend to go but I still wonder what I could be achieveing in the way of smaller layouts. The flip side is that there are some things that I woudl never have attempted on a smaller layout.

Monday, July 11, 2011

Even leggier

This weekend I toddled off to buy the various wood for another trestle and beam setup. Not boring you with the details this time around, so lest just say that everything went swimmingly. I also took the opportunity to shorten the legs by 10cm to get the rail height down to 120cm from the floor. The photo shows the result.

This is a far more comfortable height for my back. It is also surprisingly stable. I now just have to sort out where the bits that formerly lived under the layout will move too. The big problem will be the 2nd desk i have out in the Man-sion.

So, this is how its all held together.


The beams between the trestle drop into place on the inner side of the hinges. The modules then sit on top. The whole thing can be put together in less than 5 minutes.

Sunday, July 10, 2011

Station time

Its been quite a while since we had a station track plan.

Today's offering is Ngapara, which has been covered before but not in plan form. This branchline featured in the September 2008 Railfan, so there are plenty of pictures around as well. the odd thing about this station is that it is split into 2 distinct pieces. At the eastern end (closest to Oamaru) we have the station.
Note that the top loop was removed in the 1920's to leave just one, and there was a wagon turntable on the siding behind the station leading to the flour mill, which appears just under the wrinkle in the scan.
On the other side of the main road was the engine shed, turntable and livestock loading. Not included on these plans are the 2 railway houses below the loco depot that can be seen if you have a look on google earth.

I think that this station could be done quite nicely on a 6' by 9" board, or possibly expanding to 1' wide to do some extra scenicing

Saturday, July 09, 2011

Saturday morning

Just continuing the run of original titles.

In my brains Friday afternoons wanderings I've been thinking about layout sizes. More exactly the question is; 'What does everyone think that a good small layout size is?"

In my thinking, and in the process of working on a large layout my current thinking for a reasonable size layout would be about 4' by 1' for a 'first' layout (that would be 4' by 24' in S scale, or a 1/4 acre section in 9mm). I'm thinking in terms of a simple yard for shunting or just running some locos. I've been think about some simple plans but would like to see what everyone else's thoughts are/

As a short note, I ordered 2 cheapy DCC decoders from Southern Digital last weekend, and while the lady of the house has now spotted the bill, its only NZ$40 which is ridiculously cheap (just as a note they are the Digitrax DN-135 which is a base 2 function decoder). I don't think I could buy 1 decoder in this country for that price. Its just going to be a huge challenge to fit a decoder into a the Kato Mikado chassis under the Ed's.

Friday, July 08, 2011

Friday night

Well its the end of the week again. As with any Friday at work, I've been doing a bit of absent minded thinking while writing my weekly summary and planning next weeks experiments (its always good when the boss turns up at my office door and I can give him my next weeks plan).

This weekend promises to be an interesting one as the lady of the house is working both days. Thus the scene is ripe for a prolonged session in the Man-sion. so I thought i would do some thinking about some of the projects that I could be doing.
-Another set of legs to support the 3rd module.
-Have another look at the Ew mech to see whats next.
-more track work.

OK so the last 2 would involve saw blades which I don't have. That sort of makes it easy then

Wednesday, July 06, 2011

Answers to Questions

Sorry its taken a while.

last post Nick asked if it would be possible to make a Heisler on this mech.

Unfortunately the answer is no, having consulted various Railfans. The main problem is the way the model is built frame wise. For that matter I think a Price Cb is about the only thing you could make with it. I have acquired the journal with the collection of Price bush loco plans (possibly the tattiest Journal in existence) and about the only other loco that could possibly be made would be the Ar.

The main problems are that the leading bogie has 2 pickup tags that stick up, and that the chassis is built around the 2 side bars with the motor dropping in between them. The first has to be hidden in side tanks, and the second in a cab rather than a narrow bush loco boiler

I've been doing some more detail work on the Cb tonight, and also having a drive and its a loverly runner.
( I've also been cleaning the Man-sion, but that's not really of much interest to you all out there).

Saturday, July 02, 2011

New legs

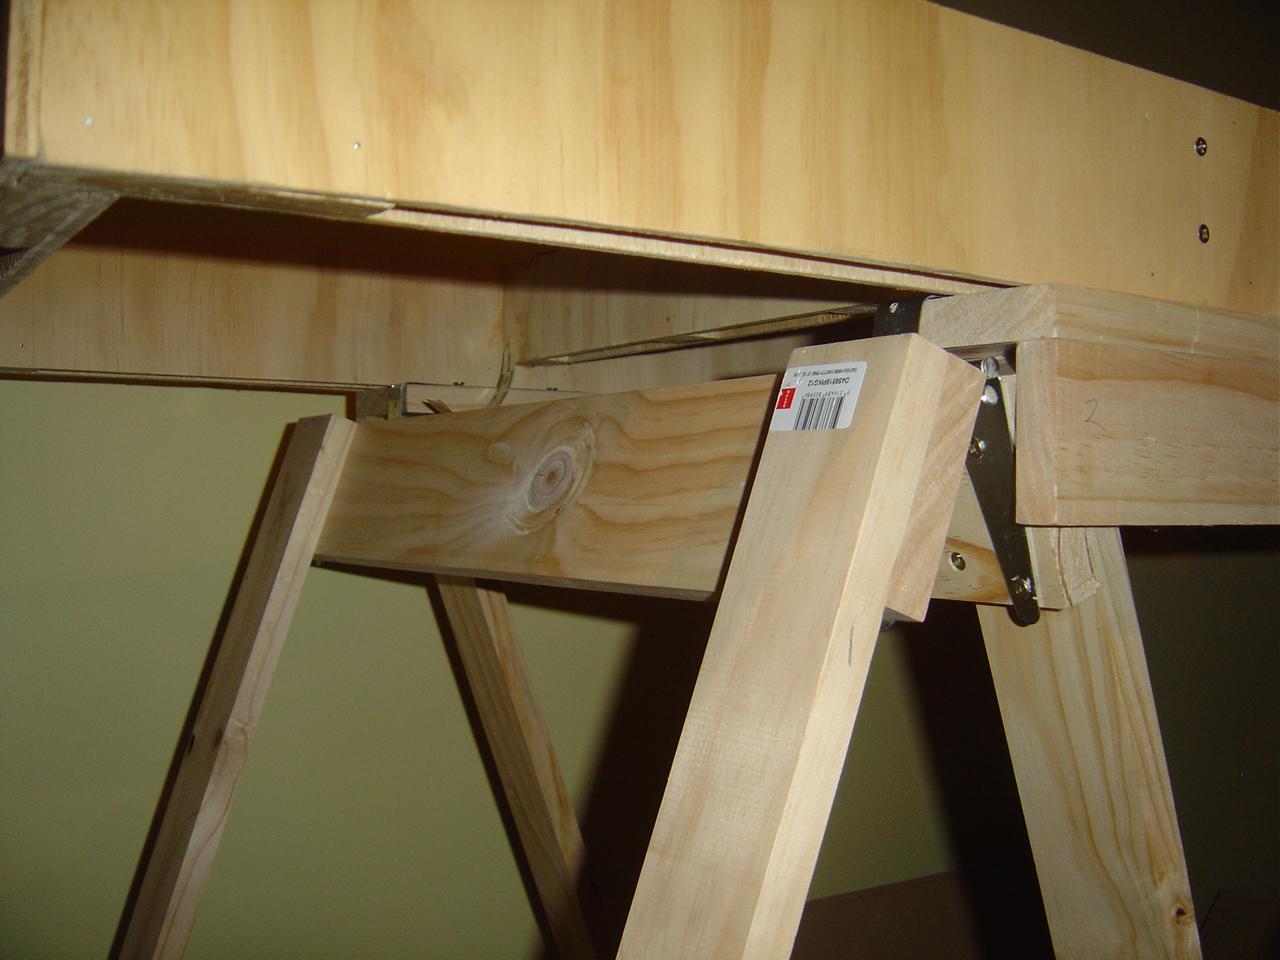
Today's project takes us back into the murky realms of woodwork. Now my skills or lack thereof have been well documented over the years, but its never stopped me. The layout has been in need of a better set of pins for quite a while, but it came to a head one night last week when it almost fell over while I was lifting modules off and on. It was time for something new, and I've gone for something a bit left field. Its an adaption of an Ian Rice invention called a 'Ulysses', which i think is some daft acronym for a universal layout supporter (kind of like a wooden jockstrap). Basically it has wooden beams mounted between trestles, with some metal tabs to hold it all together. its designed to set up and take down quick at exhibitions. so after a trip to 
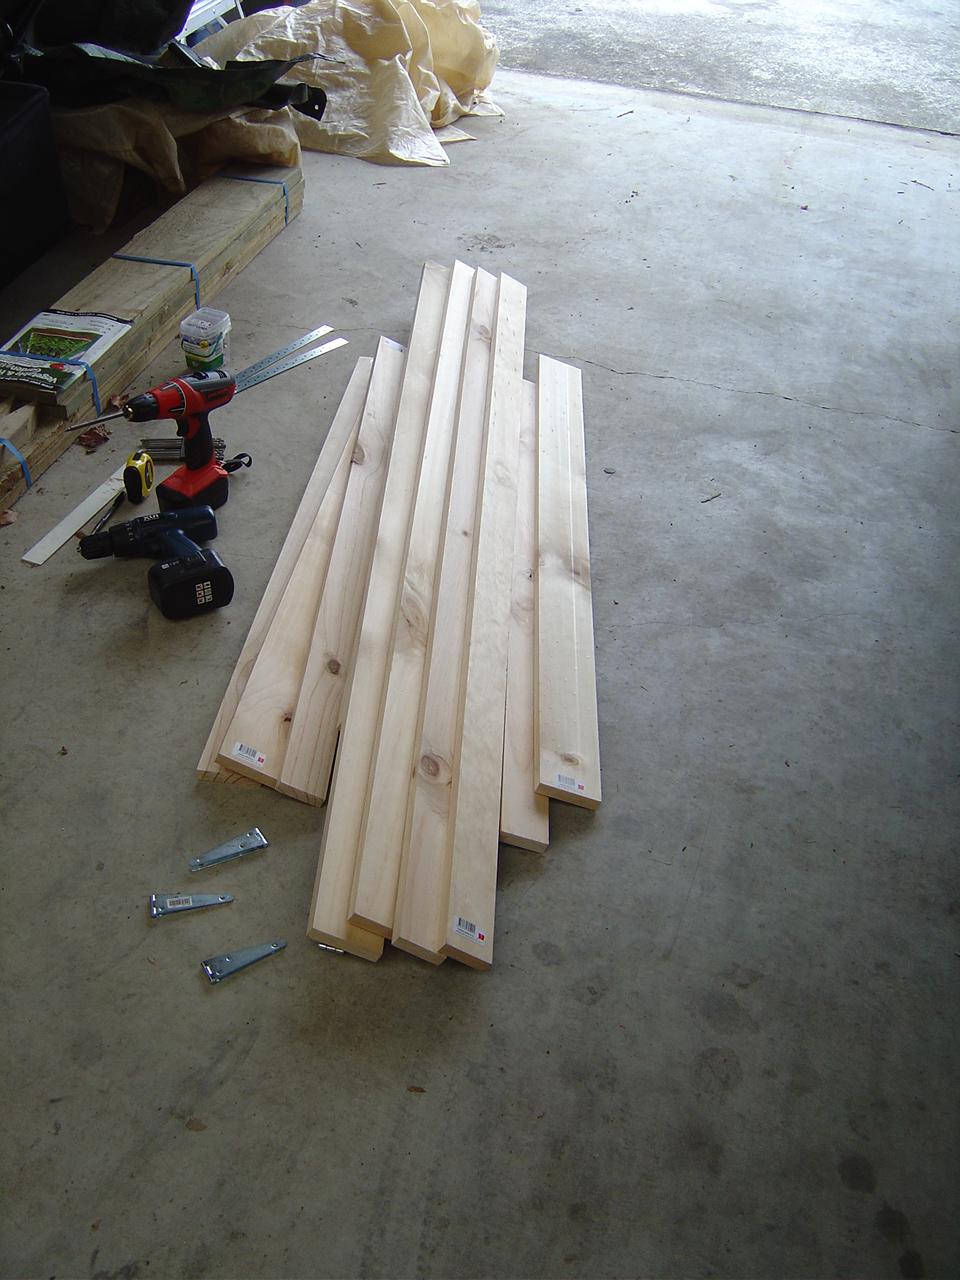
Bunnings we have all the bits we need.

'Wow, not just firewood'

Now at this point I could go on about how everything just fell together and it was all unicorns and rainbows, but real life doesn't work like that, so here instead is the true unadulterated version.

-Head out to garage to get started. go down the back to the Man-sion to get the power drills, measuring tapes etc.
-Go back to the house to get the key.
-Head out to garage to get started. go down the back to the Man-sion to get the power drills, measuring tapes etc.
-Take these to the garage.
-Go back to the house to get the car keys to unlock the car to get the wood out. the lady of the house asks just what the hell I'm doing?
-Remember that one of the drills is empty. Go back to the Man-sion to find the charger so that it is good for later.
-Finally get down to cutting some wood. Discover that other power drill is almost empty as well. Go back to the Man-sion to find the charger so that it is good for later.
-Discover I'm out of power drills.
-Discover I don't posses a posidrive screwdriver.
-Tea break time. Wonder if this is how builders do it?
after a suitable interval, head back out to the garage. The power drill is all charged.
-Put together bits of wood together and add screws. Everything seems to go ok apart from some wood splitting.
-Set the first legs up and discover that they rock (and not in the cool way). cut a small amount off the offending leg to get it to stand up.
-Repeat with second set of legs, again with the removal of excess legging.
-Make up supporting rails. Add the metal L pieces to the end that hold everything together. Mark which ends go on which legs.


-Move everything into the Man-sion. Disassemble layout and old legs. Put new legs in place.
-Wonder why support rails don't match markings.
-Rearrange legs to match markings.
-Put center module onto support rails.
-Wonder why I'm trying to mate 2 modules with the steel pins facing each other.
-reverse center module.
-Connect it all up. I think it will do.


It is quite high, about level with my armpit (wasn't that a good height?).
I might remove some of the legs to drop it down 6", but it is going to be much easier on my back. Its also much easier to get underneath to adjust things.