Sunday, December 13, 2015

On the Buses

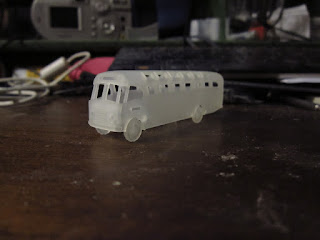
The rest of my Shapeways order was made up with an old NZR road services bus.

Apart from being a bit on the thick side, its a good model. I think that the glazing should be put in but quite thin so that the people who want to be able to see into their bus can remover it, and the rest of us can just paint it. My pan for this model is to trundle round a road somewhere on a MMW module.
 So, will it fit on the Tomytec bus chassis?

"Just about'
The rear end is OK (width wise as well) though the wheels are a wee bit small. the steering bit at the front is a problem, but a look and a think reveals that I should be able to modify it by separating it from the rest and doing some surgery.

Thursday, December 03, 2015

Hot off the printer

Something I have been meaning to do for a long time is to do some reviews of some of the many models available in NZ120 from Shapeways. The main impediment to this has been having to purchase the models first. Its a chicken and egg problem, as I'm not sure about purchasing a models because I don't think that there are enough good pictures of them around to make an informed choice. I'm not sure why no one else has reviewed (or even seriously photographed) their purchases? surely its a service to your fellow modelers.
Anyhoo, I digress.
A wee while back I noticed that Shapeways had free shipping. I found a bullet to bite and made a couple of purchases.
When the box arrived, I was reminded that the prices are in US dollars. Ouch.
So, first up, The English electric Df.


A rough check reveals that the length and width are OK. All the vents on the side are in the right places. The porthole windows look too small, but are in the correct positions and are the correct size relative to the large grills on the side. The bogie sides supplied look OK. The 3 axle ones are designed to fit over the chassis ones with a bit of filing.


 The cab doors are recessed, with no printed handrails (yay). However there are no holes for wires ones to fit. The doors on the sides are also recessed, when they really should just have an outline
OK, time for the close ups.


The leading bogie has pinpoints inset for wheels to be added. From what I can tell they are 14mm (without wanting to bend and break them). I'm assuming that one can use the wheels from the chassis. The horns are in the correct orientation for the large headlight, which the published plan has not got right (always refer to photos)
Finally the nose. The Df/Dg nose has beaten virtually every kitmaker in this country. My verdict is that its not quite there, but with a bit of filing it will do


So, my initial opinion is that its quite good, based on my leap to nit picking almost straight away.. I've seen extreme versions of this sort of review overseas, and if you are starting to split hairs then its time to get a new hobby.Now all I have to do is work out how to get rid of the benzaldehye smelling wax without breaking anything.

(Right then, I've started. the rest of you should start sharing closeups of yor 3D printed models so we can actually have some information before plonking down our cash)

Saturday, November 14, 2015

Saturday Morning

(I'm trying to get back into this blogging business.)

A sunny day here at La Casa Dandruff, and I've already turned the compost (and that's not a euphemism for anything). I've had an email from Shapeways to say that my order has been printed and shipped, so in a couple of weeks I'll start learning about how to use acrylic body shells, and if its worth it.

Following on from the West coast binge that is occurring here at the moment, I've been pondering about how to turn the area into a layout. While there are some bits (the branch lines) that would be relatively easy to model, fitting the bits into a larger system is a bit problematic. Its had me pondering (again) the merits of creating imaginary routes and stations on the west coast. Its one of those things where its something I would like to do, but my inner historian keeps yelling at me (historians love an argument, and unlike inner finescalers they can hold their drink). I know its reasonably common in the states (simply because its so large), but in little old NZ where if it was sensible (or not) someone built a railway, so all the easy bits are taken. There's possibilities (a second route across the southern alps) but once you have a route it doesn't seem to make sense to duplicate something.

Wednesday, November 11, 2015

Yet More Coal

Chatter from the peanut galley over the last couple of weeks has been discussing ore modeling locations on the west coast, and the attractions of old steam locos and long rakes of coal wagons.
A list of station track plans was drawn up, and the only major one missing from the list was Greymouth.

Greymouth was actually 2 different yards, so lets have a look at plans from 1912


 The main station also contained the car yard (and the loco depot at this time, Elmer lane not being built until the 20's). This was the departure point for passenger trains south to Ross, North to Westport and east to Otira and beyond. The other Station, Riverside was used for the local trains to the Greymouth coalfields and up the grey valley.


The wharf yard was deeper than the corresponding area at Westport. The track work was far more complex as well. Looking at it from an operations point of view, the set up is to run short rakes of hopper wagons onto the quayside to be unloaded by the mobile cranes. The corresponding trackage at Westport was far simpler.

Amazingly (and/or sadly) the only thing left of the 2 yards today are a single line to Hokitika through the main station, and the goods shed and cranes on the Quay.

Sunday, November 08, 2015

Q-ing Up

The Ghost of DB returns.

I'm alive! And back in Godzone for a while. Which always make me want to play trains.

Mr 0-4-4-0 is making some nice Q wagons and modules at the moment, so why not join in, as who doesn't love the West Coast in late-steam days? And besides, I remember seeing Q hoppers on a DJ hauled train leaving Greymouth in 1981so I can use them behind those locos as well.

So... I found four 10 foot Peco chassis with spoked wheels and threw them along with my modeling knife and a random selection of styrene bits into suitcase for the trip to the Capital.

Colonel Druff lent me a variety of Q plans this afternoon, and the first that caught my eye was one of the steel hoppered ones with the straight sides. Measuring up the wheelbase and converting to NZ120, the Peco is exactly right, so make one of those first I will. If you're not familiar with it, the NZ Railways Rolling Stock Lists site is a goldmine for numbers, dates, trivia and pictures for almost everything that ran on the rails in NZ.

My first task was to remove the extraneous detail from the Peco chassis - the protrusions above the flat top surface, the handbrake and brake-shoe details. I've also slimmed down the couplers as I intend to use them (shock horror) instead of splashing out on anything more realistic, or expensive. All was done here with a sharp blade in my 35 year old modeling knife which I haven't used in about two years but seems to be still up to doing the job. This little shard of firewood and a paper bag to catch the offcuts might not make EB's "Great Workbenches of the World" series, but it's doing the job.


Once this was done, I laid a flat piece of thin plasticard on top. In hindsight I should have cut a rectangular hole in it to make the top half of the hopper look like it's sitting in a real hole, but what can you do now. Other notable details on these series of early Qs are the coil spring pockets above each axlebox -yes I know these Pecos are leaf sprung, but I figured removing those might be a bit messy. I made these pockets with their distinctive circular holes by twirling a hole in plasticard with the knife point and then cutting squares out around these and gluing them in place.


A pair of headstocks and a fake handbrake lever and we're almost done. I don't have any handrail wire with me but that will come, and I'll need to add some weight to these as well.


More in the next episode... in about two years, if history is anything to go by....

Saturday, November 07, 2015

Saturday Morning

The suns up, the birds are singing (the cat got 2 yesterday so I can't imagine what they would be happy about), and the lawns call out to be mowed.
So the best spot is hiding in front of the computer.

I've started making some movements towards getting my NZ120 modeling back on track. Last night Shapeways and Kiwimodels (in that order) made some more money off me in the form of an EE Df top and an NZR bus. It will be interesting to see how the Tomix bus chassis can be shoehorned into the top. I suspect it will take some serious surgery along the lines of just what does the damn thing need to actually work. The Df should be a bit easier depending on whats been done to allow it to fit on a KATO mech. At some point I'll also have to take stock of the stock, just to see what runs and what doesn't, and what bits I have lying round.

Also I finished up some work yesterday on a few other models that had wandered across my workbench (for one of Am Fets mates). NZ12 I believe.


Friday, November 06, 2015

Two in two

A day off work (how can I have a head cold when its 20 odd degrees outside, maybe I'm just worn out?) gave me some time to do a few jobs. as well as having a bit of a sort out of the train room (clearing out all the house tools was an amazing start), I finished gluing down the track on the wharf.
This was then taken outside and spray painted, which revealed that my choice of colour could have been better.

'Blue, init"
Never mind, its a good base colour and a fair bit of dry brushing with a lighter grey will soon sort that out. Painting the rails will be another thing entirely though......

Thursday, November 05, 2015

Treading water

Well, a long time between posts (which seems to be the sentiment every time I write at the moment).
Things have been quite busy at work, and seem to be about to get even busier. Again theres no energy left for hobbies in the evenings (after the garden is attended too). Theres also no easy jobs to do, which tends to lead to the " sit down at the bench (if we make it that far), look at some bits for a few minutes, get up and turn the light off on the way out". Its just something that you can't force by timetabling modeling time.
One thing I could face doing was gluing down the track onto the wharf. I've been putting this off for months as I've been assailed by doubts about the next steps.Finally I just though "stuff it" and went ahead anyway.

'A varied selection'
It was all far easier when I had lower standards and could just enjoy making things. I was even considering taking up the shapeways free shipping week to buy a few bits to work on.......

Monday, September 07, 2015

Product Review

On one of my many trips to Bunnings I finally found the right sort of foam for layout building, extruded (and not expanded) polystyrene. It goes by the name Knaff board. This stuff is about 50mm thick comes in a convenient sized 1200 by 600 (or 4'by 2' for the rest of us) for about $25. I don't know if it comes in larger sizes.


Here we have the wharf and a ship placed on the board. I have a much larger card model to place behind the wharf, which probably needs too be a wee bit higher.


Sunday, August 30, 2015

More coal

Following on from the last post, I've been sent some scanned photos from a family holiday to Westport many years ago. In those days health and safety was rather more lax and so we were able to walk up the miners track, taking a detour to Middle Brake (past a "go no further" type sign if memory serves). These photos offer a window back 25 years or so when the remnants of our country's industrial history were just left to decay.

First up, looking up the hill from Conns creak, with the yard crane on the edge of shot to the right. Note the spectacular day which is quite common on the west coast, at least while I've been on holiday there.


Then on to Middle brake, the junction between the lower and upper incline. This photo is of the winding house with the remains of the pistons which were used to control the rate of descent of the loaded wagons. The wire hauling ropes had just been left on site, obviously because they were not worth much. I think that's me in green on the left with Mum on the right. obviously buy the time we had walked up the hill for an hour it was not quite such a sparkling day.


littering the bush along the incline were the remains of runaway wagons that had been left were they fell as it was not worth the effort to recover them.

And who is that dashing young man in red?


Saturday, August 15, 2015

Coal time

 (With the news of the last week with the seemingly impending demise of solid energy due to the usual combination of mismanagement, incompetence and greed, we step back to look at happier times on the coast. How we can trust people to run this country when they can't even remember where they live escapes me)

I've always had an interest in West coast coal operations, and what red blooded steam nut wouldn't. all those locos which lasted far longer in an isolated area with towering lush scenery and old ramshackle buildings.

There were 2 coal ports on the west coast, Greymouth and Westport. In this post we will have a look at the Westport station and wharves.
First up an overlook of the whole area courtesy of the 4th ed Tramway atlas.


Coal came down from Deniston, Stockton and Seddonville in long rakes of Q hoppers, hauled by a collection of Wb and later Ww locos. The section (untill it was conected in 1943) had a very small number of other wagons but 90% of the rolling stock were Q wagons.

First up the station from 1912. Even for a seemingly remote station its quite big (I suppose there had to be somewhere to put all those wagons). I was interested to see the separation of the wharfs. The goods wharf is on the right, and the lines leading up to the coal staiths, which I think lasted till the early 1920's.


 From the national library collection. More of a promenade than a coal facility.


 From the next section we see the other end of the coal staiths and the second coal loading wharf.
 The track layout is not overly complex compared to the other end of the yard.

And from the even stranger files.....

It appears that the coal wharfs were a prime destination for the well healed.

Thursday, August 13, 2015

Hello again.

 Not dead just..... not.....

My it has been a long break hasn't it. I have just really not been in the mood to put finger to keyboard. Maybe I've just run out of things to say.......

 Anyway, just to report I'm still alive, there have been no family crises etc.
Also, the MMW crew will be at the Masterton model railway show this weekend. I'lll be there on Sunday with the track making fired up, just in a slightly larger scale.

And just to add a picture, heres something that wandered through the inbox a while ago (thanks to Michael Kilsby).
 

Tuesday, April 21, 2015

Birthday time

And i even missed it.

Again its been a long time between posts. A combination of busy at work, a bit of 1:1 scale modeling on an older wooden home (and to think we seriously looked at a 100 year old house) and a general pause in modeling.

So, where am I up to?
Mostly its trying to find a bit of enthusiasm to get on with the wharf. I've come up with a way to actuate the points, but have a bit of a mental block to start with the piles. This is going to be a monumental task to do, and it will be a challenge to get it right. The paper ship I'm using also has a few issues that I will have to fix at some point.

The major problem I have is one of perfectionist block (I think that's what its called). I can have a vision of what I want to achieve, but lacking the skills (or confidence in those skills) to get to that vision means that it doesn't get past the starting post. Or that the order of the steps is crucial, and a lack of confidence in a future step can scuttle the current one.. I guess it might be a hangover from my current professional career. This involves every step being planned in advance, and nothing happens until every step to the final one is visualised. OK its not quite like this, but in chemistry if things go wrong, they can go wrong very fast and people get hurt (or at least have to fill in lots of paperwork discussing what went wrong)

In some ways working on the house has been good for this. I've now learnt to push a small project through till its either finished, or won't leak during winter. I can leave it there and go and do something else. I've also been dabling in another prototype/scale which allows me to build without worrying about whether its prototypical or not (since I'm making it up). Its also nice to be "mostly" working with RTR models for a change.

Hopefully this translates back to NZ120 in the not too distant future.

Tuesday, March 31, 2015

Wharf III

picked the wharf up tonight and got on with the job I had been avoiding, scribing the planks.
This went better than I had expected and in no time (well about an hour) I had the job done.


I then sanded the edges down, added holes for the point actuation switches to work and then added balsa strips to the edges.


The weights are to try to solve a slight warping problem. when glued to the baseboard it should be fine.

Tuesday, March 10, 2015

Suggestions

I tend to spend a fair bit of time doodling track plans. All I need is a pen, a bit of paper and an idle 5 minutes and I'm off. Most of my planning tends to be involved with tweaking plans I have already worked on to try to get a better shunting set up. I must admit that some prototypes have me stumped (the standard NZP 3 track goods yard is almost impossible to add interest to, well for me anyway).
 Possibly of more interest is industrial shunting yards. These can have an odd variety of track formations in a small area which add both visual and building interest. 

So, to keep me entertained at work, does anyone have any layout design problems that they would like examined? Scale is not a problem as I've made track in most scales. I may have to reacquaint myself with commercial track work to see what can be fitted into an area. Also the preference for operations/shunting or watching the trains go past.


Monday, February 23, 2015

Is the show draging?

If things are getting a bit slow at the train show  (just after lunch on Sunday) then here is something to keep the operators awake. ( From Alan Cox via the 2mm mailing list. apologies Alan)

There is always shunting scrabble (usually played at shows to avoid
boredom)

Wagons have a letter tacked on the non public visible side. Trains of
wagons arrive and the goal is to send back completed words with the
highest score. Wagons are also arranged so that common wagons have common
letters while Z, Q etc are unusual one offs.

I'm sure that there would need to be a few more rules than this (I've been informed that this is about it). Maybe the scrabble set to draw the letters out for the incoming train.


Sunday, February 22, 2015

Wharf part II

Well, a bit of progress this week.

I've decided to add a 3rd track to the wharf as it just didn't look busy enough. this was just in the form of a long siding with the extra point laid in front of the ones that were already there.

'From the dry end'
'From the wet end'
This looks much better than what was previously there. I will use at least part of the new siding to model so activity scenes with wagons being unloaded etc. maybe even a couple of small steam cranes.

Thursday, February 12, 2015

A start on a wharf

(And we are back. Work and summer got in the way).

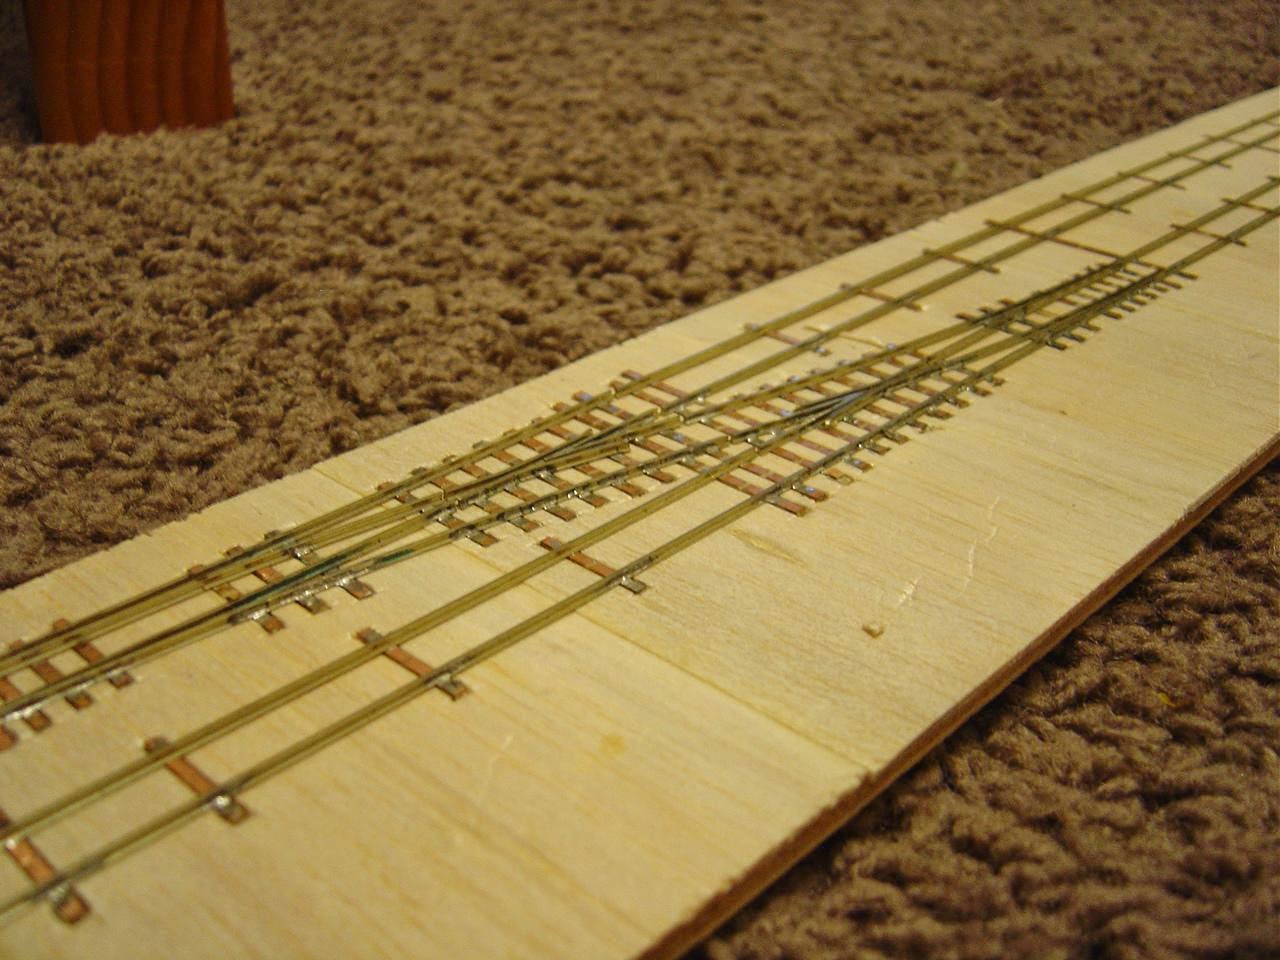
I've made a start on the wharf. The base is a bit of 6mm ply 100mm wide and about 4' long. 2mm thick balsa wood sheet has been laid across this so that I can scribe the planks in. The track has come from my aborted layout in a box file (one of may bits of track I've 1/2 built over the years)


The extra width of the wharf has meant that I can lay another siding to add another shunting track and provide some more space for a scene or 2.
To get it inlaid was a bit of a mission. I've decide to model an old style wharf (pre-WW2) with the rails on top of the planking.
The balsa wood sheet was glued at the sides of the ply sheet. I then traced out the positions of all the sleepers and cut them out. It really didn't take that long, honest.


The track was then positioned to check that everything sat in the right places.


Once I make sure everything is running OK and I come up with a point throwing system that I can hide (and after I have scribed the planks) then I'll glue everything down.