
I ended my second afternoon of DFTing by painting her up blue, yellow, gray and black, and now that the paint is dry, its now time to wrap things up by documenting the third visit to the trainroom.
Going back to that epic post on colour, I began the session by dulling down my deep sky blue and dark gray with a wash of rapid-drying light gray acrylic which has made it look a bit more like the real 7132 trailing in this shot from a few months ago (which has just this week become my inspiration for this model).
 I absolutely loathe doing handrails, but once they're done they make everything look more finished. I used very fine brass wire this time instead of my usual piano wire and the superthin ones look waaaaay better. The light attached to my workbench (the black thing in Ev's workbench post) has a (scratched) plastic magnifier built in that has never been used until painting those handrails. Boy does it make that job so much easier. My eyes must finally catching up the rest of me.
 Tranz Rail's flashy decals were from the superb Etchcetera (Andrew Wells) DC set - the cab numbers aren't the right font for the blue livery, but they will do for now. I gave the loco that ugly 'patch job' look with one more wash of the gray paint in an approximate rectangle. For some reason, many of the DFTs got a much lighter patch than their underlying blue paint. I might cover some of these 'finishing' steps in more detail in future models/blog posts because I forgot to take pictures and I'm sure you're getting sick of DFT tops by now.
Finally, a Kato SD40-2 chassis for it to sit on: I pruned the shock absorbers and some of the 'underbrake' bits off the bogies and made battery box sides from strene. The -2 fuel tank was simply shortened to save time as the end profiles are similar.
 And that’s that!
 Having not seen a lot of real DFTs in action, I must confess to not being a huge fan of them ...last week. This project started out more as something that would be 'good for the blog' rather than a loco I just had to make, but once the thing started to come together, I started to enjoy that feeling of making something from scratch and am now quite in love with a model which turned out really well.
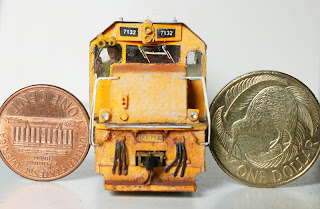
Dangerously close. Ditch lights in, but needs headlights.
Having said that, if you are going to have a go at scratchbuilding for the very first time, I'll warn that the DFT is a more difficult model than I'd thought. There's all the lumps and bumps, the underframe stuff, the painting of the raised walkways and yellow stripe - that make it quite a bit more tricky than doing, say a DC, which would be a more straightforward scratchbuilding project.And -before I forget - something I forgot to do on this DFT, was to make the whole top about a mm shorter than it should be as I did with my DFs. This would have tightened up the gap between the rear bogies and the back end a smidge, although looking at the pics above it doesn't look too bad.
 Scratch That
 I started this project with the comment “Before you ask, it’s not going to be cast, RP’d or etched. Instead, it will be quick to make, cost next to nothing and require almost no skill.”
That wasn’t intended to be a swipe at the technologies that will turn NZ120 upside down in a few years. But... isn’t that what everyone said ten years ago? I'll reiterate from a few months back: manufacturers rarely produce products for love, the market is tiny and bringing products to that market is an incredibly time consuming and expensive proposition. You do the maths.
My point is this: you can wait for things to drop into your lap, but you can also make something out of nothing today, and get a great feeling of accomplishment from doing it. Surprise yourself and then surprise someone else with it and perhaps get them interested in the scale. Given the usual 2-3 foot viewing distance, there’s no better scale than NZ120 for scratchbuilding stuff; which is a good job given the incredible number of fancy kitsets and RTR items available.
So get of that armchair, bring that beer with you and have a go. After all, this DFT top isn’t too bad for a ten dollar, paper-and-plastic, two and a half day effort eh? As Bruce Forsyth used to say : “Hope you’re all doing this at ‘ome!”
4 comments:
have just started on scratchbuilding one of the DF locos as per your plan and instructions. must admit its tricky cutting out everything and getting everything square.Its my first scratchbuild, so i'm not going to go overboard with detail. I have got a spare Kato U30C chassis lying around which will be used.
Good work beaka! I will need 2 of these puppies, so might be following along soon. Then again, I also want 4 DC's, so maybe I'll wait for the Maestro to do a DC article?? :-)
Nicely done Darryl ! A very effective way of making loco's. Just goes to show the benefits of this blog in explaining the process compared to the original April 1995 Journal article.
Congrats on a great model and blog Darryl !
Might a Dc be next in the "series" as this may encourage more scratchers due to the simpler body to reproduce?
OR how about the ubiquitous De that has occupied the minds of more than a few NZ120ers of recent times (if a suitable chassis can be found to satisfy the 1 metre viewing)?
Again, great work and lets hope it encourages some scratching !
Post a Comment