Sunday, July 22, 2018

The bridge

From the "here's one I prepared earlier" files.

I had previously prepared the bridge roof frame. As its quite a complex beast (which is a vast understatement) I first created a jig to place the square brass before I burnt my fingers during the soldering process.

So with the frame all together and without the smell of burnt flesh in my nostrils, the hard work wasn't done yet. You see with the slight angle and several levels it was a challenge to cut the pillars to the right length. Somehow I managed to fluke it with only 2 flying off to the far reaches of the modeling room. I then managed to get most of them vertical.


Thursday, July 12, 2018

Timewasting

I'm always amazed how many time I'll buy something to do a job faster than my current tools, then find its not doing what i want and go back to plan A. I had a mile or 2 of railings to paint and rather than doing them by hand I thought "I can buy a tin of spray paint for that" (Tamiya of course, not the spraycoat). After taking everything off the model, carefully labeled so that I knew where it would go back, I got stuck in. In no time I had a looming disaster on my hands with the paint forming a string of pearls along the wire. After a quick wipe down I left everything for a day, and then painted them all by hand, as I was going to do in the first place.

Glued back on its really made the model pop (and yes, the center railings still have to be trimmed to length).


Despite all this, I'm still trying to avoid 'going down the rabbit hole' detail wise.

Monday, July 09, 2018

On with the show II

So, with 1/2 a day up my sleeve I moved on to another project. a while back I received a scratch aid/kit of a Ds by Glenorchy models (I think). This came with some very nice 3D RP detail parts. After a quick look I decide to knock up the top and see how it went. Its been a long time since I have done an etched kit (at least 8 years) and I had forgotten about the burned fingers. As a tip, wear cotton and not polyester (soldering irons melt/burn one and not the other. Don't ask how I know).
The kit is 'shot down' from a Wolsey works British Rail class 04 (I'll get to how I know that in a bit) 
And I must take photos while I'm working ...


 For those of you that do own this kit (I think that there were 10?) I'll now comment on things that I found a bit difficult.
-When folding up the cab, the front corners are very small and do not bend square without a bit of work.
-The footplate sides are quite hard to fold even with the correct tools (in this case provided by Cabbage industries)

Apart from the burnt fingers things went OK (the hood bends are not quite right, but just remember that the real thing was not made that well).

Measuring the provided etch chassis gives away the parentage of the etch, as its for an inside frame loco (BR class 04). I'm guessing that a new Farish 08 will probably fit (but I'm not going to guarantee it). as the rods, counterweights and side frames are provided I'm going a different route. Oh and if anyone has pictures of a Ds cab.....

Sunday, July 08, 2018

On with the show

Hmm, theres a model show at the end of the month, the 17th or 18th ring a bell.
Hmm, the 17th and 18th are not on a weekend...
Oh, its this weekend....

And thats how I spent my weekend. On the Demo table with the usual group of reprobates.
For a bit of variation I decided to do some work on my card ship. I had all the railings to do so knuckles down and just stuck with it. After a day and a half I had all the railings done. the locating was very easy as all I had to do was poke holes with a sharp needle into the card deck at the right spot. The photo doesn't really show this and I should have taken it before I packed the rolling stock up.


I had a selection of other unassembled card boats on display. This was a point of interest with other modelers and many were surprised that the tramp steamer was card. At least one modeler asked for the details and reveled that he had been looking at buying a $350 kit for an ho scale boat but would look at this instead.
Despite this I'm trying not to be a boat modeler (I can't stand rum much).

Other big news from the weekend ( at least for me, but I don't do social media) is that North yard has acquired/rescued the Southdock range. This is great news for the NZ hobby as the unavailability of kits has hamstrung the hobby for the last 5 years. I was told that the oportunity had been taken to update the resins used in the casting.

I'll post some more photos in the next couple of days, plus other things I worked on.

Monday, June 11, 2018

Down the rabbit hole

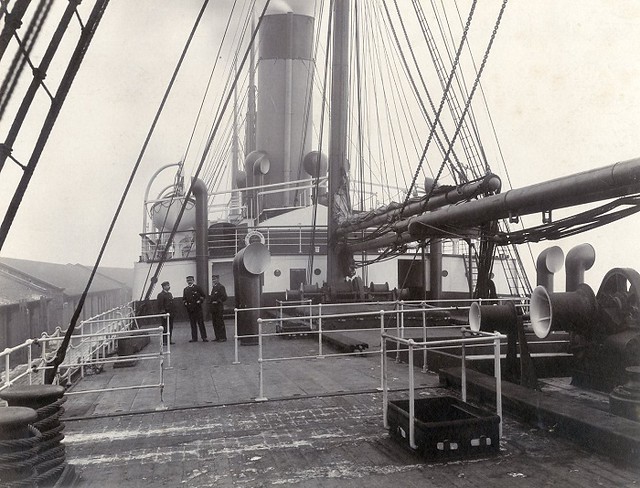
I've been doing some bits and pieces on my tramp steamer. The masts are painted and I've made a start on the deck detail.


So its all coming along nicely and apart from the railings everything else seems to be straight froward, just adding some cast details and doing the rest of the bits in wood etc rather than folded paper. So today I'm ding a web search just to see if I can find anything else on the ship, and I come across a Flickr folder with a collection of deck photos


And suddenly a simple job comfortably ensconced in ignorance get the searchlight of enlightenment focused on it. Theres plenty more railings  and a lot more detail full stop.pluses are bridge detail and also the capstans which will be easier to make. minuses are the whinches which are far more detailed.
So how far does one go with this information?I could go nuts but at the end of the day its only really a backdrop, and those were once simple paint jobs.

Thursday, June 07, 2018

More History

Amateur Fetler has sent me some photos from a lockup in darkest Timaru.

Dunedin
Port Chalmers
The current iteration of John Rappards Dunedin and Port Chalmers layout which debuted at the 1986 convention. Originally end to end, it was rebuilt in the late 80's /early 90's to a roundy roundy with Port Chalmers on an extension, which is when I first encountered it. The original rolling stock is still in existence with a modeler in Dunedin.
Its nice to see that its survived over 30 years as its an iconic layout for both the scale and NZR modeling in general.


Sunday, May 27, 2018

The Blog is 10

Just to show you all I'm not dead yet (thanks modern medicinal chemistry).

So the Blog is 10. I even managed to miss this. I see I've managed to make 2 posts in the last 12 months, with this being the second.in that time ive don very little NZ120 modeling, or even model railway modeling. I have slotted in a fair bit of wargaming trrain making (and gaming) along with the obligatory gardening and indoor renovations. I'm now getting to the end of these....I think.

One thing I do have to report is somewhat of a surprise.
Ocasionally I'll have a look on Trademe to see what is for sale. A few months back I came across a bit of a surprise listsing, and was surpised to purchase the model reasonably cheaply without a bidding war, though I suspect that no one else knew what they were looking at, or wanted it (probably number 2).


The first NZ120 loco I ever built. A Farish J94/08 chassis provided the basis. The plastic top wasn't heavy enough so it was also my first (and so far only) ecursion into brass scratchbuilding. The funnel and air pump were turned with a file (the only one I owned) on a hand drill. The brass was all soldered together which was an exercise in juggling new hot bits of metal into position while keeping the older bits in the right positions. It did work in the end. The way I've built it means that the top will not some off, and I think/know it's impossible to adapt to DCC.
So, its a remined of how far (or short) that my modeling skills have come since 1990, and nice to have it back in the collection