DB Says:
The roundhouse balloon module inches forward in tiny leaps and massive bounds.
The 'wide legs' were attached and a brace added. No matter how many times I do legs, they never end up the right length. 1100 mm, less feet, less module depth etc. Well these were about an inch too short, so I had to go buy some 'long' hinges to extend them. I figured this would be stronger than sticking bits of wood onto the tops of them, and I'd planned to use hinges anyway.
Looks silly, but its all quite sturdy. As these 'wide' legs are attached to the underside of the module, they obviously fold up snugly against it. as can be seen in the above pic.
The thin legs at the other end are mounted down the endcap, a little closer to the floor, so they fold up a little further from the module, neatly on top of the wide set of legs. Almost as if that's what was intended.
A little tab attached under the middle of the module (below) can hold a screw to keep everything neat and tidy for travel (except for the brace, which I suppose I could attach under the edge to the right of the pic below).
Finally, some primer and paint was added. Dark grey for the 'public edge' (I had a little left over from the Studholme sides) and 'Harvard Grey' everywhere else, because we had an unopened tin of that with no purpose in its life.
And rather than working or watching the cricket on Friday night, I churned out four more end segments before I run out of enthusiasm. Another 2-4 should do.
On Saturday it was time to bring things inside, which was quite easy, and from there, things went somewhat crazy.
It took me about an hour to fettle the holes for the turntable feeders that I'd 'guessed' the locations for into the right sizes and places, but once that was done, the turntable was popped into place, plugged in, and .... it works! Quite cool really. I didn't try powering any locos, but the spinny thing works well. Coolness.
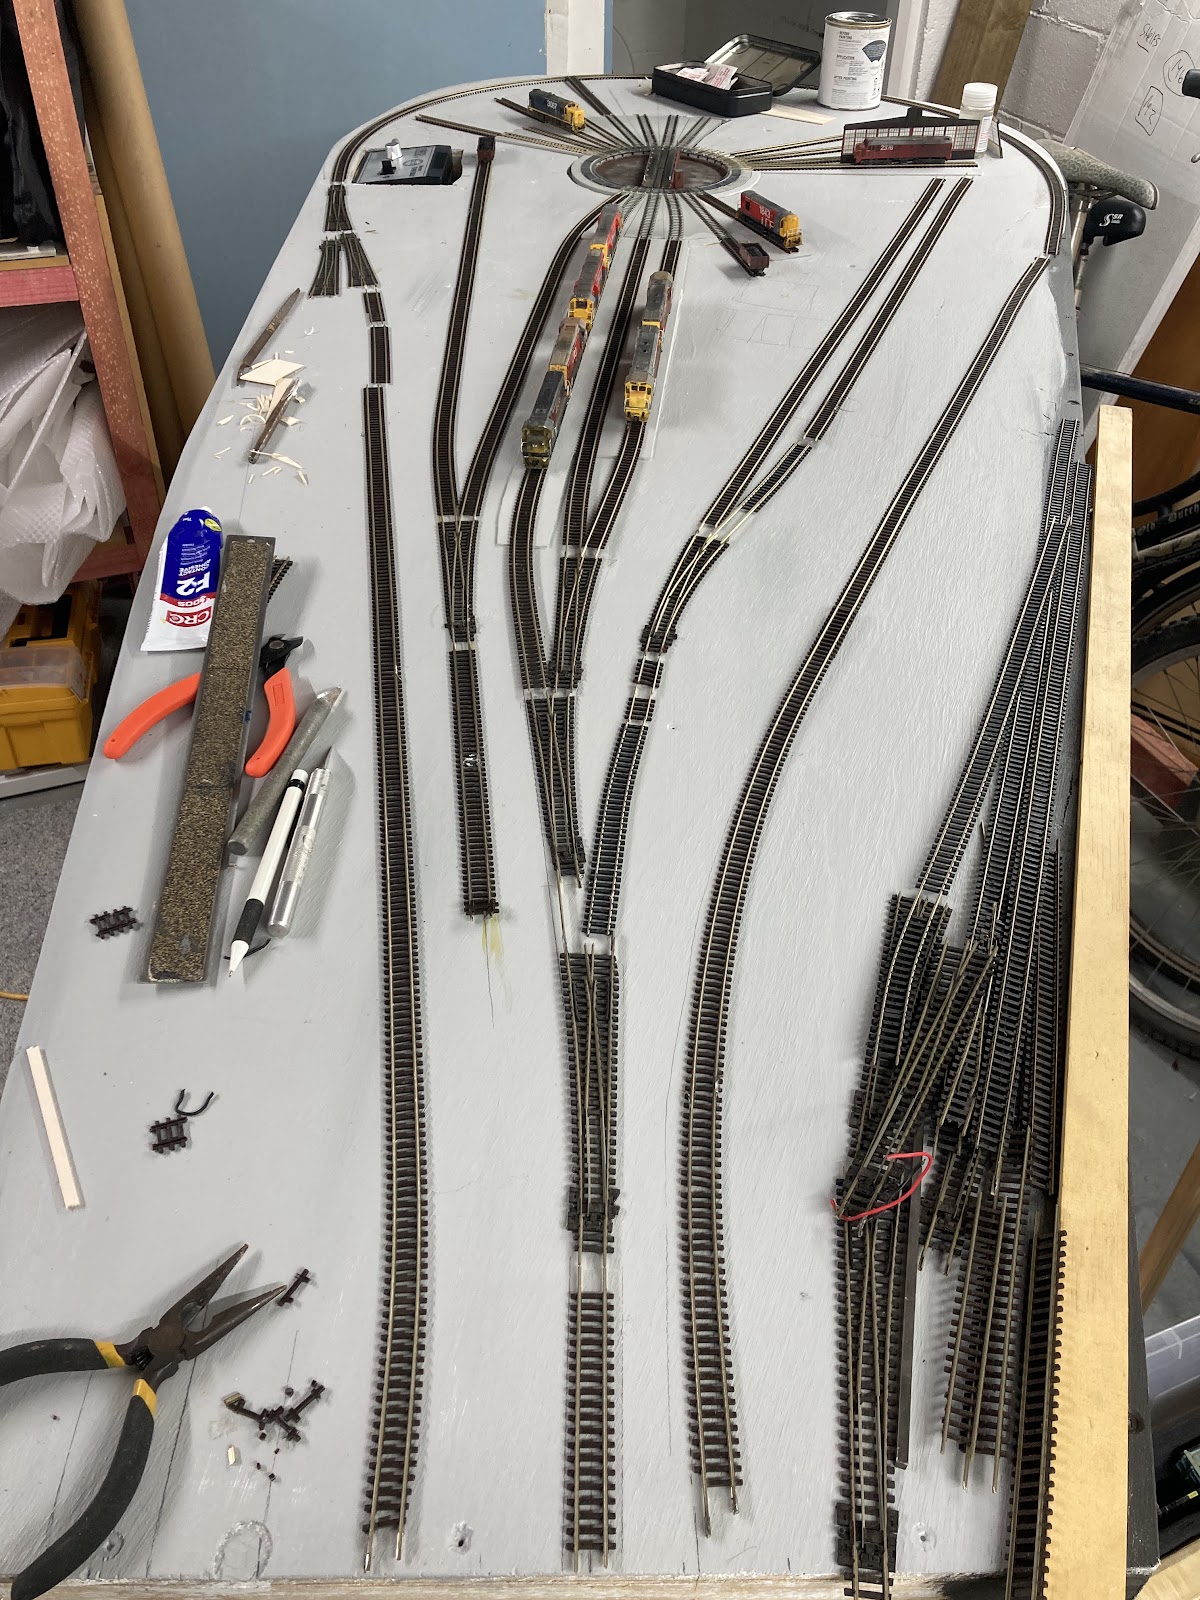
So then the table was screwed into place and the Kato radial tracks glued down.
As feared/expected, the 6mm ply pit is a tad shallow, so I started applying some (bass?)wood sheet from Mitre 10 that I happened to have handy and that seems to be the perfect depth. This was painted Harvard grey to match the rest of the baseboardA few holes around the turntable and tracks were filled in using this too, to stop the ballast falling through onto the floor.
The approach tracks were all glued down into place down to where they will meet the points/turnouts at the pointy end. The track that will likely be unpowered that runs down to the turntable control box was also added (with its point, as its unlikely to be powered anyway). As was the first 'main' radial track outside the roundhouse side wall with DG 2376 sitting on it, and two short radial tracks out by the foreman's office (one with the DI, one with an LA wagon of coal for the office).So that's some serious progress, next steps will be to permanently lay the main balloon track, and DCC those three points at the pointy end for depot track access. Four if I can be bothered doing the curved point where the two railcar shed tracks split.
Then wiring, soldering some fishplates up, and testing.


3 comments:
Coming together well.
Outstanding work sir!
looking really good. I know what you mean about the leg measurement thing!
Post a Comment