Showing posts with label Kits. Show all posts

Saturday, December 14, 2024

Little coal wagons - LCs

 DB says:

Back in the Otaki to Cass era, Rhys and I had a really cool four wheeled coal train of about 35 LCs. These were all cast jobs, with mine being a little rough to say the least, being my first foray into casting with automotive bog and homemade masters and RTV moulds.  I still have about 15 of these somewhat embarrassing specimens that are almost 35 years old now. Of course, back then, the CB hoppers were only a few years old, so the long trains of little four wheelers were still fresh in the mind and pretty groovy. And they still are.

Some months ago, I noticed that Russell Trackgang had some LC tops available, so I bought 10 for a very reasonable price. These have sat in my pile of unstarted projects for many months, but in early October we had a big rainstorm that necessitated a round-the-clock flood watch in the basement,  so I decided to knock these together.  While I'd always planned to just have a few highsiders to put into an 80s goods train, the idea of a west coast coal train raised its head. 

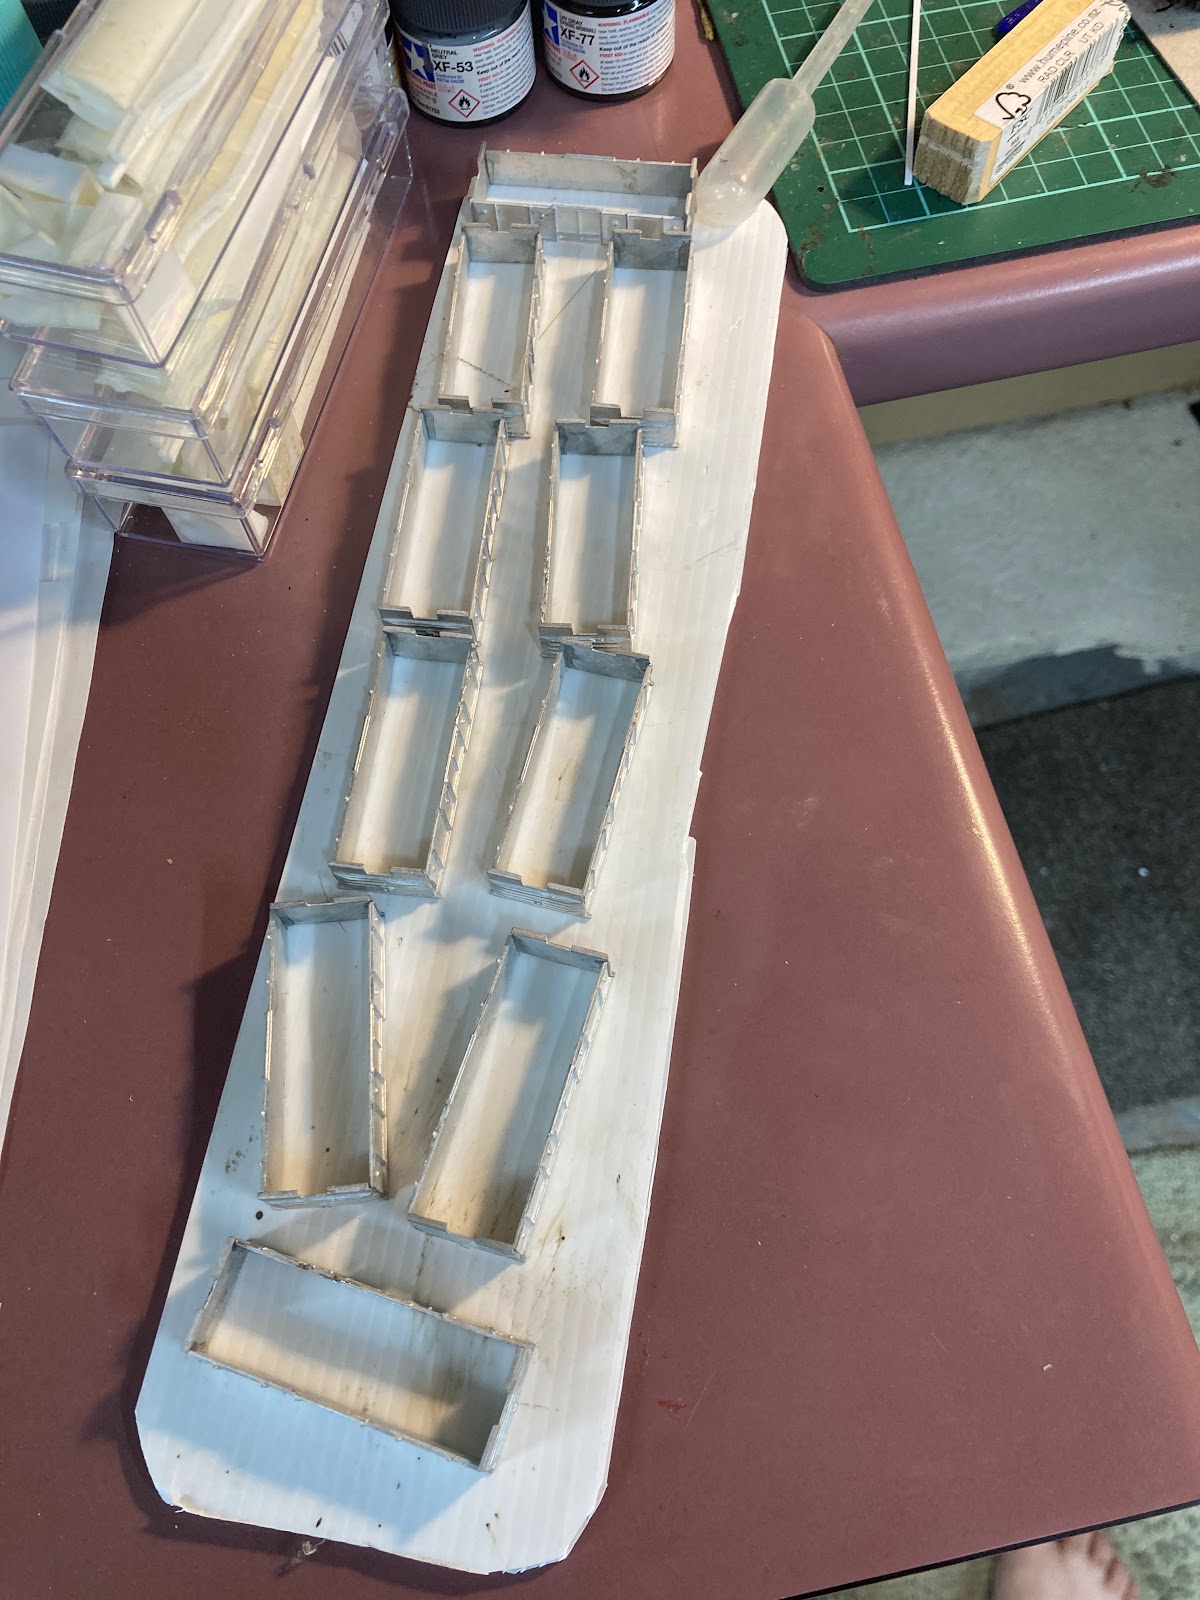
With my poor history of assembling whitemetal models, I decided to be clever this time by sticking a side and an end together with 'superglue gel' around a 90 degree wooden end, then I'd simply link these pairs up. Pretty soon I had all twenty corners assembled with minimal fuss. Unfortunately only about two were actually at 90 degrees, so when I stuck them together, 90% of the them were wonky. Many were broken apart and reset, many ended up as four sides on the floor or stuck to fingers. I eventually got them together.

Then I found upon returning to the project that most of these had badly meeting corners, or were rhomboid in shape, or didn't have parallel walls, or did not sit flat, so I was only able to put a floor and chassis into one of the 10!

The others got broken apart, cleaned of glue, and a new strategy attempted, whereby I cut a set of plastic floors to size, then glued a side to this it at 90 degrees, then an end (usually finding my side wasn't at 90 degrees when finding the end would go on crooked) but I eventually managed to encircle the floors with sides and ends. This took about two months of periodic effort, with pauses to replenish my swear words reservoir and unstick fingers, walls, and regain mental composure after 'completed' tops would collapse in a pile of superglue while tweaking them.

Eventually all 10 were assembled and reinforced with contact glue (woohoo!) , and Peco underframes were prepared. You'll note that the floors are relatively high up - after looking at a few prototype pics and a plan, I think its a flaw of most of my previous models that the wagon tops don't sit low enough on the chassis.

One wagon was prepared to go next to the locos by having a Microtrains coupler:


Time for some primer:


And some paint. After a visit to the local bike shop to see what they had in stock I settled on the reddish-brown Tamiya XF-9 Hull Red as the base colour. 


Monday, April 15, 2024

Venting - TrackGang Ventilated Z van - 2 - painting

DB was pondering with Mr Bätchelé de yong the other day: 

We came to the conclusion that the main obstacle of modelling progress is inertia: the tendency of objects at rest to stay at rest. The (positive) converse being that objects in motion tend to stay in motion.

I have a fear of soldering, and a fear of spray painting, among many other fears, so my Z class wagons have been stalled for more time than they have been moving forward. Yet after almost a week of over-thinking and worrying, I managed to prime the metal bodies with a can of Tamiya Surface Primer. Something I've never used before.

And by golly it's good. As this stuff contains chemicals known to cause cancer in the State of California (which is probably not what they mean, and besides, they even put this warning on cornflakes over there), I took it out into the garden and applied four or five very light coats instead of the usual one big lumpy one, which is always my default mode when spraying (cover, damn you, cover!). 

With the light sprays, the wagon bodies slowly turned grey and more importantly, all the detail was still visible and with no paint runs. Go me!

The stalks here were bits of dowel from the dollar shop used for Z scale bridge pylons the day before and the leftovers and offcuts were stuffed into a box. My, I think I'll save this Mighty Wagon Holding Apparatus for future sprayings.

Despite the natural desire for my moving objects to stay in motion, I allowed the primer a day to set and then put some white on the sides. This was a mix of some sort of Tamiya pure white acrylic, tinged with some grey/brown and some yellow/brown. This all came out a bit grey and dark for me so I applied (a lot) more white to the mix and overpainted. This was all done in vertical streaks to imbue a mild form of 'weathering' into the base, as the Zs that I saw were never ever white.

As an aside, I graduated from Humbrol enamels to Tamiya (and other) acrylics about 15 years ago. I liked how they set so quickly and could be thinned and cleaned up with relatively non-smelly water, isopropyl alcohol or thinner. They also seem to last longer without drying up in the tin. 

The one downside being that they have a very short working time, so if you're taking your time, they can start to blob up and peel off. A few years ago I discovered 'Tamiya Paint Retarder' and this is magic stuff, with a drop added to your mix giving you far more time to work. Yet it still sets quickly so you can still move onwards, ever in motion. My mixing trays are usually clear plastic covers from glue and the like (to the left here, with various shades of white to pick from)

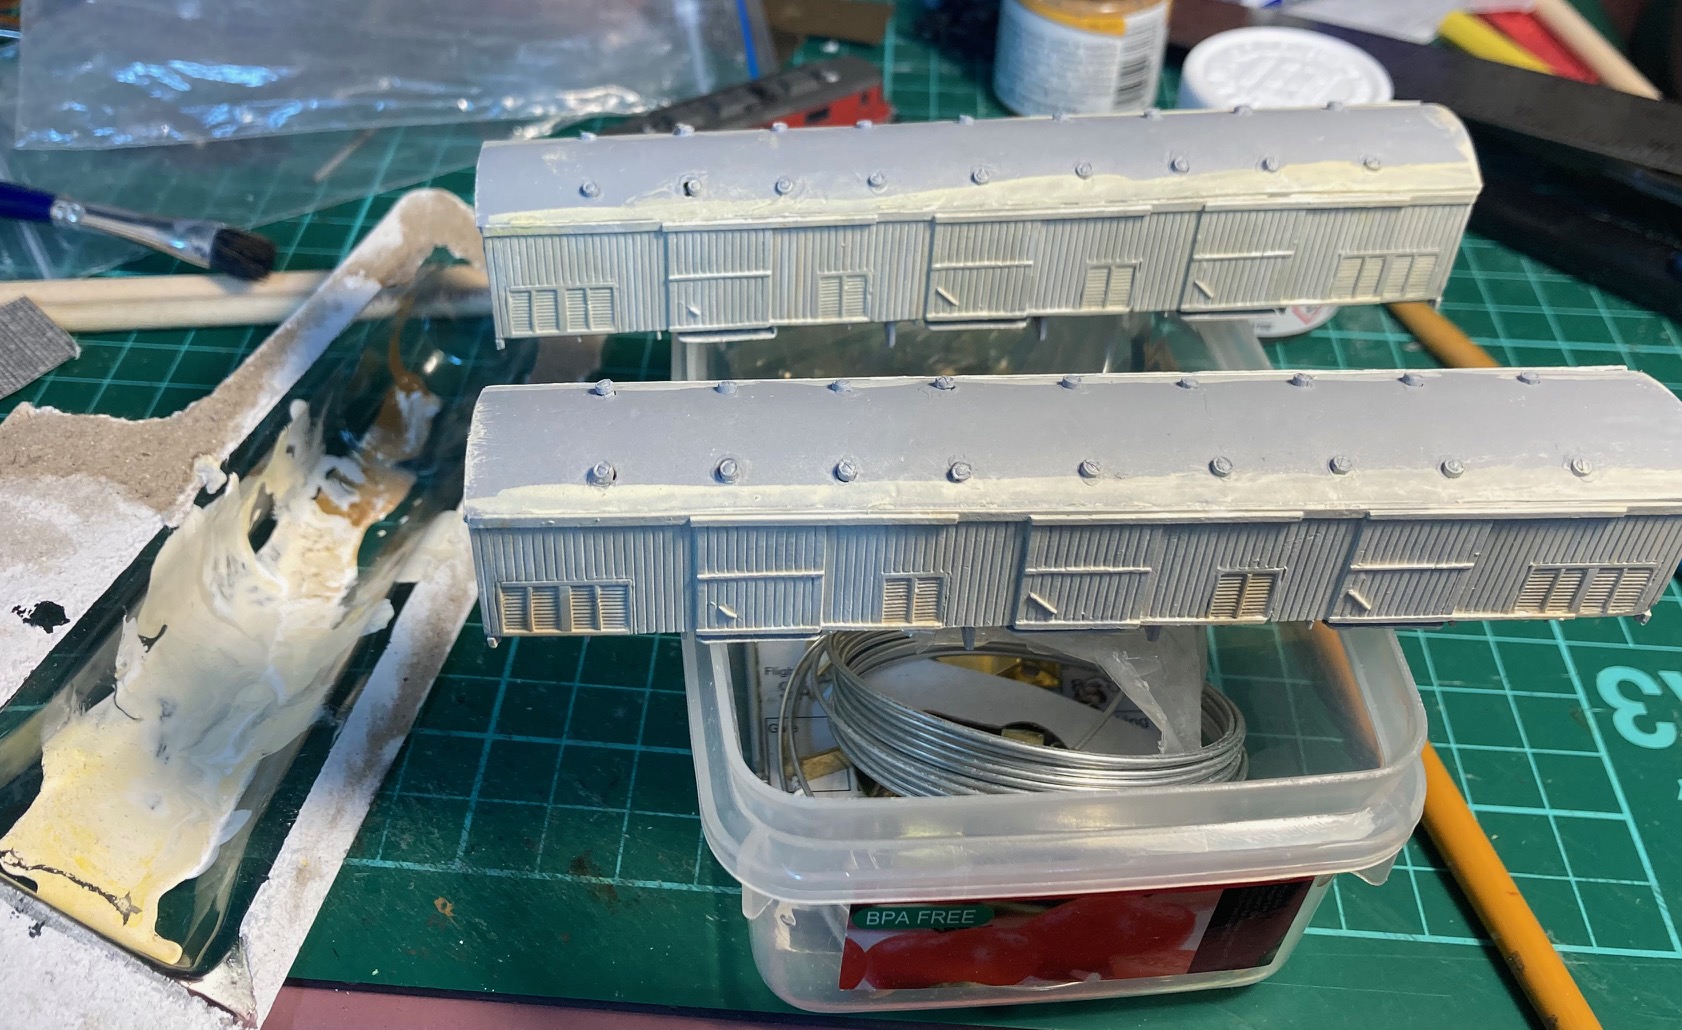
As I wasn't sure where the roof join paint line would be, I overlapped the side colour onto the roof. This additional layer also helped fill any gaps between badly glued together parts. You might be able to make out some slightly different shades from the different layers. There is more brown in the ventilation grilles for example.

Then the roof was painted. I always remember this as a yellowy brown colour, but looking at the Cousins Brothers (Cuzzie Bro's) Pictorial Railways of New Zealand, it seems this was more of a chocolatey brown, so away I went. 

I was very careful doing the join with the white, and very uncareful around the roof ventilators, where a few holes needed to be blobbed up with paint. 

As a first step in weathering, I also added some Tamiya Panel Line Accent wash to the louvres (you can see this on the rearward wagon. More on weathering later, but for now, this thing needs trusses added underneath, and then decisions will need to be made on bogies and couplers. 

These will be in the '80s' train, and for ease of wagon mixing, this train will have the old style rapido couplers throughout (95% of my '80s' wagons do already). As these are the heaviest wagons I have, they will track nicely behind the locos, which have body-mounted Microtrains couplers.

I mentioned this earlier, but this is probably the nicest piece of NZ120 that you can't buy right now (as they don't seem available anymore from Trackgang). The sideframe detail just below the white body is great (see the first pic on the previous Z post), and the bodyside details sublime. Wrangling and fitting the roof was a pain, and I made my drilling mistakes with the roof vents (again, a one piece 3d printed roof would do wonders here). But these really are top shelf so far. 

Tuesday, April 09, 2024

Venting - TrackGang Ventilated Z van.

DB says.

Just looking behind the curtain at the blog now, there seem to be half a dozen little partially-finished posts of works in progress. I've also been distracted by life, and models in 5 separate scales, but many of those half-finished bits are mine. And I swore I'd never become a rubber-gauger...

So in the face of that, why not start another post on something completely different.  

I've always loved Z ventilated vans. These were the long 50 foot white 3-door wooden ones with louvres, rather than the non-ventilated ones that were usually red oxide, or in the 70s/80s sporting various colours carrying parcels on our passenger trains).

They were quite popular at Studholme in the old days I'm told, carrying strawberries and other produce away. I recently read in a book of local history that they were usually marshalled next to the van at the back, so the guard could enjoy the smells!

Imagine my thrill when a pair of Trackgang examples came up on Trademe. 

Now, if you've been reading MD for more than 10 years, I know what you're thinking, as I've had pretty mixed opinions of Pat Eade's old Trackside kits, but I came into this with an open mind, but with a bar that was set fairly low way back then.

First impressions: Wow. the castings are impressive. Incredibly well detailed, clean, crisp straight lines, thin walled to keep the weight down. - far better than anything I've seen in NZ120 with the exception of the laser cut Batchelor Sheep Wagons. Certainly far more impressive than 3d printing seems capable of at the moment (there's a challenge thrown down!) 

As for the bogies, one set was assembled (bonus! as these have always been a pain for me to do). They have pinpoint bearings! More on the bogies later when we get to them, but for now, let's start making things. 

A quick whiz with a file cleaned up a few of the edges on the sides and ends, and things were straightened out and flattened after being in a mailing bag. But there was actually almost no flash to speak of. Just in case I wasn't clear, these are some really impressive parts in my fingers.

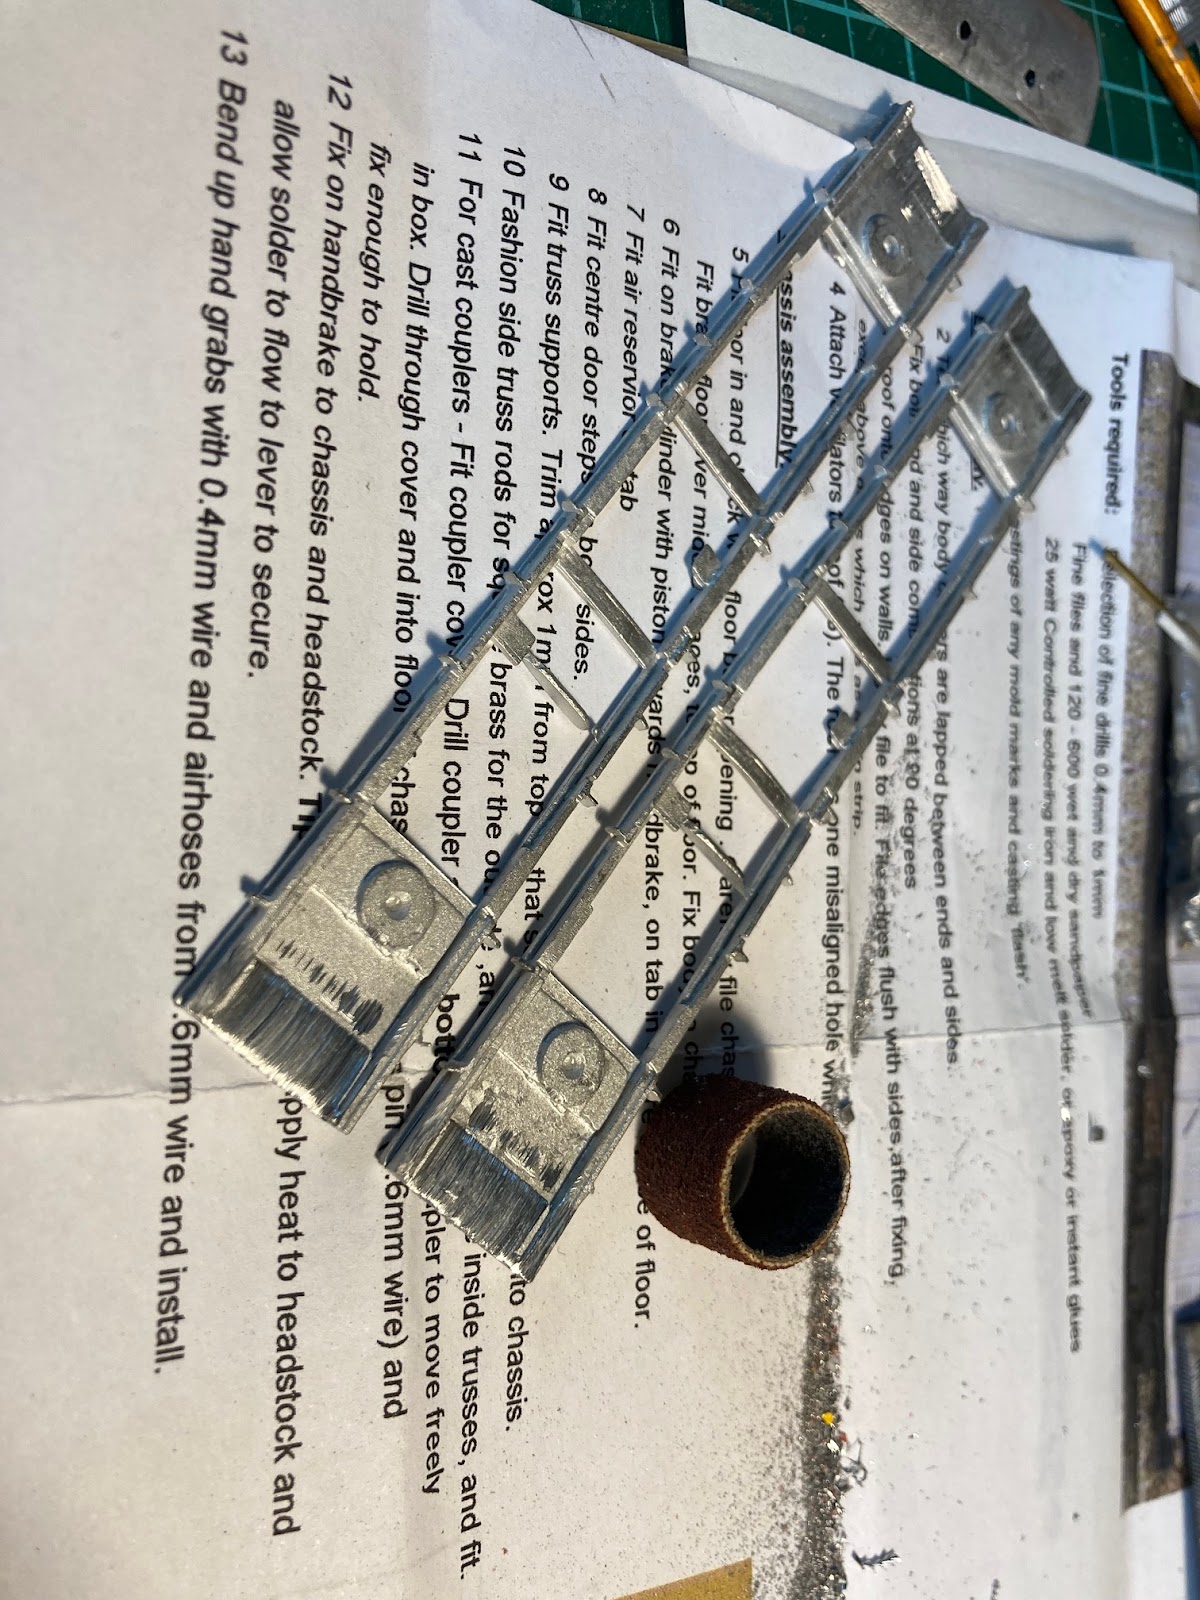
The only fiddling I did was to remove the coupler pockets with a Dremel drum, as I'll probably fit either MicroTrains or old Rapido ones. TBD.

You may remember from many earlier postings that I can't solder my way out of a balloon, so these were assembled with some random brand of super glue gel and strengthened with Araldite epoxy. 

I've never used gel super glue before, and it was certainly more forgiving than the usual stuff, but the faster acting stuff is probably better, as just when you think you have this sorted it collapses in a heap as the glue hasn't decided to set yet. Problem solved with a few tins of paint to keep things more or less square. Look at the detail. Superb.

Oddly, I read the instructions, before doing the opposite. I stuck an end onto a side, then put in the floor, then the other end and side. And I'm glad I did it this way, because the roof required quite a lot of thinning to fit in the supplied recesses.

Then it was time for the secret weapon to add some glue fillets inside to bolster the superglue:

Here is the roof going on. It required a fair bit of fling and bending to get it flat (well, "flat" to match the "almost-flat" metal box I had made). I drilled out the vent holes as suggested, but used a drill bit that was a little big. Which is silly, because I have the right sized one on my bench.  
The vents come three to a sprue (right side here of the pic below, seen both attached to the sprue and clipped off) and the little tails poke through the holes. Clever enough. Arguably the roof-plus-vents would be a nice 3d printed addition here to eliminate this relatively fiddly step. My clumsy fingers and failing eyesight proved the super glue gel's claim that your fingers wouldn't be instantly stuck to things to be only partially correct. Not instantly...  A 3d printed piece would also reduce overall weight and move the centre of gravity lower. I did consider using some bent plasticard, but that would have left me with one nice edge, one terribly rough fettled one, and vents all over the place.

More to come. 

Wednesday, September 08, 2021

Ds part III-ish

 Some time off this week (enforced unfortunately, running repairs to the sausage casing) has eventually allowed me to do a bit more work on the Ds. Wle waiting from wheels and motors to turn up I've been haing a look at the collection of photos I've assembled off the wibbly wobbly woo. One thing that has become obvious to me is that theres a bit more under the skirts that has been provided for with the package of RP parts.

As we can see theres a whole stack of springing thats missing from the frames. The counterweights in the kit are also completely the wrong shape but thats for another day.
A quick hunt through the bits boxes threw up some brass square tube. Out with the files and saw and we were away using the accurate mk1 eyeball for measurement.

The frame was then marked out with an aproximation of where the spring dodads should go


It was then just a simple case threading some wire throught the holes and a bit of soldering.


I've left the wires long and I'll cut them to lenght when the wheels are in the frame and the frame spacers are soldered in. A bit big (probably would have worked for HO scale) but they will do.
And what does the inner finescaler think? I dunno. I haven't heard from him since I refused to paint the correct unit collars and cuffs on 6mm Napoleonic figures last year during the first lockdown.

Sunday, August 29, 2021

New Wheels

In the post this week I recieved some wheels from Dundas models. The old ones are gone and the new ones are far nicer. Pity there's no spoked ones.

So left to right we have Greenwich 6.2mm, Mosskito 6.2mm and Mosskito 8mm (for the DS).

Now for the review. Good points are that they are all NMRA compliant for back-to-back, flange depth and wheel width. Bad points are that they are still on 15mm axles. Also note that they are are only insulated on one side so care should be exercised when using metal bogies in metal underframes. However it is an easy way to arrange for extra power pickup.

Unfortunately I ordered the wrong gauge for the 8mm wheels (which were on OOn3 length axles but to OOn3 gauge, not OO9). So another $20 before I get to play with the DS mechanism.

Sunday, August 22, 2021

The DS kit; On with the chassis

 Another "first in a long time" moment today.

I fired up the soldering iron and did a small job on the Ds. I've made a start on the etched brass chassis

A long time ago I purchased some bits from the 2mm association with the deluded notion that I was going to build an F with them. Fast forward to last week and I dug everything out just to see what I had. First job was to solder in the bearings. The holes in the sideframes had to be opened out a fraction for a snug fit. I then applied some solder paste around the edge of the holes, inserted the bearings and applied the iron.

Just as tidy as I ever was
I put the flanges on the inside of the frames to stop the wheels shorting on the frames which will be electrically dead.

From the other side I will have to do a bit of careful cleaning up with a file.

Note that as I mentioned here, the frames are for a standard gauge BR shunter. The plan from here is to do some frame spacers to take into account the wider than prototype wheels, then go from there. All seat of the pants stuff and no computers involved.

Monday, July 09, 2018

On with the show II

So, with 1/2 a day up my sleeve I moved on to another project. a while back I received a scratch aid/kit of a Ds by Glenorchy models (I think). This came with some very nice 3D RP detail parts. After a quick look I decide to knock up the top and see how it went. Its been a long time since I have done an etched kit (at least 8 years) and I had forgotten about the burned fingers. As a tip, wear cotton and not polyester (soldering irons melt/burn one and not the other. Don't ask how I know).
The kit is 'shot down' from a Wolsey works British Rail class 04 (I'll get to how I know that in a bit) 
And I must take photos while I'm working ...


 For those of you that do own this kit (I think that there were 10?) I'll now comment on things that I found a bit difficult.
-When folding up the cab, the front corners are very small and do not bend square without a bit of work.
-The footplate sides are quite hard to fold even with the correct tools (in this case provided by Cabbage industries)

Apart from the burnt fingers things went OK (the hood bends are not quite right, but just remember that the real thing was not made that well).

Measuring the provided etch chassis gives away the parentage of the etch, as its for an inside frame loco (BR class 04). I'm guessing that a new Farish 08 will probably fit (but I'm not going to guarantee it). as the rods, counterweights and side frames are provided I'm going a different route. Oh and if anyone has pictures of a Ds cab.....