Showing posts with label DM (Stadler). Show all posts

Friday, October 03, 2025

¡Hola! The 3-Foot 6 DM Class - 4

 In which DB says, "about time". 

On Thursday, I found the courage to return to the DM project, just in time for it to head north to the train show on Friday. 

The DM provokes mixed feelings all around. Its nice to have something clean and new to photograph, but it will mean the end of the DX and DC class that we have loved for for five decades or more.

The model is also a mixed bag, so I both love it and hate it. The 3D print is very nice in places (especially the cab and headstocks), but its a bit off in the long hood detailing, not that mattered, as I printed up sides and moved the roof around. My shell has a slight bow in one of its sides. I've also found this a very challenging build, although some of that is my own fault.

Some nice etched handrails arrived from Lewis (made by Aaron Wall) a few weeks back. As known, these are gorgeous, yet a bit long in the x-axis. I believe there are new re-scaled ones available now or coming soon. This set is one of the early ones, so you have to dispense with a segment from each corner if you want to have enough of a gap for the crew to board via the side steps. You'd have to be staring at both the model and a prototype picture closely at the same time to notice. 

You also have a decision on to make on how to mount them. This may affect at what angle, and even for how long, they remain mounted. Ideally the lower ends of the pointy bits would be longer, and fit into slots pre-made in the side sill, or even better, a leaf could be taken from the Z scale playbook, and the yellow side sill itself could be an integral part of the etch. This would make mounting dead easy and provide the best chance of them being straight and resistant to being bent when knocked.

It may not be immediately apparent as the black GP above is not shown in a large photo, but the sidesill edge, the handrails (long and short hood), and the battery boxes under the cab are all part of the same etched strip here. Easy to assemble, always lines up, always stands at 90 degrees, and resistant to breaking.

But be that as it may. 

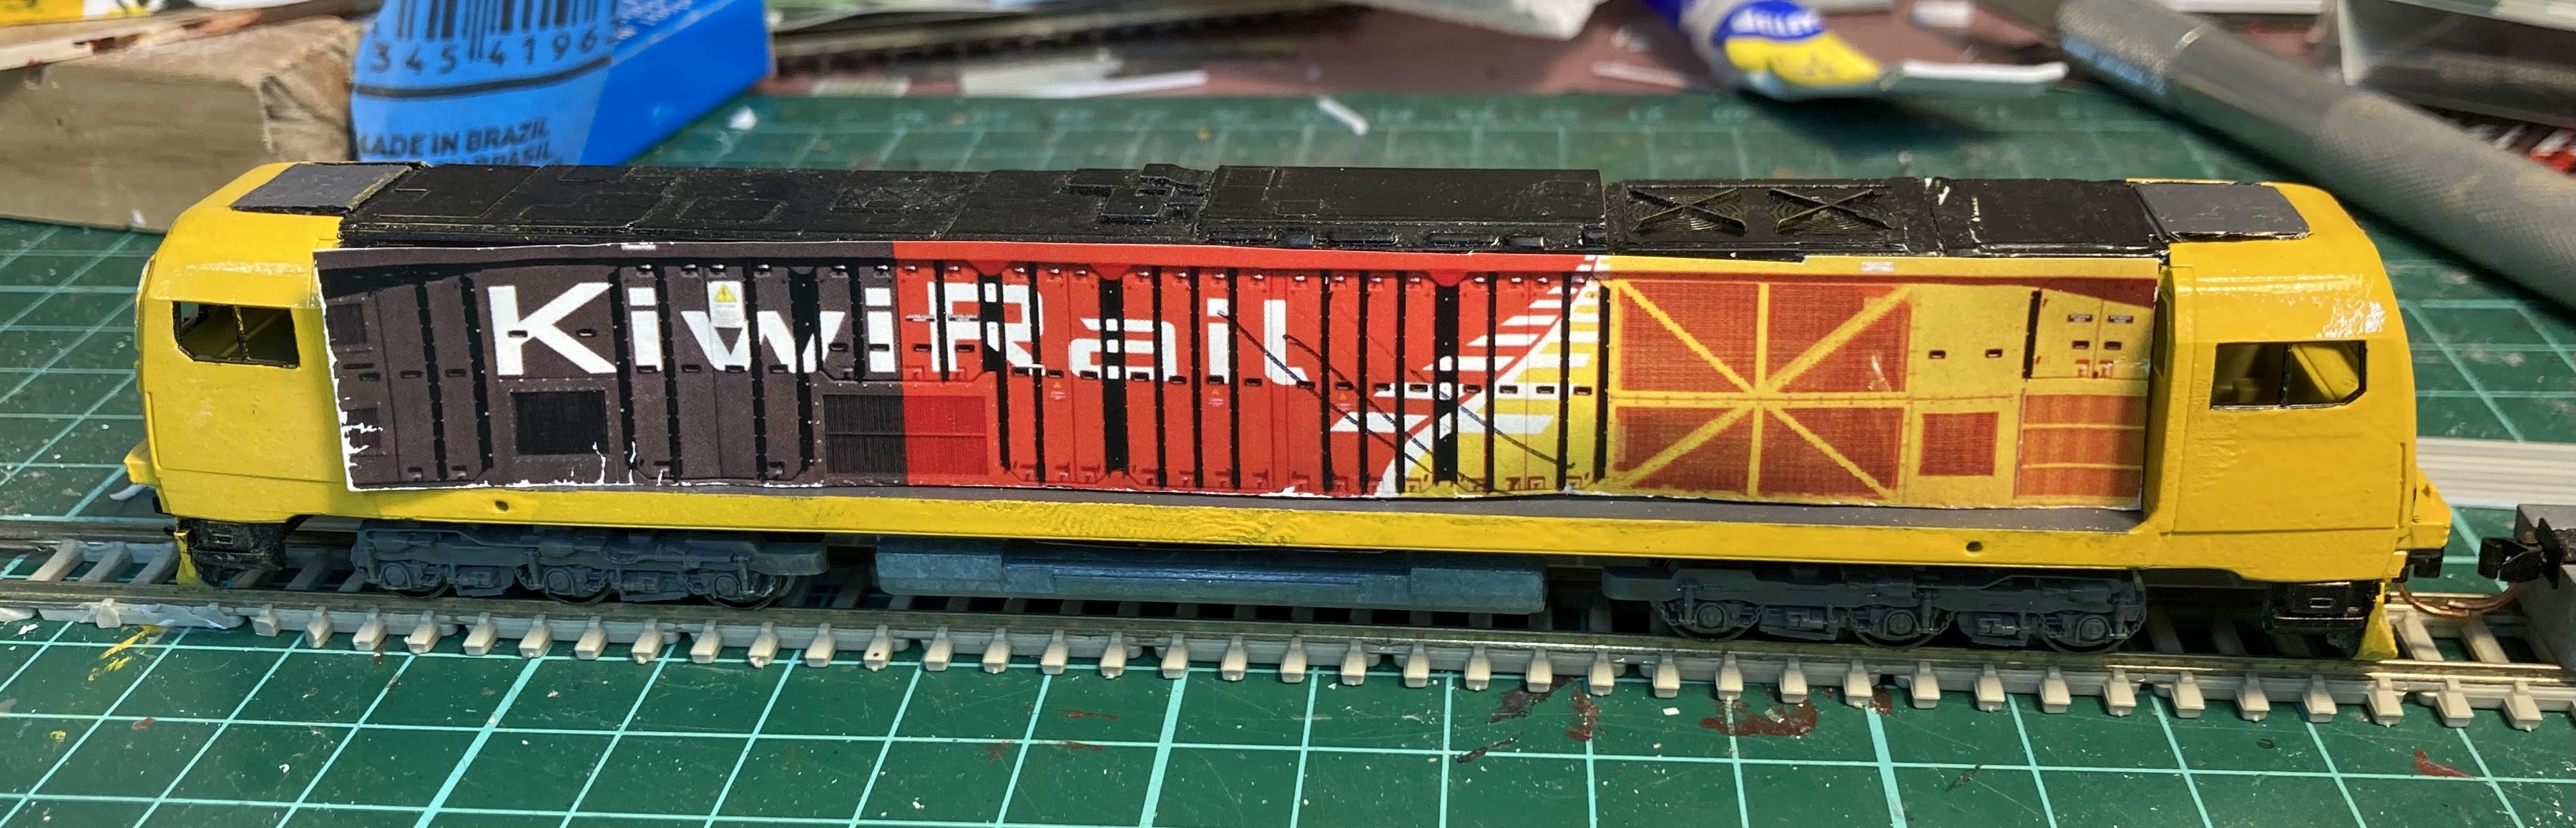
Back to NZ120land. I added some brake hoses, put in some MV Lens 'lights', and finally got around to glazing the front window. I did a much better job than I did on the back end window, including a strip between the window segments. Looks ugly, but viewing from this close is prohibido anyway.  That blue builder's plate is a bit '3d' from this angle!


I trimmed the handrails and superglued them on using some stripwood to hold them a constant distance out from the long hood until things had set. As mentioned, I'd like to have put the mounting pins into slots in the sills, but getting slots in the right places would have been a messy and time consuming job, so here they are out proud. A bit ugly, but a some yellow over the top makes them look a little better.  

The chassis is an old SD90 with a hardwired decoder. It seems to run nicely enough. A fuel tank and bogie sides come with the print, but I decided not to use them. The tank is a bit of a squeeze on the chassis, so it broke (and it was bowed anyway). I may use the bogie sides in future. 

My fuel tank is from an Atlas Dash 8 out of the spares bin, with the 'near end' being a part from a Japanese shunter top, chosen because it had a decent sized square grille that looks a bit like the aluminium cooling radiators on these. Now that I think about it, I don't think the prototype has these on both sides...!

A million other little detail things were done. Blue Stadler makers plates (under the cab on the LE's side) were added, as were silver tips to the brake hoses and taps, the four side steps, and various roof antenna. I also added a bit more detail on the cabtop air conditioning units. The inside rear of the 'good' cab wall had some 'smoke' applied, as it was a bit bright with its white styrene and yellow overspray.

I was going to tart up the bogies using the supplied sides, or even improving these SD90 ones with some sandboxes on the inner ends and parking brake units on the outboard ends, but time is short, they are dark black, and you don't really notice. 

The model could do with some numbers on the front and also the white KiwiRail logos on the Stadler design trademark black chevron, but this will do for now. 

So now that it's done (about time too, (told you I'd say that)), do I love it or hate it? I certainly like it a lot more than I did on Thursday morning.

Tuesday, April 08, 2025

¡Hola! The 3-Foot 6 DM Class - 3

DB perambules onwards in Spanish:

Glazing.... This was really hard. The easy bit was painting some clear styrene with Tamiya Smoke. 

The DM has two cabs of course. One of mine is at the, well lets call it the 'good end' which will have a driver and lead the trains, and the other is the crappy end, which will face the wagons. The bad end has a lovely coupler and a broken 3d-printed cab handrail that I knocked off somehow during the current commissioning process. The good end has all its handgrabs intact and a recycled coupler that is a bit gummed with glue, but as it is in the lead, it won't be used much anyway.

I glazed up the bad end first.

The side windows were cut to shape and some Microscale Kristal Klear (kringeworthy naming aside) which was dabbed on the inside, using whatever tiny holes remained available to prod a stick with a small blob of it around the inside. Tweezers then forced the glazing up into the inside through the little hole under the cab and attempted to place it in the right location without smearing too much Kristal Klear about on the visible glass face. Not an easy task.

The front piece was cut to the approximate size and shape by trial and error (not an easy task for my eyes against the black painted window frame background (so it might be easier to do this while the shell is still grey). This was also attached with Kristal Klear and a skinny black strip of styrene added between the two panes afterwards. I'll probably go over the edges of the glass in black later, although that might also be a recipe for disaster.


You may not be able to see it here, but before the glass went in, I painted the drivers desk (this had to be done via the side windows) and I also made up a little angled box for the console that sits to the driver's left.

An issue with glazing the DM is that the actual 'glass' in the real thing is a lot smaller than the black painted bits, especially with the tiny side windows and the front emergency exit window. I've brightened up the shadows in a picture of the real thing to show this:


Anyway. As for the good end. The sides were installed per the above process but the front left open at this stage. Lewis has hinted that a better and far cleverer glazing solution might be on the way.

A volunteer was then called from a box of 1:120 unpainted figures that date from my TranzAlpine AG van exploits, and painted up with the current KiwiRail 'uniform' of an orange fleece/jacket with white reflectorised stripes, and a black golf shirt underneath. 

Unfortunately our man had to meet with an unfortunate accident (link nsfw) to fit behind the desk with his arms sitting above it, but the less said about that the better. Because of the tight spaces inside, to add salt to the literal wound, he then had contact glue smeared on his lower torso and hands in an undignified manner before being ruthlessly forced through the front window at the end of a pair of tweezers.


The printed long hood sides have also been laid on with some sort of tacky white glue. One of the yellow bits bothered me enough (a bit too fluro/green) that I overlaid it with the cab paint. I think this is the side visible in all three pics below.  


The cabside numbers came from some N Scale Microscale BNSF decal sheets and the white reflector strips are from a Southern Pacific set, cut into chunks. I've not put these along the sides in the hope that a set of handrails will mysteriously appear in my mailbox in a month's time. Until then, this project will go into stasis.

Wednesday, April 02, 2025

¡Hola! The 3-Foot 6 DM Class - 2

DB continúa...

The ugly close-ups department has heartlessly captured the following unpleasant pictures. You have to remember that even with my magnifying loupe, I'm basically poking around with the paintbrush by feel here and even with it on I still can't see this mess of the now-grey headstock details. 

More painting, and some couplers after they were added in the greatly-expanded coupler boxes:

Mounting... My old SD90MAC was retrieved. This is a loco that I've never really liked (although I do like the weathering effort on the top). It needed some pruning with the pair of cast metal ears filed down (circled in red)

The DM top had to have the four underskirts removed, plus I needed to remove two of the little 45-degree brace/angles right up inside the shell to make room for the taller end of the metal chassis :


And it then sits reasonably low with its couplers at the right height, again with my over-magentaed first-pass paper sides 'placed' on the body for an approximation of looks:


You'll see in the first (prototype) pic from the previous post that the real loco is a real low-rider, but getting the model lower without majorly messy surgery to thin the inside of the roof and side sills would be really tough. 

Additional under-details - pyramoidal sandboxes and an effort to 'lower' the toolboxes were added from white styrene below:


I'm a bit disappointed in how what started out as nice airbrushing job has turned into a bit of a blobby mess, but its unlikely many people will see it from this close anyway. 

I must also say that the pictures presented in the last two issues (#18 and #19) of The Linesider, that fine organ of Aotearoan ferro-equiology, have been invaluable in making progress so far.

Sunday, March 30, 2025

¡Hola! The 3-Foot 6 DM Class - 1

DB puedo hablar un poco de español:

Despite having one of these prints on my bench for some months now, it seems I'm going to struggle to get it into service before the real thing. 

Initial thoughts on the print: 

It looks waaaay overscale when placed next to my model DXCs - too tall and too long. It seems it's not, the real thing being a lot bigger than we are used to! 

Great detail - the difficult cabs and front end are well represented, even the front handrails are there. The roof details are pretty good too, although some are quite subtle and may vanish under a coat of paint. 

Further investigation:

After the real DMs arrived here and were seen in the flesh, it appeared like they would be a very challenging prototype to model. The sides are very detailed, and the prominent black rubber joins between the door panels will be really hard to paint and imagine applying the decals around these. 

There are also differences between the shell and prototype in the side door panels, especially those close to the cab, and on one side of the loco (the 'upside down' side in the image below) which has the square dynamic brake inlets. Not that many people would notice any of this. 

So I decided straight away that my sides would be photo overlays printed onto glossy paper, a la Ken Devlin Specials.  I spent about three hours one night building up the sides from photographs. This required perspective correction, scaling, colour matching, and - for the other 2.9 hours - removing the complex side handrails from the photos.

If anyone wants this full size (about 4000x4000 pixels) you can email me at the LinesiderNZ email. Maybe Lewis might host it on his website as this will get compressed. 

I took the file down to the print shop, printing it on the same paper The Linesider uses. The first page looked too magenta, so a little green was added, and by the third copy it looked about right. Even if you take the same file to three proper commercial printers, you will likely get three subtly different hues depending on what paper, ink and model of printer is being used, and the temperature, humidity and even whether the printer is warmed up or not will affect tones, which are basically dependant on how the different colours of ink (cyan, magenta, yellow and black, or sometimes red, green, blue) are absorbed into, and layer up on, the paper. The things I've learned over the past few years.

With this done and laid over the top, it made obvious a few shell issues which will likely be corrected in a future iteration of the 3D model. Primarily that the radiator section (roof fans and 'union jack' sides) is a bit close to the cab at that end. This also pulls the adjoining chunky roof section over the engine/SCR unit  (with its four 'feet') a bit further off-centre. 

On the side sills, the circular lifting lug holes are also slightly misplaced. This is what made me initially wonder whether the shell was overscale, because the bogie centre spacing was one of the few prototype measurements I had when the shell arrived. I'm not sure I will remember to move them...

The panel-side details aren't going to be a problem, as I'm going to be using my paper overlays anyway, but I will need to move the roof fans to sit over my union jacks, and this will require moving the engine room roof as well. I'm also tempted to make the roof a/c units more prominent, which will make them easier to paint.

Into Surgery:

The first thing I decided to tackle was to slightly alter the cab roof top corners. These are angled (as modelled on the shell) at the 'back' corners to give plenty of door height access into the cab, but at the front, the real thing transitions to a more rounded shape. A little filing sorted this.

When viewed from above, the front face of the cab should also curve a little more at the corners, rather than having a bevelled join. I had a little crack at this, but not in the top-right corners (when viewed from the front) where there are a nice handrails printed. 

The 'cowcatchers' were also subtly modified at the bottom. There's not much to fault though, as the very complex cabs have been modelled well.

After the pic above was taken, I also opened out the bottom of the coupler pocket to take MicroTrains couplers - another message to designers - every 3D printed coupler box I've ever seen has needed to be enlarged.

The roof fans and engine lid were moved about 5mm towards the middle (I was also able to move my sides slightly the other way to meet them!).

So in summary, you could well say none of this surgery really made that much difference. 

And below, with filler added, ready for painting. 

First few coats badly sprayed: