Showing posts with label 3D printing. Show all posts

Wednesday, December 03, 2025

An Ab. Or not. - 1

DB has had a busy lately, but has recently been down to the trainroom for the first time since the Christchurch Show...  

You may recall that I purchased a sound equipped Broadway Limited Light Pacific 4-6-2 earlier in the year, thinking that it 'looked about right' for an Ab.

So a week ago I decided to look more seriously for the first time at the Ab shell that 3-6 models delivered several months back.  

The Ab itself is a decent print. Things look in proportion. The boiler bands are a bit prominent and the diameters of the smokebox and boiler cladding look quite different, but that might be authentic, and anyway, it will all fade away when everything is painted black and a few bits of piping are put on top.

As can be seen, when I pulled apart the Broadway Limited tender, and there was a far bit of stuff in it. All wheels pickup power (as do the drivers on the loco). This is good. There is a multi-wire connector between the loco and tender. The sound decoder and a speaker also live in the tender. All nicely plugged-and-socketed for disassembly.

On seeing this. I decided that an A class might be a better choice, as I might be able to to fit all this back into a scratchbuilt 'box' A tender, but it won't go into a 3D printed Vanderbilt Ab one. The Ab tender print can be turned into a dummy, and hang around inside the Elmer Lane roundhouse.

A few visits to the Dremel in the garage had the underside of the boiler widened out to fit over the motor. It didn't take much effort actually. 

The problem was that even with that done, the whole body sits very high (of course!). A few more visits outside had me thinning out the inside roof of the boiler. 

Now that is minimalism. The main problem was that the chassis has a tiny white square socket above the middle driver (a socket for the headlight wiring) and a cast 'tray' that carries wires above the brass flywheel. I didn't want to risk disaster by removing these. So I thinned the shell further. 

All was going swimmingly until I decided to cut out out a small section of the top of the boiler roof completely, fore and aft of the steam dome, to let the white box and tray sit up into these holes. I'd cover the small holes with paper. 

Of course something snapped when I was reshaping the headstock and then the whole thing ended up on the concrete floor! The dome came off, as did the headstock, and the boiler cracked a bit. Bah. At least the little white socket and cast tray can sit up into all those holes in the boiler now, lowering the body onto the chassis to an acceptable height!

The holes have since been patched up. But not that well, mind you. 

The A doesn't have the Ab's prominent curvy steam pipes to the cylinders, so these were removed, plus the other details (makers plate etc) on the smokebox beside these. 

I think I'll leave the loco here for me to calm my nerves!

 --------------

Instead, lets take a serious look at the tender. Maybe that will be easier. And its really important because of all its guts. Being an American prototype, it's a lot longer than ours. With our much lighter axle loads, we couldn't carry nearly as much water and coal around.

The cast floor has bogie mounts and a coupler, plus the attachment clip for the loco drawbar, so I thought I'd preserve these features by simply shortening the floor. After unpluging the speaker and decoder, a few semi-careful slashes with a Dremel cut-off wheel had the black chassis ready to be snapped into three, with the centre bit then discarded.   

There are three 'levels' of stuff inside the tender. On the bottom are wires from the bogie pickups and the attachment for the loco drawbar. I've had to add some supporting steel rods as well, to hold my two chassis halves together. 

In the middle is the DCC/Sound chip. 

The speaker is on top. All these pieces are nicely plugged-and-socketed for easy detachment. The speaker is nicely shaped to fit inside the tender, creating a snug soundbox.

I wanted to preserve this clever design work, as well as the idea of a removable tender-top so that everything can be easily disassembled if there are any issues in future. 

After more pondering, I figured that the supplied tender top isn't a million miles off the shape of an A tender anyway, so I'm adapting it by lopping a bit off the back to shorten it, and building the coal box on top. Yes, the 'curved top wings' are a little high and should extend further back, but nothing a galloping horse would notice.

So the challenge is now, how to fit the guts back into the shortened tender (I subsequently decided to  extend the tender chassis by about 2mm from what I had cut it down to). It's going to be a very tight squeeze.

Top fits on the shortened chassis. Speaker to be shortened:

The speaker was relatively easy. I prised off the PCB with the socket, cut the PCB down, and relocated it on a shortened base. In doing this, it wouldn't fit easily, and I eventually broke the solder join between one wire and the PCB, so attempted to solder the tiny wires to the back of the tiny socket, then glue the remainder of the PCB onto the shortened speaker tray.

I then thought I'd better see if all this work has damaged anything by plugging things back together and giving them a run:

Good heavens. Its still runs and makes noises.

Saturday, September 13, 2025

Balls of Cement - URC Sputnik Wagon

 DB says:

I received a care package from 3 Foot 6 models yesterday. 

There are some impressive items within it, and I'm pleased to say that the quality is superb. Lewis mentioned a few months back that he has changed up his processes and the results really show here. No strata! Flat surfaces! Straight edges! No sags! Even the resin seems slightly less brittle and a little more forgiving, unless you drop something onto concrete from a height that is...

But more on that in a moment.

Its been a while since I have 'made something' with wheels, so why not let 3'-6 do most of the work and I'll finish things off. 

A prototype that I've always wanted is a cement wagon or two. There were two main bogie tank styles - these spherical Sputnik URCs, and the UBCs that came with either spherical or flat sided tanks with more conical tops. These are appropriate from the late steam era through until the mid 1990s. 

Here is a URC laid up at Taita in the early 90s.

The 3-6 one, which I believe was designed up by Simon Lister, is a Sputnik type. So that's what I'm making, and handily I have the picture above. There are a few wagons preserved too:  https://www.nzrsr.co.nz - search for URC in class. One has a picture showing the piping on the other side. There is also one UBC of the other shape preserved. David Mac's rolling stock register is a great resource for remembering what older wagons looked like without having to go and see them.


The 3D print quality here is great. Despite these being spherical surfaces, there is no strata at all on this print, the tubs are smooth and completely free of facets, the flat surface of the wagon top is completely perfect. There is not even any warp in the sides or the truss rods, or in the width of the trusses. The only slight blemish is in one of the corners, but its so minor I'm not going to touch it. There is a slight ring around each of the four cement balls (in the top half). I'm not sure if this is intentional from the design or a slight printing defect but I gave them a quick ineffective rub with some fine sandpaper that must have last been used on something yellow.

The four lids were glued on top, as these are printed as separate parts. I needed to open up the holes for these slightly in two of the balls. 

Then I did my usual removal of coupling pockets and shortening the bogie mounting points so the wagon will sit lower.


About this stage I managed to drop the whole thing onto the concrete floor. I can never manage to hit the little carpet mat under me and am finding such fumbles are one of many perils of getting older. 

The terminus of the dropping motion all but snapped the frame in half and removed two of the balls. Bugger. Some glue had it back together in short order. I put some steel wire (my point rodding) under the wagon floor to keep things together and flat.

I then had the clever idea of enlarging the two central holes in the bottom to fit some chunky short steel screws into. This would add some much needed weight to the wagon. I very slowly and carefully drilled these out to the required size, being careful not to damage the truss rod cross braces. This took a while at very slow RPMs. After all that care, I realised I'd need to remove the cross pieces anyway to fit the screw heads. D'oh.

The cross pieces were replaced with some thin styrene strip. The above pic shows the underframe with its removals, additions and repairs.

Then the action moved topside. After a 'first coat' of painting, I added the two platforms between the sets of tanks out of some scribed wood that was lying on my desk, and some ladders which are Marks Model Works CB ladders, some of the most useful things you can buy. I've can used these on many models. If they were a little longer and I was a little smarter, I might have tried shaping them better and making the nice hoopy bits on the top. I could have used some brass wire here. Maybe I will. Nah, that's never going to happen. 

But some .020 Evergreen styrene rod made some pipes on the deck, and along the side that doesn't have the ladders. 

And then it was time for paint and weathering. The base wagon is flat black, and the tops Tamiya Royal Light Grey. Weathering was a little brown wash on the truss rods, and on the top some pale grey Vallejo Game Wash and white Jacquard Pinata Alcohol Ink wash, running from the top down, and concentrating on the top half of the spheres. A little rust was dabbed on in places too. I may go back with the white ink at some stage, but then again its a subtle effect and I will use these on trains at their 'early to mid-life'  - either 1960s steam or behind 1980s DJs. So before they got really scungy.


The wagon was shod with some Kato Japanese 'Taki' tank wagon bogies that were reviewed here a decade or more ago. I used these rather the usual than MicroTrains ones because I will be running this among four-wheeled wagons which have Rapido couplers, as do these bogies. These also have a longer wheelbase and slightly larger wheels than the MT ones.

Sometimes the manufacturers, Kato especially, make spare parts available when they rerun certain models, but usually in limited numbers. I put these bogies on my Hobbysearch Japan wish list quite a while ago, and also some bogies that might suit a 30 foot guards van. When they all briefly showed up as orderable recently, I snagged a few sets and they arrived a couple of days ago. As this is typed, I'm not sure how much they cost.

The final touch, done after these pictures were taken, was to spray a little Dullcote on. The mysterious 'rings' on the top quarter of the tanks show up a bit in the photos, but aren't that noticeable when you're staring at the wagon going by. The Dullcote may help too. The bendiness in the second to last pic is due to the phone wide angle/close up, not any printing problems! 

Other than waiting for things to set this was a pretty quick project, taking about two hours up until the weathering.  

The most tricky job with all these resin bogie wagon prints is getting the bogie mounting points to take screws. I'm not sure what the perfect answer is here as different bogie manufacturers require different sized screws or mounting techniques. Every screw I've tried on a 3D print has trouble biting into the tough resin, even if you enlarge the hole very generously. And sometimes the mounting piece will crack or break off while you are doing this, or you end up damaging your nicely detailed wagon. 

What worked with this URC, on the third attempt at enlarging the holes, was discovering that I own a small 'tap' which scours out a thread inside a drilled hole nicely. Its not quite the same thread pitch/type/size as the small bag of metal bogie holding screws that I've used forever (seriously, they need a straight screwdriver bit if anyone can remember those). But the tap will gently and efficiently remove enough material that the screws seem to find a home reasonably well. I must find a handle for it rather than using pliers. Perhaps it would fit into the handheld pin vice thing I use for small drills. So if you have this issue too, you might consider going to one of the local engineering firms with one of your screws and get the right sized tap. They aren't terribly expensive and will last a lifetime of making 3D bogie wagons up.

Its a cute wagon. Something quite different in a train that's for sure. Highly recommended.

The southern branch of MD will be away over the hills for the next week doing research in the field.  

Tuesday, June 24, 2025

Wb 2 - Bodywork and a pipe band

Db continues his Wibbledeebee:

Scalpel please, Nurse.


This might look a bit brutal, but was done for two reasons. Firstly, I didn't have much luck straightening out the warped side tanks. And second, I needed to make some space for a DCC decoder.

Below you might be able to see where I removed a fair bit of material on the underside of where the boiler and top of the side tanks join. There is also a lot more space inside the side tanks now.


Getting the band back together after a fall off the bench onto concrete separated the front end into four pieces (one still missing but replaced with styrene):


Part way through applying filler:

The body was then spray primed (nice) and brushpainted (yuck) with weathered black, which is a bit green for my liking. This was to ensure that there would be some paint on the parts that would be hard to get to after the pipes and things went on:

The distinctive Baldwin Wb 'curved gusset' between the top of the bunker and the cab was added, the air reservoirs under the cab, steps on the side of the rear bunker, and a toolbox. This 3D print has one on the front buffer beam, which I've only seen in one of these on a very old pic, but I quite like it. 


A mess of air pipes (the more the merrier!) handrails and some stays behind the cowcatchers completed things. The piping detail was done using this pic from the NZ Railway Observer as a guide, and a few other Wb pics stolen from the web.


And to close, a pic that illustrates my frustration with putting way too small coupler pockets into tough and brittle 3d prints. Its going to be a squeeze:


Friday, June 20, 2025

Wb 1 - Wubbada Wubbada

In which DB contemplates his first steam loco model (this long-maturing blog entry was written in September 2024, had its genesis in late 2023, and is in mid-2025 almost ready to go...).

I have always been a diesel man, as that's what I've grew up with, but if there is one place I'd like to go back to in a time machine, it would be the West Coast in the late 1950s-1960s. A magnificent collection of ancient engines with jaunty little trains of four wheelers running through bush scenery and over rickety bridges to remote coal mines on wobbly branches to places with funny names like Blackball/Roa, Dunollie/Rapahoe/Rewanui, Conns Creek and so on.

When we decided to come back to NZ in 2015, I had visions of making a small Rewanui module to get back into NZ120. I bought a couple of Bachmann 2-6-0 locos in anticipation (underpinnings for a Wa and Ww maybe), and when we were in Wellington looking for a house, I started making a relatively awful Q hopper wagon on a Peco 10 foot chassis, but that was a very short-lived attempt to return to NZ120. After that, we were away for a while, and Swiss Z scale won my heart for a few years.

In October 2023, I came back to modelling after a few years off. Press-ganged into operating the massive 9mm layout at the Christchurch show, I spent the whole weekend running a small train around (and around and around) with a Wb. The loco was running backwards the whole time because only the headlight on the bunker end worked, and because it seemed to run better that way without derailing anyway. Both were handy excuses, because I secretly prefer the aesthetics of a tank loco or a Dsa running backwards. 

Delving further into the aesthetics of tank engines, I have always preferred the looks of the W, Wa and Ww, so have never paid much attention to Wb locos, but this big 9mm model won me over. The other train that was running for most of the time was an Ab with a couple of red wooden carriages and a matching car-van.

Wednesday, April 02, 2025

¡Hola! The 3-Foot 6 DM Class - 2

DB continúa...

The ugly close-ups department has heartlessly captured the following unpleasant pictures. You have to remember that even with my magnifying loupe, I'm basically poking around with the paintbrush by feel here and even with it on I still can't see this mess of the now-grey headstock details. 

More painting, and some couplers after they were added in the greatly-expanded coupler boxes:

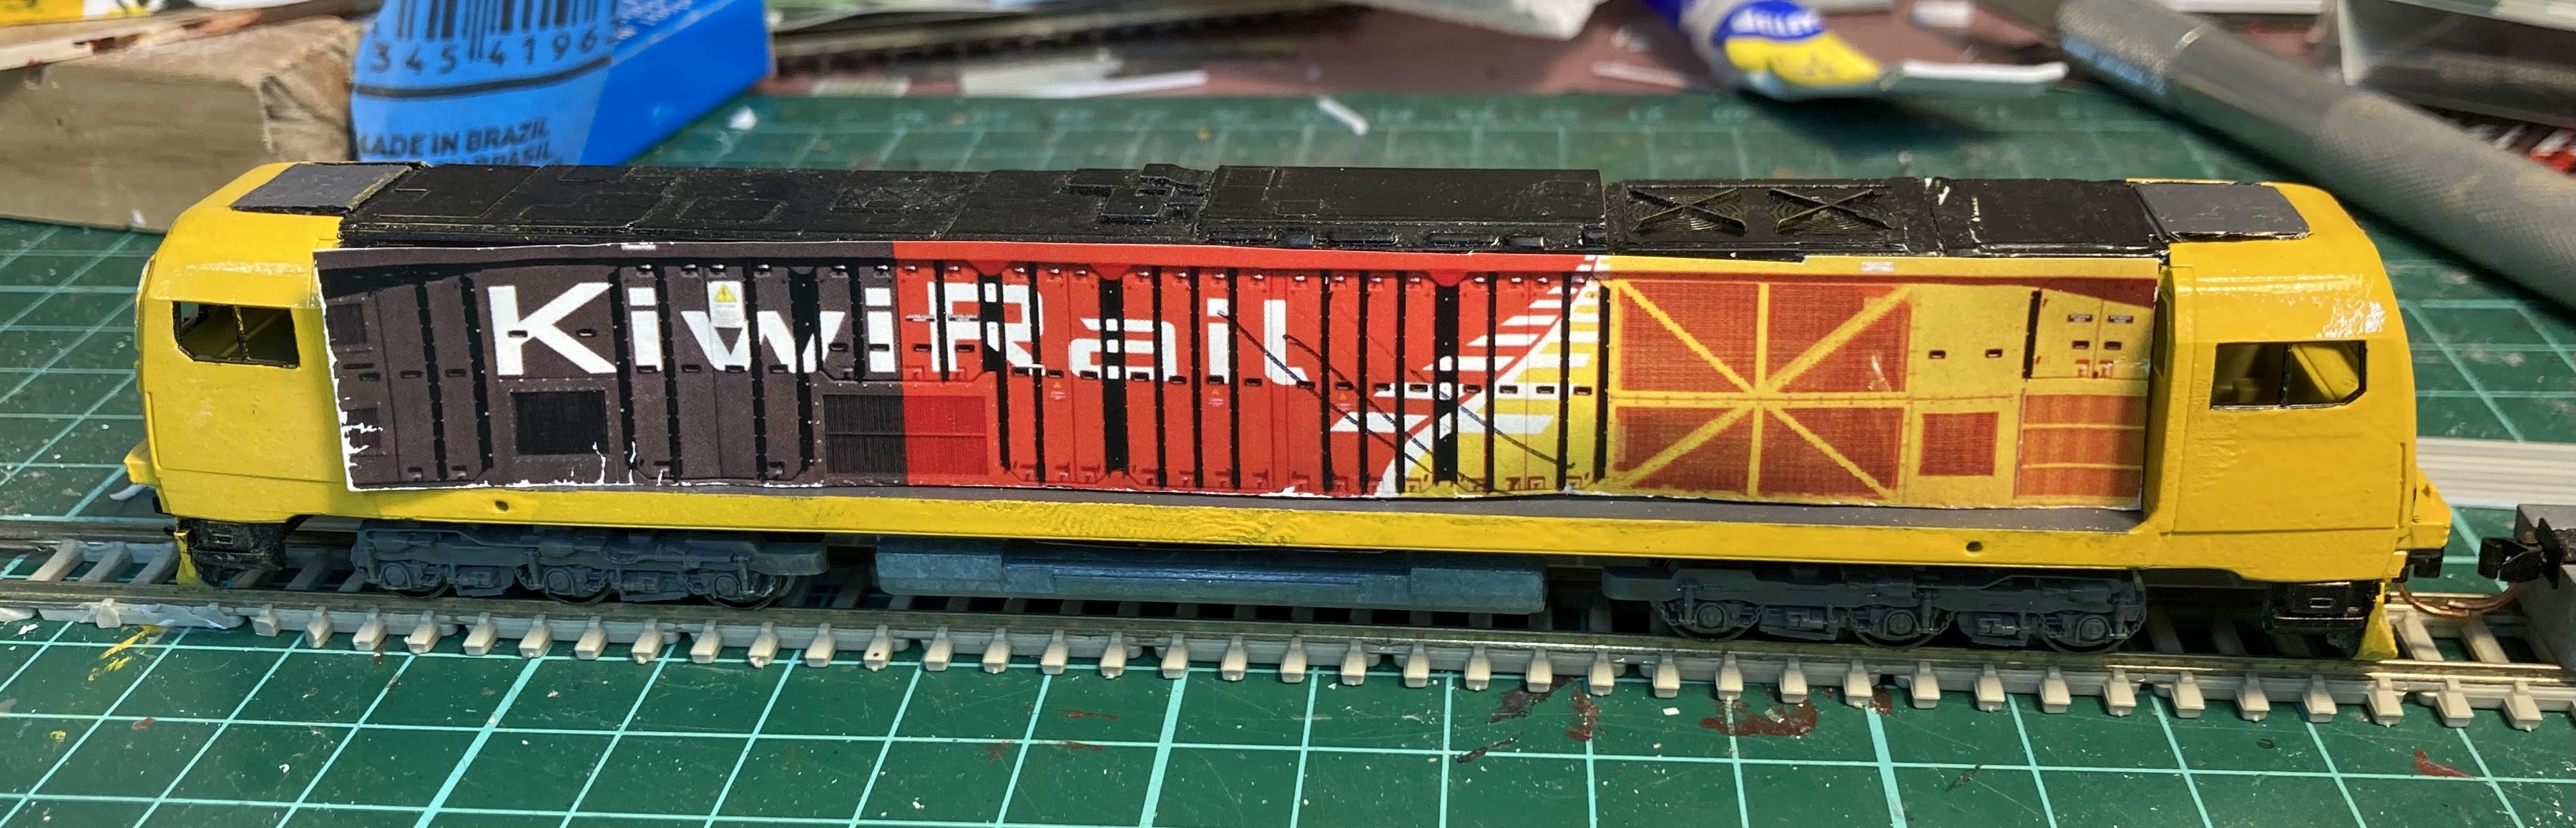
Mounting... My old SD90MAC was retrieved. This is a loco that I've never really liked (although I do like the weathering effort on the top). It needed some pruning with the pair of cast metal ears filed down (circled in red)

The DM top had to have the four underskirts removed, plus I needed to remove two of the little 45-degree brace/angles right up inside the shell to make room for the taller end of the metal chassis :


And it then sits reasonably low with its couplers at the right height, again with my over-magentaed first-pass paper sides 'placed' on the body for an approximation of looks:


You'll see in the first (prototype) pic from the previous post that the real loco is a real low-rider, but getting the model lower without majorly messy surgery to thin the inside of the roof and side sills would be really tough. 

Additional under-details - pyramoidal sandboxes and an effort to 'lower' the toolboxes were added from white styrene below:


I'm a bit disappointed in how what started out as nice airbrushing job has turned into a bit of a blobby mess, but its unlikely many people will see it from this close anyway. 

I must also say that the pictures presented in the last two issues (#18 and #19) of The Linesider, that fine organ of Aotearoan ferro-equiology, have been invaluable in making progress so far.

Sunday, March 30, 2025

¡Hola! The 3-Foot 6 DM Class - 1

DB puedo hablar un poco de español:

Despite having one of these prints on my bench for some months now, it seems I'm going to struggle to get it into service before the real thing. 

Initial thoughts on the print: 

It looks waaaay overscale when placed next to my model DXCs - too tall and too long. It seems it's not, the real thing being a lot bigger than we are used to! 

Great detail - the difficult cabs and front end are well represented, even the front handrails are there. The roof details are pretty good too, although some are quite subtle and may vanish under a coat of paint. 

Further investigation:

After the real DMs arrived here and were seen in the flesh, it appeared like they would be a very challenging prototype to model. The sides are very detailed, and the prominent black rubber joins between the door panels will be really hard to paint and imagine applying the decals around these. 

There are also differences between the shell and prototype in the side door panels, especially those close to the cab, and on one side of the loco (the 'upside down' side in the image below) which has the square dynamic brake inlets. Not that many people would notice any of this. 

So I decided straight away that my sides would be photo overlays printed onto glossy paper, a la Ken Devlin Specials.  I spent about three hours one night building up the sides from photographs. This required perspective correction, scaling, colour matching, and - for the other 2.9 hours - removing the complex side handrails from the photos.

If anyone wants this full size (about 4000x4000 pixels) you can email me at the LinesiderNZ email. Maybe Lewis might host it on his website as this will get compressed. 

I took the file down to the print shop, printing it on the same paper The Linesider uses. The first page looked too magenta, so a little green was added, and by the third copy it looked about right. Even if you take the same file to three proper commercial printers, you will likely get three subtly different hues depending on what paper, ink and model of printer is being used, and the temperature, humidity and even whether the printer is warmed up or not will affect tones, which are basically dependant on how the different colours of ink (cyan, magenta, yellow and black, or sometimes red, green, blue) are absorbed into, and layer up on, the paper. The things I've learned over the past few years.

With this done and laid over the top, it made obvious a few shell issues which will likely be corrected in a future iteration of the 3D model. Primarily that the radiator section (roof fans and 'union jack' sides) is a bit close to the cab at that end. This also pulls the adjoining chunky roof section over the engine/SCR unit  (with its four 'feet') a bit further off-centre. 

On the side sills, the circular lifting lug holes are also slightly misplaced. This is what made me initially wonder whether the shell was overscale, because the bogie centre spacing was one of the few prototype measurements I had when the shell arrived. I'm not sure I will remember to move them...

The panel-side details aren't going to be a problem, as I'm going to be using my paper overlays anyway, but I will need to move the roof fans to sit over my union jacks, and this will require moving the engine room roof as well. I'm also tempted to make the roof a/c units more prominent, which will make them easier to paint.

Into Surgery:

The first thing I decided to tackle was to slightly alter the cab roof top corners. These are angled (as modelled on the shell) at the 'back' corners to give plenty of door height access into the cab, but at the front, the real thing transitions to a more rounded shape. A little filing sorted this.

When viewed from above, the front face of the cab should also curve a little more at the corners, rather than having a bevelled join. I had a little crack at this, but not in the top-right corners (when viewed from the front) where there are a nice handrails printed. 

The 'cowcatchers' were also subtly modified at the bottom. There's not much to fault though, as the very complex cabs have been modelled well.

After the pic above was taken, I also opened out the bottom of the coupler pocket to take MicroTrains couplers - another message to designers - every 3D printed coupler box I've ever seen has needed to be enlarged.

The roof fans and engine lid were moved about 5mm towards the middle (I was also able to move my sides slightly the other way to meet them!).

So in summary, you could well say none of this surgery really made that much difference. 

And below, with filler added, ready for painting. 

First few coats badly sprayed:


Tuesday, March 25, 2025

LC wrap up

 DB finishes up:

A bit of paint, weathering, coal and decalling has this batch of LCs (10 of Lewis H's latest model and two of the older prints) added to the coal train. My homemade black-on-white laser printed 'Lyttelton coal traffic' decals somtimes exhibit a little cracking at the edges if they are cut out with a less-sharp knife, and then some white shows through, so most of that was touched up with some flat black paint.

One of the neat features of the latest iteration of the 3-Foot-6 LC is that, because it is downscaled from an Sn3.5 model, it has a lot of really nice fine detail in the doors, end handgrabs, and a footstep at one end. Picking the last two items out in white really makes the wagons look nicely detailed. I need to add a few handbrake levers at some stage. Something that might be a good thing to etch.  

Recent efforts with the Trackgang whitemetal kits and 3-Foot-6 3D-printed ones have eradicated my early 1990s bog-cast resin ones from service, leaving me with a pretty good looking decent-length classic 1980s Midland Line coal train. When you add locos, guards van and the little protective XP or KP in front of it, it is about 2.1m long, or as long as the Studholme loops will take. 

The train looks pretty good. Hardly finescale, but its uber-Bondscale quality. 

I'll probably add another 5-10 of Lewis' next version, as I'd like to have the option of having an even longer train, plus having a few extras to drop into normal goods trains. And it sounds like a few LAs might be on the cards too. 

In summary, with no naked-eye visible strata, these latest LCs take the 'Nicest 3D Print That I Have' title away from the ZAs, and with the addition of new floor mounting points and some interior door lines, they will be just perfect. As Lewis says "the beauty of this tech is we can constantly and fairly easily iterate our designs to improve them"

And all credit to him for not only making these models available to the NZ120 community (filling the void left by the demise of Shapeways) but continuing to improve them; and to the earlier pioneers of 3D printing whose designwork have enabled this. And in the days before 3D, lets not forget Russell Jones' Trackgang (and Pat Eade's earlier Trackside) - all of this had made NZ120 a more viable scale. Three cheers for the suppliers!

Wednesday, March 19, 2025

Are we there yet? Taking Stock of 3d Printing with some LCs

DB completes the 3D printing review with what was to be the opener in the post...

I've had quite a few purchases from the Lewis Holden Printing Factory on my workbench for a while. Some for well over than a year now. So lets look at a few frustrations from 3D printing (this has since been started in previous posts on passenger cars). 

Some of these models are LC tops. These are the same as ones I've bought and posted about previously, but putting them up against the latest additions to the four-wheeled coal train, the Trackgang whitemetal LCs (the brown completed one below) shows a contrast when it comes to the details like the placement and 'finery' of the ribs and internal tie-down 'bumps', and also the overall straightness and squareness that 3D Printing was supposed to help us with, although I suppose in this case, bent bodies were pretty realistic for coal route LCs!


But also note the chunkiness of the ribs and wall thickness of this particular design (and my earlier KS wagons).

My Z scale exploits have made me pay more attention to wagons 'riding high', and in recent projects you may have noticed me sanding down bogie mounting points and inserting the Peco chassis 'up into the body' for the recent batches of LCs. To my eye, this presents a far more accurate portrayal of the LC than when the top is sitting way up high on top of the chassis.

Modelling that lower look with these printed models (or making any alterations at all) is more of a pain than with scratchbuilt stuff, because the resin is so tough and brittle, so to 'raise the floor' you really have to get in there with a dremel, which is challenging to get into tight corners, and messy.


To make a proper low-rider, I need to remove the above areas painted black with a Sharpie pen, to let me insert the chassis. 

In fact even without my low-rider desire, I'd still need to either thin the Peco's plastic chassis or remove a smaller amount of resin print because those walls are so thick the Peco won't fit between them as intended anyway.

And ideally, for looks, you want to thin the inner side walls a little when viewed from the top. Further surgery had to be performed on the Pecos (see in the pic below) to make up for not being able to get a dremel deep into the corners of the underside....

The end result is nice:

In the pic below, compare the low slung LC (light brown one at right) with the sit-on-top Euro-look LC (darker model at left) in the below pic:

But getting to this point is too much work for a 3D print. I could have scratchbuilt this from styrene in half the time I spent dremelling. Why not just modify the design to save everyone the hassle? 

And that is exactly what Lewis has done with his latest creation, after some back and forth with Dandruff HQ.

This is his build in the pic above, looking pretty sweet. This is a great example of "if you're going to go to the effort of designing it, why not make it as good as you can?"

So, a number were acquired, but they have been sitting on my bench for a while as they required some pondering time. The outsides look superb:

That's some mighty tasty and fine detail. Note the handgrab and footstep on the end (the little knobs on top are from supports used in the 3d printing and curing process and are easily removed with a file.

The floor is supplied as a separate piece:

The challenge is fitting it... The tops have a little protrusion that is probably supposed to locate the floor, but mine were only on three of the inner sides. It was a very tight and tricky fit for the floor. Plus they are inclined to be a little warpy by their flat nature, so after many attempts I decided there was no way I was going to get flat or consistently located floors without assistance. 

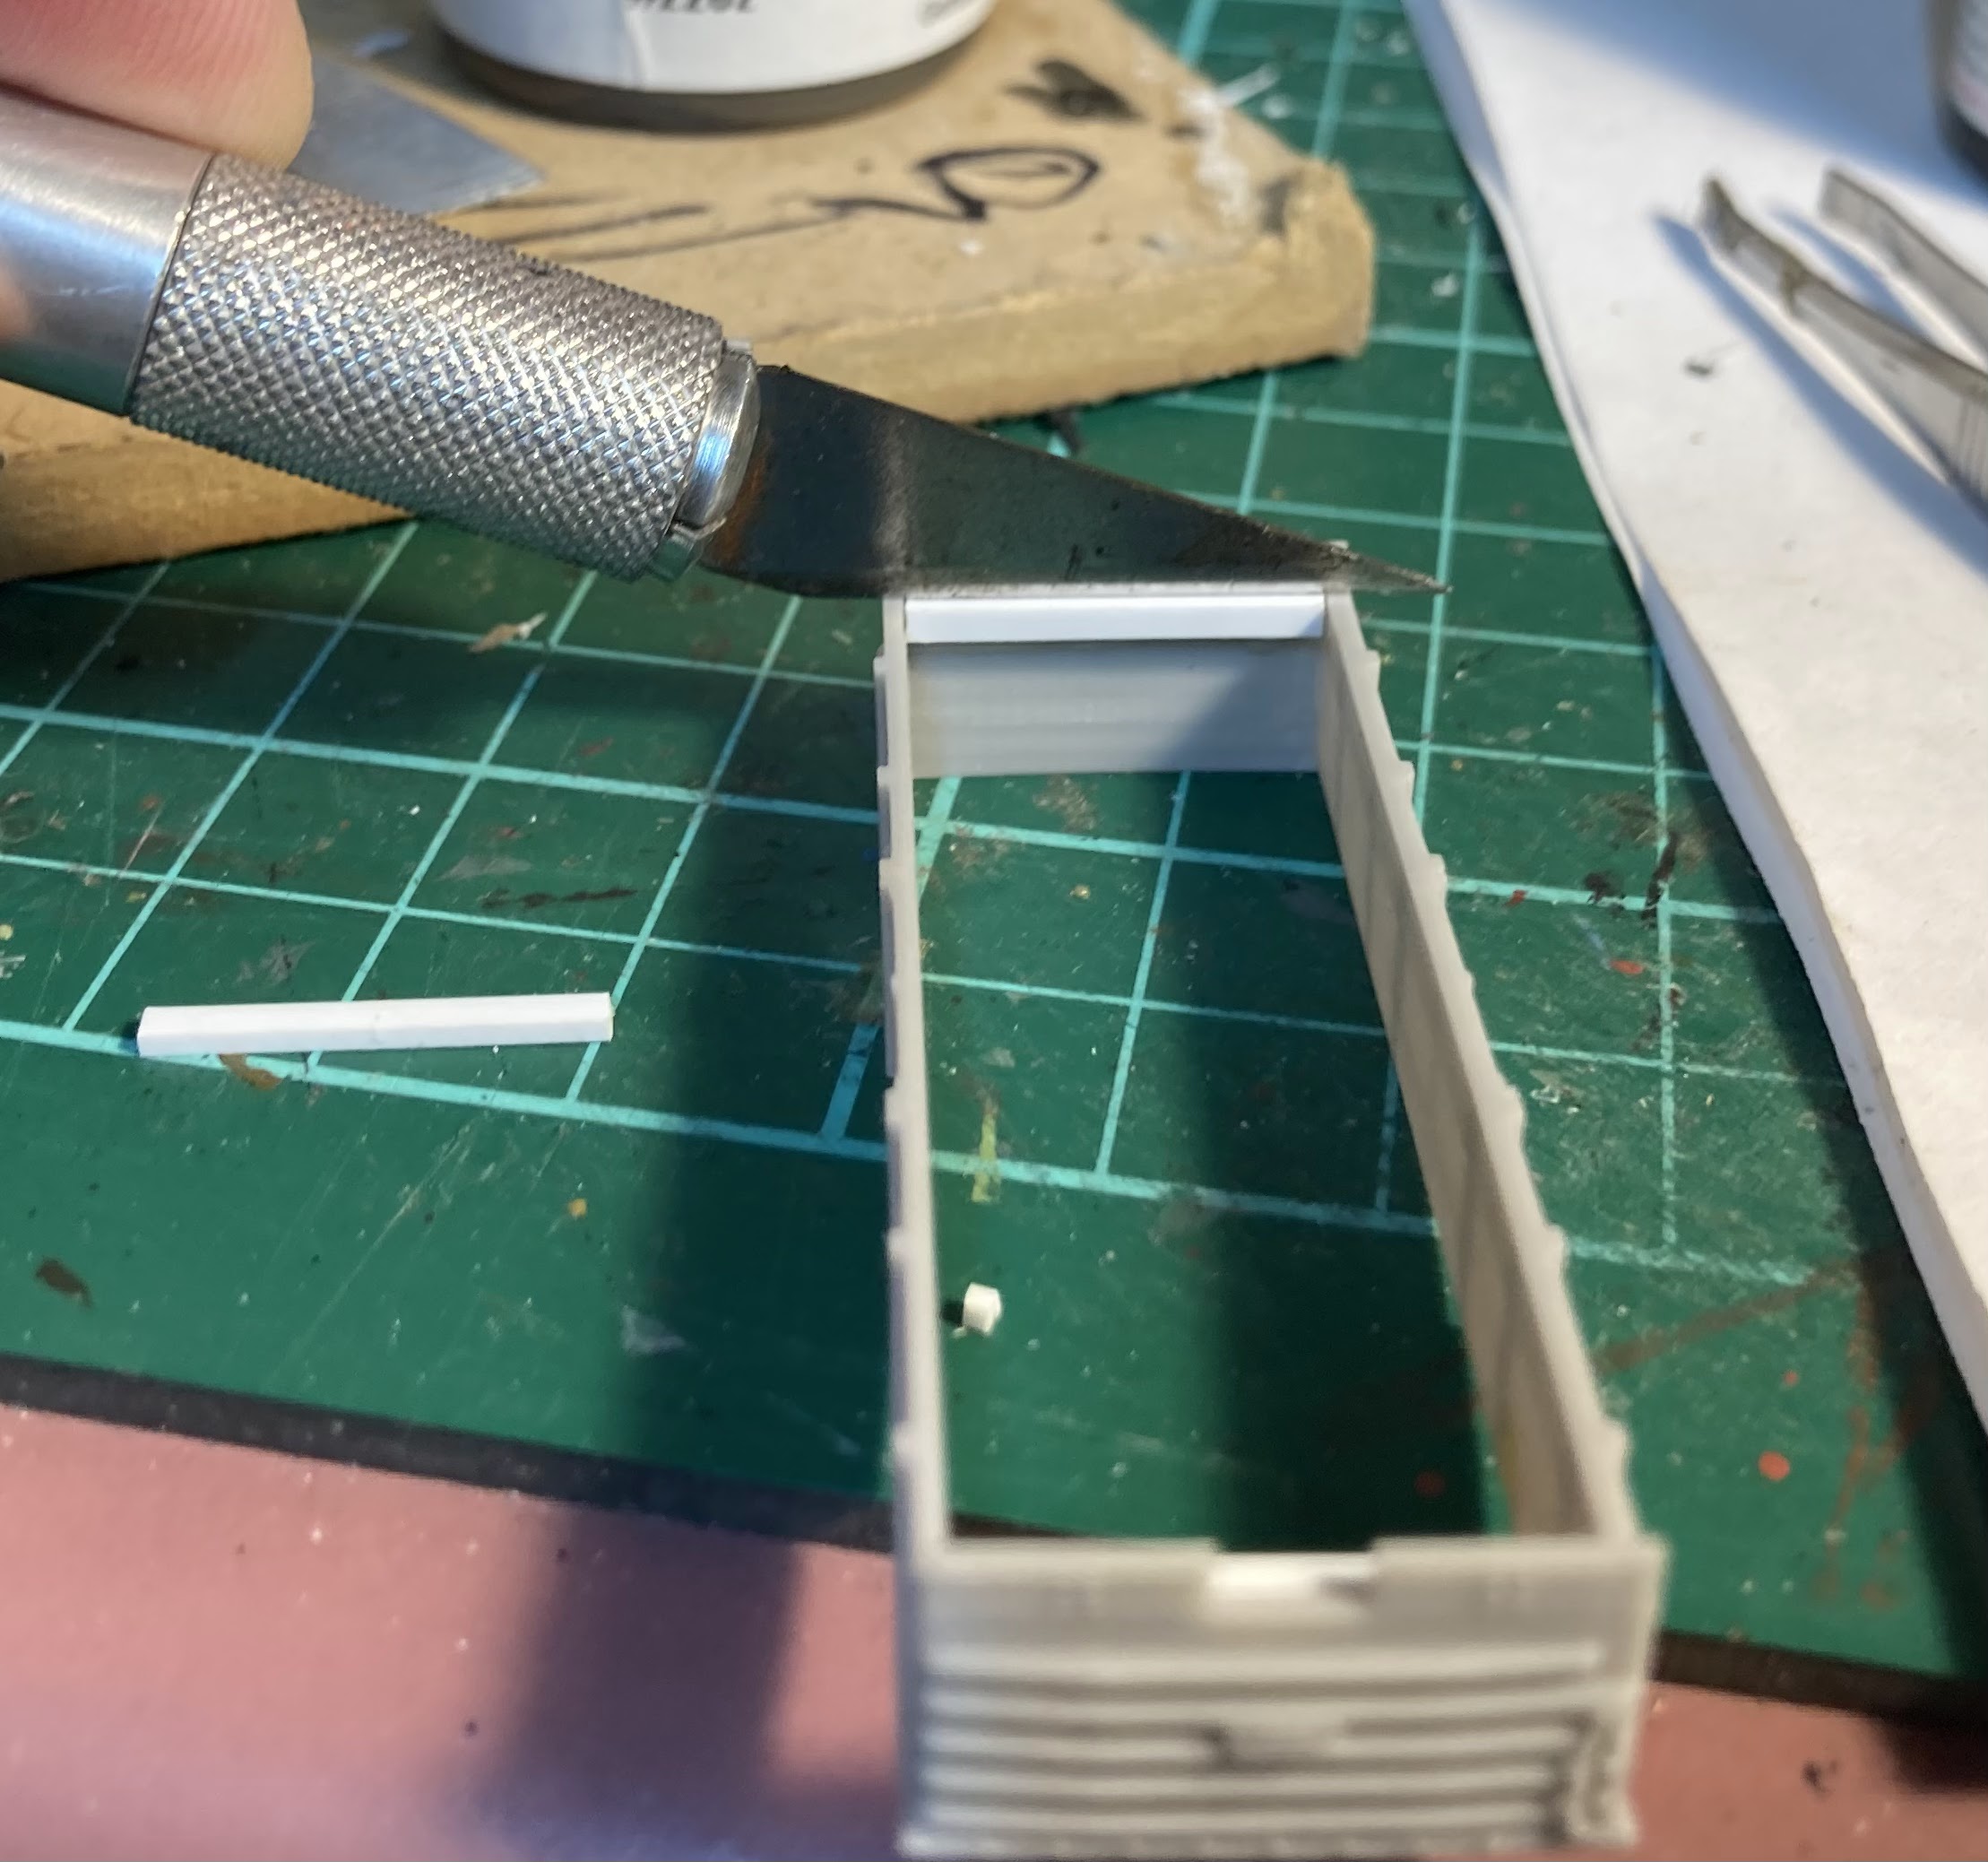
After fiddling with various sizes of plasticard rod, I reckon 0.060 inches-worth of Evergreen styrene is the right depth of stopper to have the floor sit at the height I want.  So strips of .040x.060 were cut and levelled with the bottom of the side walls thus:

I quickly found it easiest to do it the way pictured below, holding the wagon down and simultaneously pressing the strip against a knife blade (or a ruler or something) held in the other hand for a few seconds while the superglue took:

Then it was time to create some NZ120 marching powder by thinning one side and one end of the floor:

So the floor drops in nicely against the stoppers. If it warps up in the middle that's no drama, because the chassis will be secured at the corners anyway:

From here it was paint time: various shades of reddy brown on top:

And some drybrushed brown on the bottoms as the wagon assembly plant rolled into action:

Ta-da:

About 15 years ago, I had three holy grails for NZ120. 

  1. A module standard.
  2. A realistic one-piece modern freight bogie.
  3. And a relatively cheap LC and KP top that you could just pop onto a Peco - meaning anyone could churn out trains quickly without needing any special tools or skills.   

It looks we are getting very close to being 2/3rds of the way there.