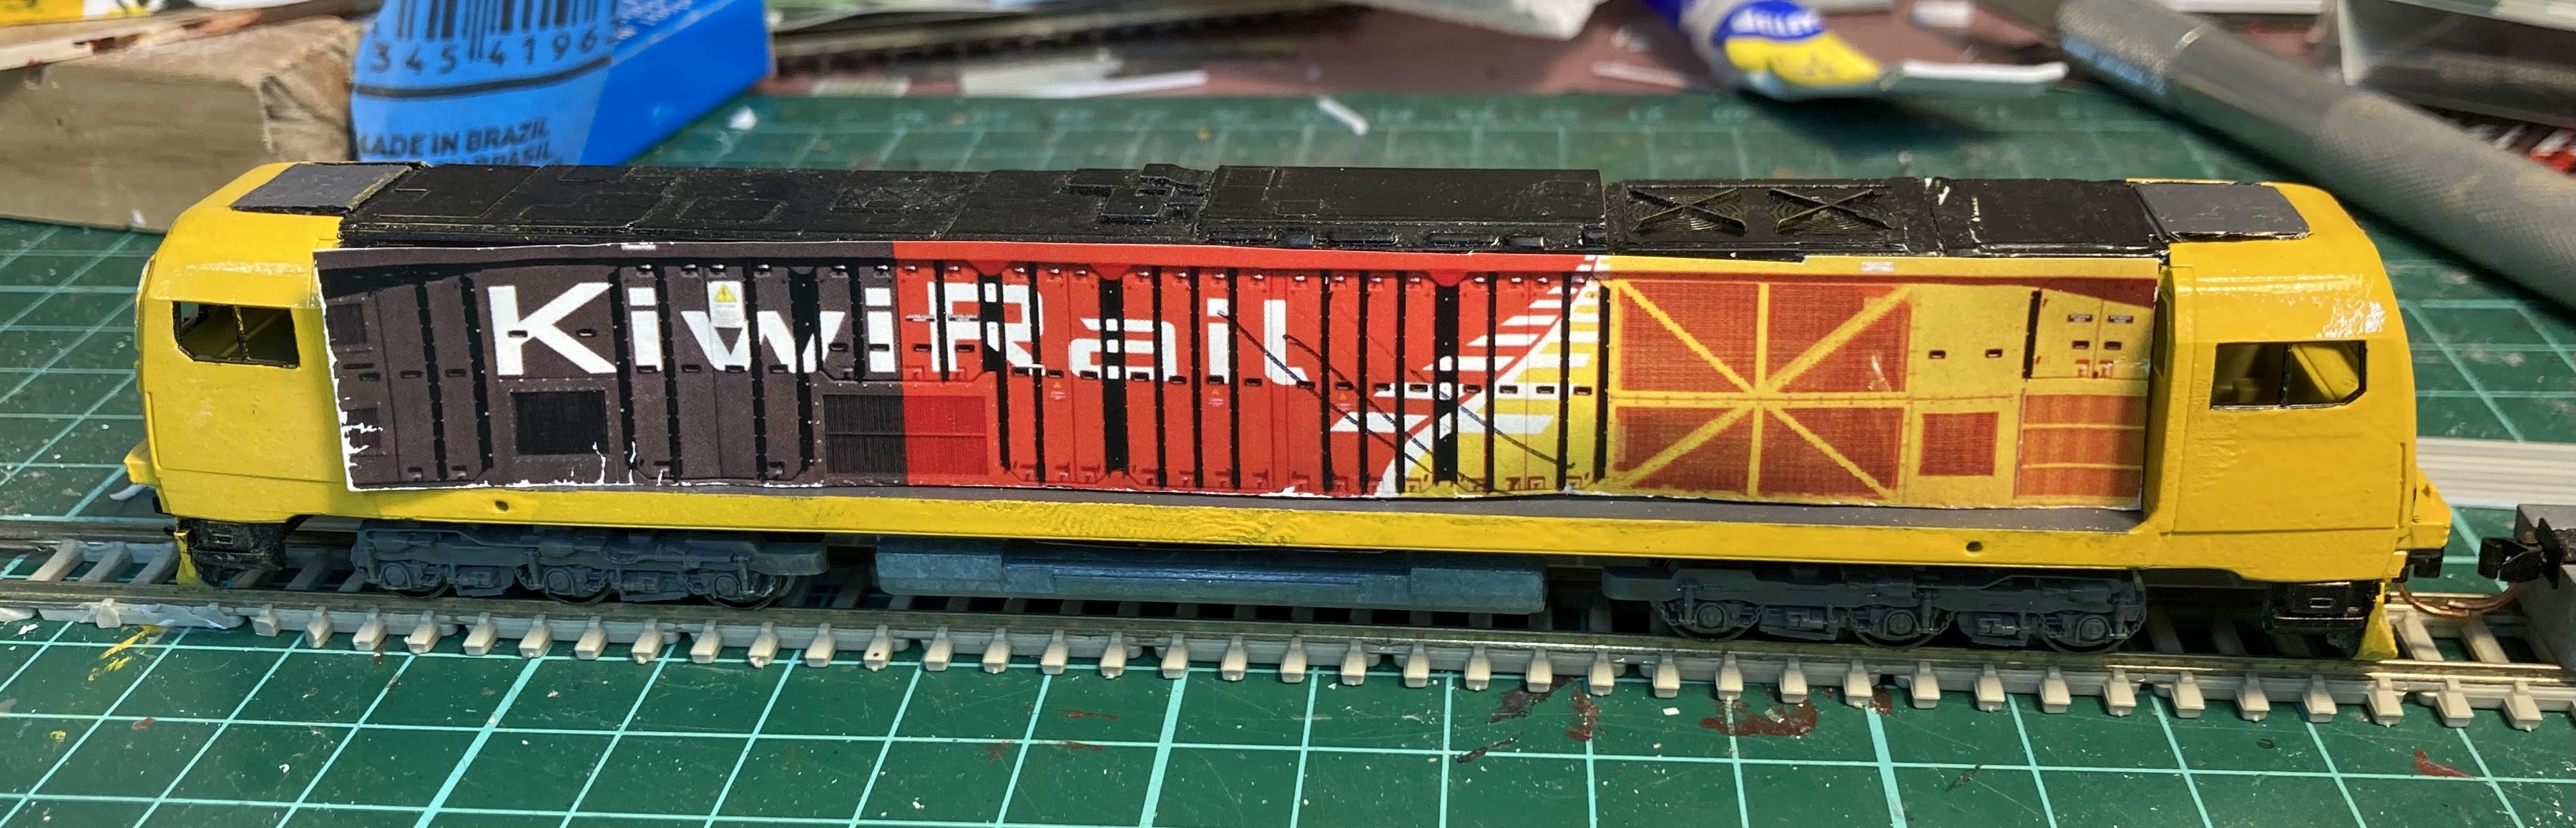
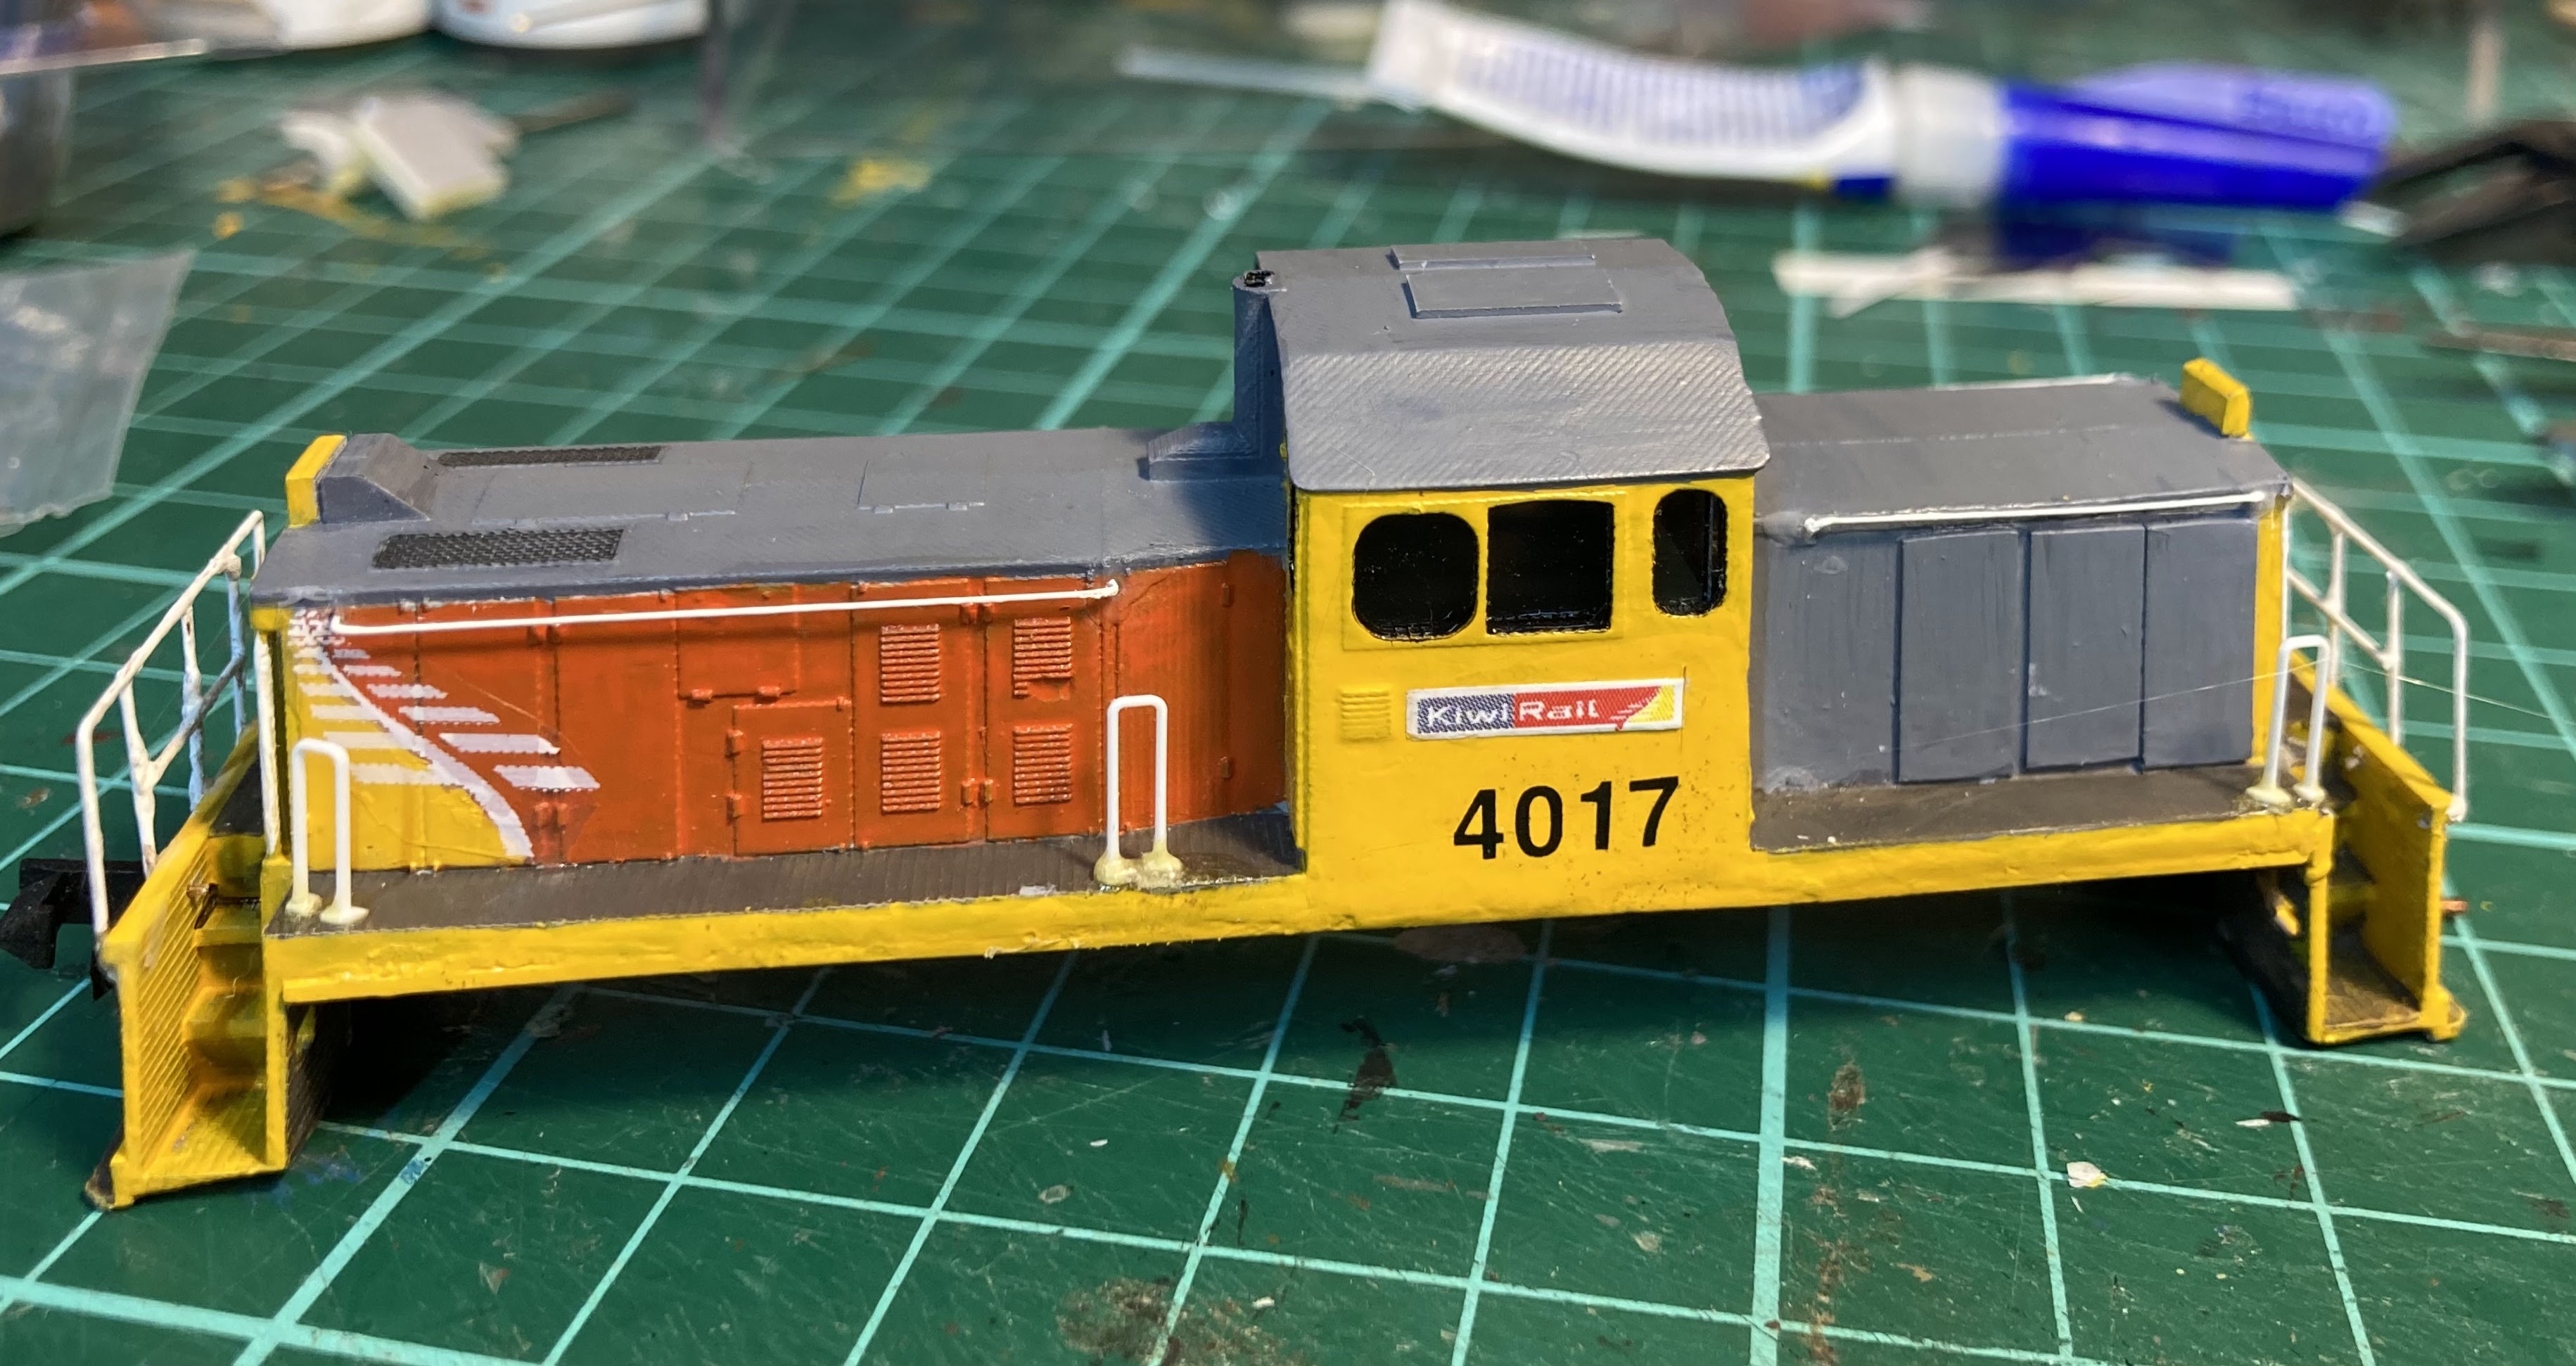
Showing posts with label Diesel Locos. Show all posts

Friday, October 03, 2025

¡Hola! The 3-Foot 6 DM Class - 4

 In which DB says, "about time". 

On Thursday, I found the courage to return to the DM project, just in time for it to head north to the train show on Friday. 

The DM provokes mixed feelings all around. Its nice to have something clean and new to photograph, but it will mean the end of the DX and DC class that we have loved for for five decades or more.

The model is also a mixed bag, so I both love it and hate it. The 3D print is very nice in places (especially the cab and headstocks), but its a bit off in the long hood detailing, not that mattered, as I printed up sides and moved the roof around. My shell has a slight bow in one of its sides. I've also found this a very challenging build, although some of that is my own fault.

Some nice etched handrails arrived from Lewis (made by Aaron Wall) a few weeks back. As known, these are gorgeous, yet a bit long in the x-axis. I believe there are new re-scaled ones available now or coming soon. This set is one of the early ones, so you have to dispense with a segment from each corner if you want to have enough of a gap for the crew to board via the side steps. You'd have to be staring at both the model and a prototype picture closely at the same time to notice. 

You also have a decision on to make on how to mount them. This may affect at what angle, and even for how long, they remain mounted. Ideally the lower ends of the pointy bits would be longer, and fit into slots pre-made in the side sill, or even better, a leaf could be taken from the Z scale playbook, and the yellow side sill itself could be an integral part of the etch. This would make mounting dead easy and provide the best chance of them being straight and resistant to being bent when knocked.

It may not be immediately apparent as the black GP above is not shown in a large photo, but the sidesill edge, the handrails (long and short hood), and the battery boxes under the cab are all part of the same etched strip here. Easy to assemble, always lines up, always stands at 90 degrees, and resistant to breaking.

But be that as it may. 

Back to NZ120land. I added some brake hoses, put in some MV Lens 'lights', and finally got around to glazing the front window. I did a much better job than I did on the back end window, including a strip between the window segments. Looks ugly, but viewing from this close is prohibido anyway.  That blue builder's plate is a bit '3d' from this angle!


I trimmed the handrails and superglued them on using some stripwood to hold them a constant distance out from the long hood until things had set. As mentioned, I'd like to have put the mounting pins into slots in the sills, but getting slots in the right places would have been a messy and time consuming job, so here they are out proud. A bit ugly, but a some yellow over the top makes them look a little better.  

The chassis is an old SD90 with a hardwired decoder. It seems to run nicely enough. A fuel tank and bogie sides come with the print, but I decided not to use them. The tank is a bit of a squeeze on the chassis, so it broke (and it was bowed anyway). I may use the bogie sides in future. 

My fuel tank is from an Atlas Dash 8 out of the spares bin, with the 'near end' being a part from a Japanese shunter top, chosen because it had a decent sized square grille that looks a bit like the aluminium cooling radiators on these. Now that I think about it, I don't think the prototype has these on both sides...!

A million other little detail things were done. Blue Stadler makers plates (under the cab on the LE's side) were added, as were silver tips to the brake hoses and taps, the four side steps, and various roof antenna. I also added a bit more detail on the cabtop air conditioning units. The inside rear of the 'good' cab wall had some 'smoke' applied, as it was a bit bright with its white styrene and yellow overspray.

I was going to tart up the bogies using the supplied sides, or even improving these SD90 ones with some sandboxes on the inner ends and parking brake units on the outboard ends, but time is short, they are dark black, and you don't really notice. 

The model could do with some numbers on the front and also the white KiwiRail logos on the Stadler design trademark black chevron, but this will do for now. 

So now that it's done (about time too, (told you I'd say that)), do I love it or hate it? I certainly like it a lot more than I did on Thursday morning.

Tuesday, September 30, 2025

Loco Testing, 1...2...3...

 DB powers up:

In the past few days, I've repainted 5 tarpaulined four wheelers and a KP, added another layer of decals to the ZH, made up/recycled three new container wagons to 40-foot boxes, replaced a broken Peco chassis and half a dozen broken couplers, oh, and made those two extra AOs for the TranzAlpine. A few missing handrails and broken headstocks were re-attached or refabricated on some of the diesels.  There's nothing like the chance to run a few trains in a few days to motivate some action.

In fact it feels like I've been doing everything and anything that I can to avoid cranking up the Digitrax to see if anything actually works

Yesterday I started some testing. I didn't bother testing the DXCs, as they are pretty reliable. 
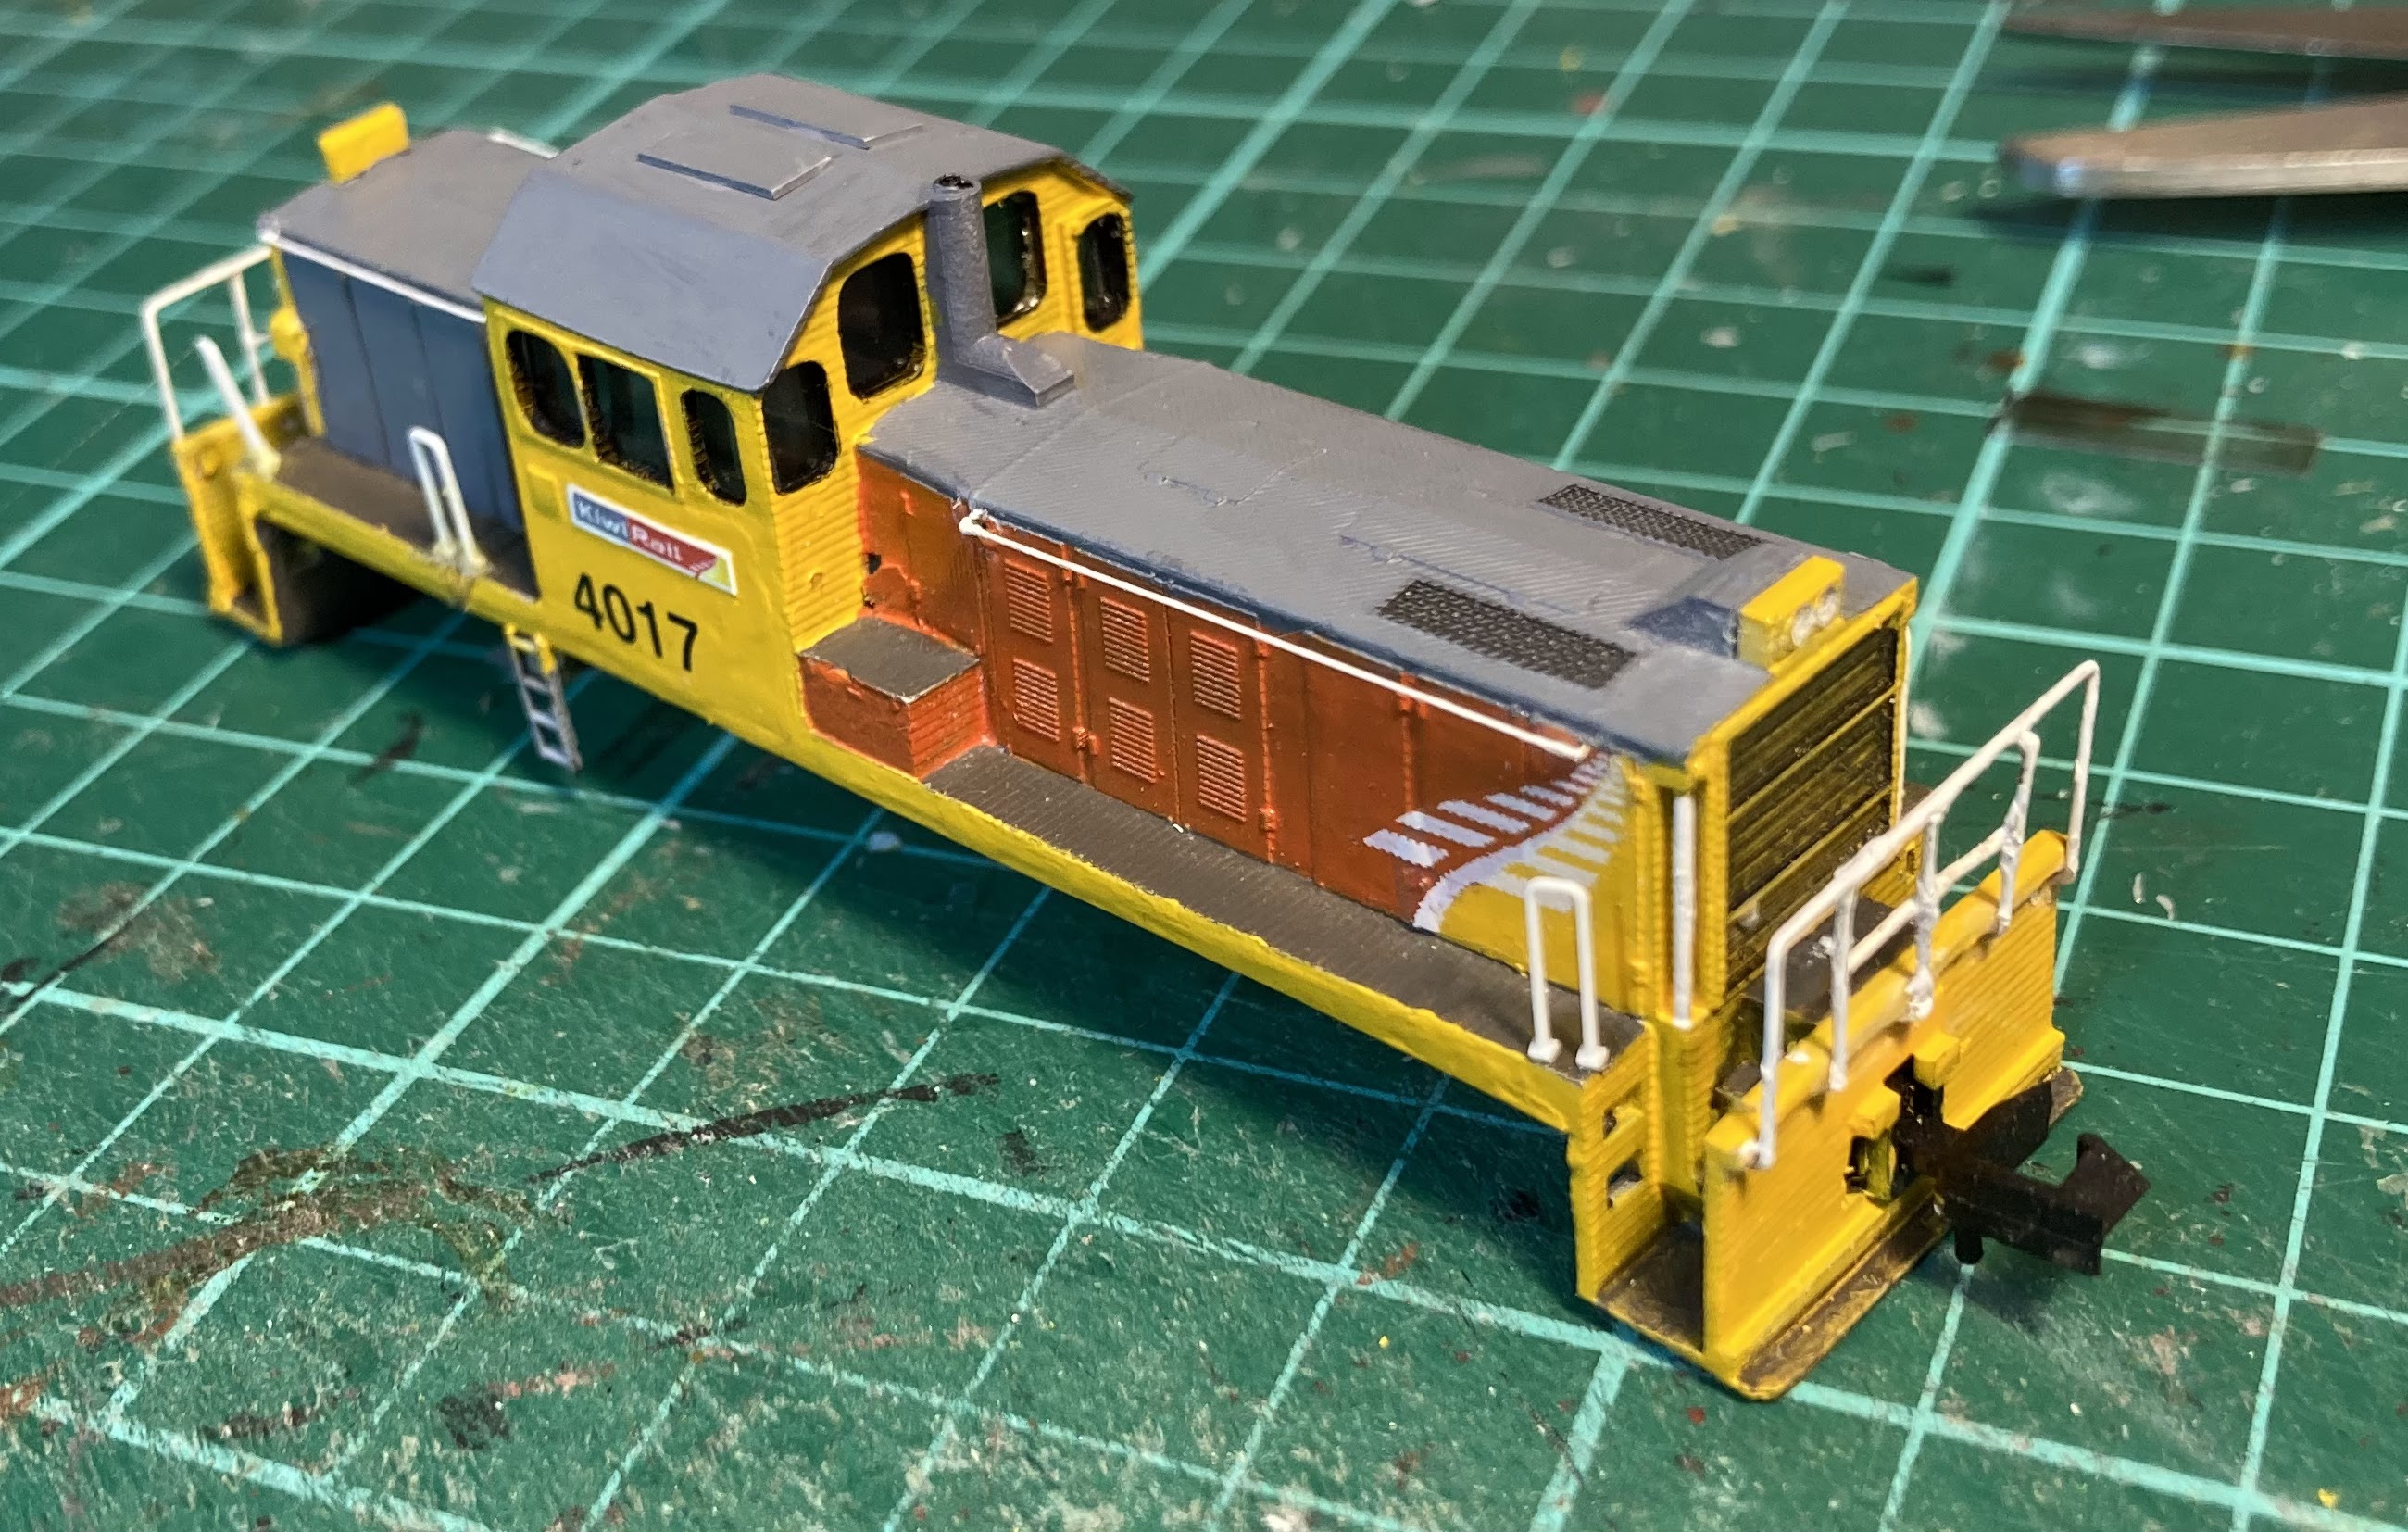
The DGs were up first, as old-cab 2376 was also such a great performer at the start of the year when I was planning Elmer Lane. I figured that new-cab (once 2330, now 2007), with the same Kato PA-1 chassis and clip-in Digitrax decoder would operate identically. Nope. Couldn't even detect the decoder. Disassembled and reassembled. It looks like I'd put the copper strips in upside down. These transmit track power between the bogies and decoder, so they were not making contact with the latter. Eventually I got it going, but 2007 wasn't working nearly as well as the original cab. Much slower, and a bit erratic.

At this stage, I needed to look up the Digitrax manuals online, as its been a dozen or more years since I have tried programming and couldn't remember how to get it into programming track mode (run/stop+F0 if anyone else needs to know, then Disp and Set).

With that figured out, I checked that I hadn't set the VelicityMax and VMid CVs on 2007's decoder. Nope.

It was time for another pull apart. I seems the driveshafts and worms aren't seating that well on the bogie gears. After comparing the two locos innards, 2007 was reassembled carefully and everything clicked into place.  Finally! Progress. The two ran beautifully. They had no problem pulling the 30+ wagon 4-wheeled coal train around the ballon loop, and then pushed it back. I then tried this pushing and pulling with the engines at the back end of the train (flipping the positions of the locos and van). All good, so it seems this curve behind the roundhouse should be OK. 

The Atlas SD-35 based locos were up next. I vaguely remember these being a bit reluctant, skitzy and slow, and 4559 and 4421 certainly didn't achieve many millimetres on our last outing. 
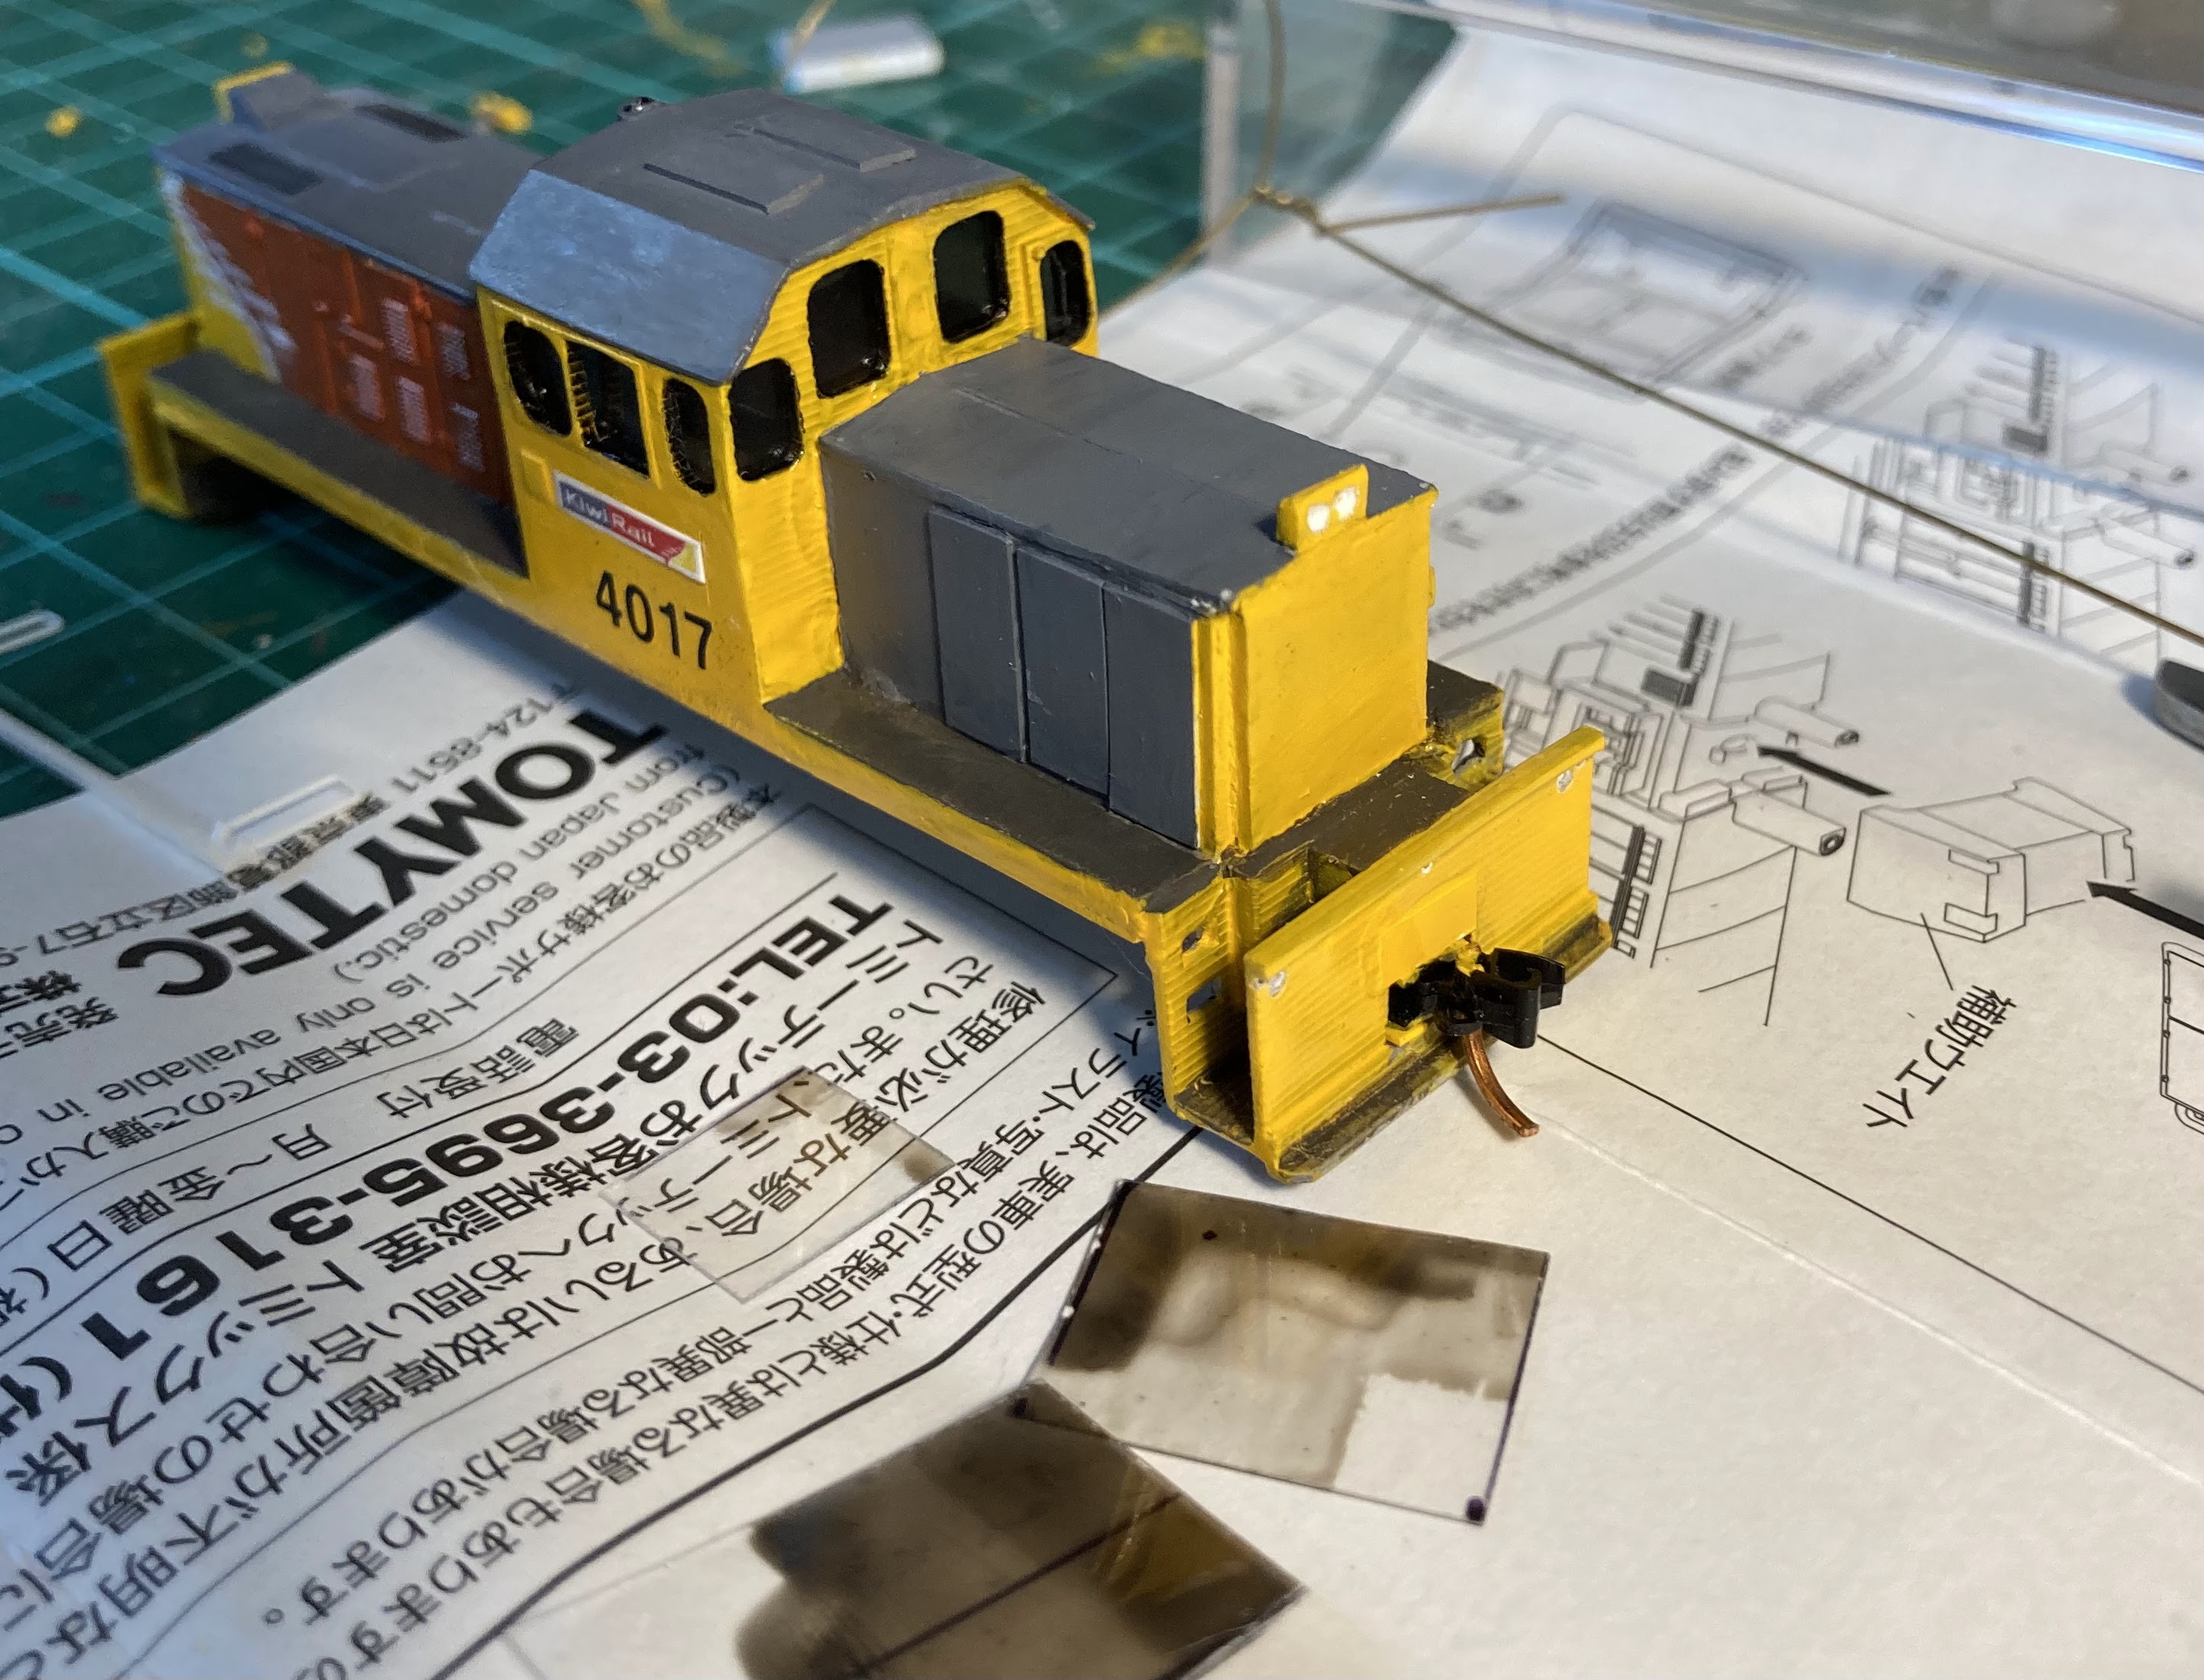
DBR 1213 was first. It unexpectedly ran really well!  DC 4421 was stubborn and erratic, but after some running in and wheel cleaning ...ah the smell of carbon brushes and oil takes me back to Hornby models of the late 1970s...  After five minutes, this was running nicely. Sweet.

Ideally DC 4559 should pair with DFT 7132 on the Tranz.  Again it was similarly hesitant, but with the same treatment was soon humming after a few minutes. 

So that means it should run nicely with 7132, but alas 7132 was only running about half as fast as 4559. After some prodding into the Digitrax, it seems I had set the VMax and VMid on this one to slow it down. I'm not sure why. For some reason I thought the SD 35s had the Altas slow motors, but that wasn't the reality here, so I moved those two CVs up on the DFT a few times until the two MU'd together nicely. 7132 is a Kato SD40-2 dating from about 2010, so runs well, but periodically has that annoying screech that some Katos have. I might try oiling the worm bearings. 

DA 230 was the last of the Atlas SD35s, and it ran quite well on its first go without needing much encouragement. 

Old DFs 6277 and 6064, both Kato SD40-2s with hardwired decoders, wouldn't do anything other than sit there humming, but I'm not sure whether they are worth digging further into further, but I might have a look tomorrow.

DJ 3067 is a tough one. It was decodered just before I stopped with NZ120 in about 2013, and I couldn't get much out of it at all. Periodic flickering of the lights but nothing more than a quarter of a second of action out of it.  This was the big disappointment of today's testing, because the loco top will have to be pulled apart to get into the chassis and decoder. Obviously there is a wire or contact that isn't doing its job.

DI 1843 has a frankenstein chassis. It runs quite smoothly, but is pretty slow. The way the body twists when the direction changes makes me wonder if there isn't something binding in there.

Blue DX 5448, on a Kato U30C with a hardwired decoder was a surprise, moving well on its first try. This used to sit on a Bachmann Spectrum Dash 8, so it has no rear headstock. Given its success in the Moving Department, this and some rear brake pipes, were added...

DC 4939 is sitting on the same Kato SD9 chassis that it had on Otaki to Cass, also with a hardwired decoder. These hard-wired jobs were DCC'd about 1997 for my wee Wellington layout. This ran perfectly too. Unexpected!

DXR 8007, made a screeching sound. It turns out this Atlas Dash-8 chassis, with its modified DXR fuel tank, has no decoder! As I use two digit addressing, there will be an obvious issue as '07' is now taken by DG 2007. Its a trivial task to add a decoder, but this really needs some bogie work as well. I might concentrate on the DJs instead.

So today I did. I had 3067 running 'moderately well' after a few minutes, so then started to decoder 3021. Seems like a long time since I pulled it apart. It is. 


After about 5 straight hours without a break I still didn't have it going. Initially the new (Digitrax Z decoder from 2002) couldn't be seen by the programming track. Pull apart, check. No luck. Try again. No luck. 

Decided that my chassis-to-decoder link, via the old mini headlight board, wasn't connecting. Drilled holes for screws and made up some brass tabs.

Still no luck. Touched the chassis to the programming track and could finally see the decoder. Aha the bogies are filthy, covered in black gunge inside. 


Pulled them apart, cleaned them thoroughly. Put them back together. Shorts. Pulled apart. Checked a few bits, put some Kapton tape around the motor leads.  Shorts. 


Pulled apart, put electrical tape around the whole motor. Shorts. So far the DJ has taken up 5 hours of my time with no success. Bloody hell. 

I put it aside (before I threw it across the room).

Instead, I decided to add a decoder to my 'third DJ chassis'. Borrowed one from DF 6064. Modified the chassis and applied the decoder in about 20 minutes. It works!
But it has a different style of motor runs about ten times faster than 3067. And I didn't succeed in slowing it down. I slowed down the DGs so they run about the same speed as 3067, but that DJ is pretty noisey and sometimes erratic. It probably needs a clean, but that would take a pull apart.

The DI runs about ten times slower than everything else. So much for the South Island fleet!


Monday, September 22, 2025

Re-built rebuilt DG

DB gets all nostalgic:

Recabbed DG 2330 was either the first (perhaps second?) successful NZ120 loco I built. Even though it has a lot of balsa wood, plastic and paper inside, it still stands up pretty well more than thirty years later. 

In about 1992-3 not long after it was built.

It has always had freestanding handrails, near-flush windows, see-through roof fan grille and a decent level of detail, including window wipers (in the early 90s!  - made from single strands of aluminium electrical wire), and '3d' brake hoses. The proportions aren't too bad given that it was built off a recabbed DG plan that Fettler von Amateur and I drew up with pencil and ruler in the mid 80s. 

The Microsoft Paint NZR logo on the cabside was printed out on a work laser printer (new tech back then) with the red flash painted in. It even had a crew, albeit HO scale giants, and the assistant's side window is partially open.

The hand painted numbers were not exactly a highlight, nor the chunky plastruct steps. The horns are probably a bit big. I'm not sure where they came from.

The chassis was an EMD E8 from Kato. The E8 is a long loco, so the Kato chassis had to be shortened. The rear end of the drive shaft was cut off with a hacksaw, and during exhibitions, the sharp end of it ground a circular hole in the DG's plastic back wall which is still there. 

In 2012, when 2376 was built.

By 2012, it has received a new DCC-able Kato PA-1 chassis, some finer steps, a headstock number (thanks MS-Excel!) and had lost its crew, who were still still glued to the old E8 chassis. Not much else changed. It still didn't have glass in the portholes nor much on the back - its never even had a rear headstock.

Fast forward to my thinkings of yesterday, where I thought I might give some of these old models a tidy up.

The numbers would have to go, and I still had some old leftover cabside ones from when I made my DXCs which looked like they may fit. While I was on the go, the paint was touched up in a few places. For example, you can see some superglue haze above the cab steps here, and a brown blob under the middle porthole, and no yellow on the edges of the front headstock, a white chip and some old contact glue residue on the cab roof -  all of these were later sorted out.

I decided to renumber 2330 into 2007 to match my 9mm one.

The handrails by the cab door and cab front corners were painted silver to represent the prototypical chrome ones.  Headlights in the form of MV Lenses were added. A bit of 'support' was added (a chunk of Evergreen H-iron in front of the fuel tank) to stop the engineroom steps getting bent in all the time. 

The crew were rescued from the E8 chassis and returned to DG duty! As this metal chassis is a little taller, they needed to have another slice of torso removed, so they are not much more than driving heads now.

The rear coupler was swapped from a Kadee (which kept lifting up) to the stock Kato plastic one, and this will mate up solidly to the matching one on DG 2376's backside. This ended up being a very time consuming process, as I ended up swapping the whole bogie out for one from another PA-1. And then tried to file a millimetre off the back of the chassis. Then reassemble the whole thing, whereapon I found one of the drive bearings was missing. Then I couldn't get the copper current collectors and DCC board to reassemble..... Then I kept dropping bits on the floor. Then I had to colour-match the bogies. Etc etc. So changing the coupler ended up taking one and a half hours or more.

Note the white hole in the styrene rear end (in the rear door)

The rear end got a partial headstock, a few brake hoses, a step, some MU plugs, and then I went mad and added some handrails. I didn't do the two on the back end of the roof as I didn't want to mess up its weathering. 

You might even see the recab has porthole glass now. Microscale Kristal Klear (not completely dry yet in the pics) was applied after black rubbers were painted in.


These widebody Kato PA-1s are big heavy chassis, so this pair of DGs should have no problem lugging a long four-wheeled coal train about. I still need to change that front headstock number though...

Tuesday, June 10, 2025

Pain in the Nethers - Chassis Frustrations -1a - Atlas

DB follows up - 

FYI here are the three versions of the Atlas SD7/9/24/35/etc. 

The 1990s Atlas/Kato one  - they still run well, but the motor had to be isolated to add a DCC chip:


The early 2000s edition was 'DCC friendly' with an isolated motor, and you could unscrew the chassis halves a little to pop out the light board for a DCC replacement. The negative with models of this era was maintaining good electrical connection between the frame and the decoder board (often requiring slim brass shims wedged into the four corners), and between the board and the motor. These models have quite slow speed motors from memory, which was a pain when running them with other locos, which why most of my other diesels have been modified with DCC speed changes to they will run with these slow DC/DBR/DA chassis:


The new one. Black speaker box under the board at right whether you want one or not, little piggyback board under the main board at the left end, joined with an E24 connector (DC here, but these can be replaced with a DCC or DCC+sound one):

On the plus side, while the bogies look identical to the older models (complete with now-redundant sticky-up copper tabs), tiny wires are now used with micro connectors to bring the power up to the board, rather than the old brass strips along the sides. I think the motor is also linked to board with wires, so I may end up throwing away the supplied board and hardwiring an orange decoder into those wires. Of note, the chassis isn't split frame anymore,

With the tiny wires, connectors and components one wouldn't want to drop this on the floor...

Wednesday, April 02, 2025

¡Hola! The 3-Foot 6 DM Class - 2

DB continĆŗa...

The ugly close-ups department has heartlessly captured the following unpleasant pictures. You have to remember that even with my magnifying loupe, I'm basically poking around with the paintbrush by feel here and even with it on I still can't see this mess of the now-grey headstock details. 

More painting, and some couplers after they were added in the greatly-expanded coupler boxes:

Mounting... My old SD90MAC was retrieved. This is a loco that I've never really liked (although I do like the weathering effort on the top). It needed some pruning with the pair of cast metal ears filed down (circled in red)

The DM top had to have the four underskirts removed, plus I needed to remove two of the little 45-degree brace/angles right up inside the shell to make room for the taller end of the metal chassis :


And it then sits reasonably low with its couplers at the right height, again with my over-magentaed first-pass paper sides 'placed' on the body for an approximation of looks:


You'll see in the first (prototype) pic from the previous post that the real loco is a real low-rider, but getting the model lower without majorly messy surgery to thin the inside of the roof and side sills would be really tough. 

Additional under-details - pyramoidal sandboxes and an effort to 'lower' the toolboxes were added from white styrene below:


I'm a bit disappointed in how what started out as nice airbrushing job has turned into a bit of a blobby mess, but its unlikely many people will see it from this close anyway. 

I must also say that the pictures presented in the last two issues (#18 and #19) of The Linesider, that fine organ of Aotearoan ferro-equiology, have been invaluable in making progress so far.

Sunday, March 30, 2025

¡Hola! The 3-Foot 6 DM Class - 1

DB puedo hablar un poco de espaƱol:

Despite having one of these prints on my bench for some months now, it seems I'm going to struggle to get it into service before the real thing. 

Initial thoughts on the print: 

It looks waaaay overscale when placed next to my model DXCs - too tall and too long. It seems it's not, the real thing being a lot bigger than we are used to! 

Great detail - the difficult cabs and front end are well represented, even the front handrails are there. The roof details are pretty good too, although some are quite subtle and may vanish under a coat of paint. 

Further investigation:

After the real DMs arrived here and were seen in the flesh, it appeared like they would be a very challenging prototype to model. The sides are very detailed, and the prominent black rubber joins between the door panels will be really hard to paint and imagine applying the decals around these. 

There are also differences between the shell and prototype in the side door panels, especially those close to the cab, and on one side of the loco (the 'upside down' side in the image below) which has the square dynamic brake inlets. Not that many people would notice any of this. 

So I decided straight away that my sides would be photo overlays printed onto glossy paper, a la Ken Devlin Specials.  I spent about three hours one night building up the sides from photographs. This required perspective correction, scaling, colour matching, and - for the other 2.9 hours - removing the complex side handrails from the photos.

If anyone wants this full size (about 4000x4000 pixels) you can email me at the LinesiderNZ email. Maybe Lewis might host it on his website as this will get compressed. 

I took the file down to the print shop, printing it on the same paper The Linesider uses. The first page looked too magenta, so a little green was added, and by the third copy it looked about right. Even if you take the same file to three proper commercial printers, you will likely get three subtly different hues depending on what paper, ink and model of printer is being used, and the temperature, humidity and even whether the printer is warmed up or not will affect tones, which are basically dependant on how the different colours of ink (cyan, magenta, yellow and black, or sometimes red, green, blue) are absorbed into, and layer up on, the paper. The things I've learned over the past few years.

With this done and laid over the top, it made obvious a few shell issues which will likely be corrected in a future iteration of the 3D model. Primarily that the radiator section (roof fans and 'union jack' sides) is a bit close to the cab at that end. This also pulls the adjoining chunky roof section over the engine/SCR unit  (with its four 'feet') a bit further off-centre. 

On the side sills, the circular lifting lug holes are also slightly misplaced. This is what made me initially wonder whether the shell was overscale, because the bogie centre spacing was one of the few prototype measurements I had when the shell arrived. I'm not sure I will remember to move them...

The panel-side details aren't going to be a problem, as I'm going to be using my paper overlays anyway, but I will need to move the roof fans to sit over my union jacks, and this will require moving the engine room roof as well. I'm also tempted to make the roof a/c units more prominent, which will make them easier to paint.

Into Surgery:

The first thing I decided to tackle was to slightly alter the cab roof top corners. These are angled (as modelled on the shell) at the 'back' corners to give plenty of door height access into the cab, but at the front, the real thing transitions to a more rounded shape. A little filing sorted this.

When viewed from above, the front face of the cab should also curve a little more at the corners, rather than having a bevelled join. I had a little crack at this, but not in the top-right corners (when viewed from the front) where there are a nice handrails printed. 

The 'cowcatchers' were also subtly modified at the bottom. There's not much to fault though, as the very complex cabs have been modelled well.

After the pic above was taken, I also opened out the bottom of the coupler pocket to take MicroTrains couplers - another message to designers - every 3D printed coupler box I've ever seen has needed to be enlarged.

The roof fans and engine lid were moved about 5mm towards the middle (I was also able to move my sides slightly the other way to meet them!).

So in summary, you could well say none of this surgery really made that much difference. 

And below, with filler added, ready for painting. 

First few coats badly sprayed:


Monday, June 03, 2024

DSJ Part 6. Handrails.

 DB teters onwards:

A few minutes were available for trainroom duty today, so some handrails sprung from the holes that were drilled last time. I had grand visions of soldering these up on the workbench nice and straight, and then inserting them into the holes. This was never going to work as I'm shite at soldering, and all my superglued ones from the ancient past are still intact. More or less, anyway.

So an overall hoop of brass was folded to fit and glued in the outer holes. Then the central vertical piece inserted into a hole, cut to size iteratively, and glued to attach to the hoop. Then the two remaining vertical pieces done similarly. 

To finish things off, the horizontal bar was glued in place (which I assumed went all the way across, but after looking at a few prototype photos, doesn't). The first horizontal bar, on the unpowered/short hood end went in nicely first pop, and the other end had to be wrangled about and a small kink added in the middle with tweezers and fingers covered in superglue. These end rail pieces were all made with leftover (0.6 or 0.4mm??) brass rod that came with the Trackgang Zs. Overall, this didn't take as long as would be imagined. 

Ironically, the 'short hood' set of rails is pretty straight and square (whereas the short hood end itself isn't!) but the verticals at the powered end aren't quite as vertical as they should be, which shows up against that perfect 3D printed end!  


The two vertical handrails indented into the corners of the short hood were added with finer brass (pic above), although the 3D printed ones on the powered end look better (pic below)! Those vertical corner ones and the horizontal grabs along the tops of the hoods were made from .008 inch brass (a bit fine in comparison, but what was at hand) .

And lastly, the vertical standalone inverted U shaped bits in the corners and by the cab doors were cut from the Tomix top. A little short, being 1:160th (or maybe 1:150th), but they were too nice to not use. Yes, the leaning one in the background of the above pic is being stabilised by a tin of paint as it sets!

Sunday, June 02, 2024

DSJ Part 5. Couplers and glazing.

DB relates a few more tiny steps.

Glazing has been added inside the cab. I used some clear plastic painted with that semi-transparent Tamiya 'Smoke' on the 'inside' side of the glass. This was leftover from my 56 foot cars from a decade ago. I figure I still have enough to make another two or three or four cars so should do that (adds to project pile).

Leftover bits of glazing are on the paper under the loco. Those paper instructions were fished out of the rubbish bin in the hope of finding some clues as to how one might easily DCC the chassis. After a few minutes on google, it would seem most of the Tomix stuff isn't that easy to deal with, but I can see some possibilities.

Couplers had also been added, with a Microtrains at one end, and in what must be a rarity in custom made NZ120 and even in N scale locomotive builds these days - a Rapido at the other. This is so I can shunt (or at least 'tow around'), Peco wagons. The coupler is sprung and has that little tag under it so I suppose it could be used with some sort of mechanical automatic uncoupling mechanism operated from under the track, but that seems extremely unlikely to eventuate. I've never had much luck with Microtrains and magnets either, so shuffling wagons about with a little five finger shunting will be the the order of the day, if the DSJ sees much action at all! 

Dig that funky coupler:

The glazing looks better though. The DSG/DSJ have always had tinted windows, so my efforts here look decent from a distance. Cutting and sticking in pre-painted glazing is one of those jobs that looked like it would be quick and easy, yet it easily took an hour out of my limited mild-cursing budget. By the way, 'In the Loop' is back on Netflix.

You can still see through them but only just.


Thursday, May 30, 2024

DSJ Part 4. Decals.

DB returns after a few days of busyness:

A start was made with the decalling by using some spare old ALPS KiwiRail 'ferns' from my DX project of about a dozen years ago. Artistic license applies, as some KiwiRail DSJs have the fern this size, some have a smaller one placed high, and as the DSJ's paint design is asymmetrical, this also requires a 'reverse fern' on one end. 

I don't have a reverse fern, but on a visit to the local bike shop for the Tamiya paints recently, he had some Tamiya Decal Adhesive, so I bought that and used it to stick the 'top/printed side' down to the paint (glue side out) and this seems to have worked fine.

The KiwiRail logo patches were printed out in various random sizes on white glossy paper at The Warehouse. The large ones were a last minute addition... and even they are a bit small! When doing this, always make sure you (and they) are printing at 100% (no scaling). 

The glossy paper was a bit thick, but I managed to somehow 'thin it in half' with a sharp blade (top right logo above being split). These were attached with Selleys wood glue/PVA.


Numbers were from a MicroScale BNSF patching set, which were about the right size and a similar (but not quite right) font. Its really hard to install these so the numbers all line up. I scored C+ on one side and a D grade on the other.
 
All decals and logos have been covered with semi-gloss clear gently applied with a clean brush to protect them. The grey was repainted a slightly lighter colour in amongst this action after two hatches were added on the top of the cab. I'm not sure what these are for, as the DSGs don't seem to have them. Emergency escape hatches in case there is a need to ditch in water?
Plastruct blocks have been installed inside the tops of the hoods to fix the height of the model so that the headstocks clear the rails. The thing is sitting even higher than expected, so I might move the springs up on the bogies to fill the increased void.

A few dozen more tiny paint touch ups have also been done, and a start made on drilling some holes for handrails.

Saturday, May 25, 2024

DSJ Part 3 and a half. Coupler pondering.

DB Says:

Not much to report other than a few brief visits to the painting chair in recent days.

A structural challenge discovered a few days ago was that the coupler slot in this model is the perfect size for the underslung MicroTrains couplers that I have in the spare parts box, but it is at the wrong height, leaving the coupler face way too high. I have always used the 'MicroTrains standard height', because many of my wagons use their bogies as-is. Even the non-underslung versions won't work in this hole location.

Assuming fixing this was going to make a potentially fatal (to the model, hopefully not the modeller) mess, I pondered a few solutions before trying two tonight.

  1. Cut the coupler slot right down to the bottom (including taking out the shunter's step in the centre) by making two cuts with a Dremel disc. I worried this might crack the ends off or break something badly, plus it creates a dusty mess everywhere.
  2. Drill a bunch of small holes below the current opening with my Black and Decker drill and use a file or something to square up the enlarged hole. I did this, but didn't have to...
  3. ...because I used my tiny jeweller's saw to expand the whole thing downwards about 5mm in an approximately square shape. This was surprisingly easy, really quick, and not wildly messy in terms of dust.

A few pictures as the model stands.... Tamiya Panel Line Accent stuff was used on the end/top grilles at the motor end. There must be some variation in how this model is printed, as the top-port grill was well contained, but the Accent colour seeped out of the top-starboard one. Easily covered with some grey once it had set.

A triangular blob of yellow has been applied at this end, marking where a KiwiRail Fern will split the red and yellow. The DSJs seem to have their grey half at the short hood end, and the red on the motor end on both sides, with a 'reverse Fern' on this port side. 
The copper bogie 'springs' have been capped with a sliver of plastruct rod (about .020x.020 inches size). My big clunky fuel tanks have been removed from the shell. I'll cut them down and mount them on the chassis sides instead.
I've also painted the thick window edge cutouts black to make the cab wall thickness less obvious.
The white below on the end is a reflection! I have been contemplating another coat of the orange, as the grey Tamiya Surface Primer certainly takes some covering. I might try the white version once this grey can runs out.
As you might be able to see in this view, I finally had the yellow cab sides looking OK after four or five coats and touchups, yet the last thick coat obviously wasn't thoroughly dry underneath, and of course I stuck my mitts in it. Gordammit. 

Upcoming items on the agenda include finalising the chassis height inside the shell, adding couplers, and then finishing the shell off with handrails and decals.