Monday, July 03, 2023

RailX again

Yep, its that time of the 2 years again with RailX on in Palmerston North. I also see that theres a show in Timaru, though I doubt there will be many people having to choose. Having failed dismally last time to operate a layout (again, I'm sorry for being so crap, Grant) I think I'm allowed to play with the model makers again. And unless theres great demand I won't be bringing any boats this time round. Looking through the collection of 1/2 finished products (Df, Johnston A, Ds ) I'm actually thinking about making more track. Its something thats still not commonly done and is very hard to spead up using 3D printing (certainnly for anything more complex than straight track). Now that I have said that someone will come up with a way of doing it.

So, drop by and say hello (oh, and Russel, if you are coming down I could be tempted with a 56' guards van)

Saturday, July 01, 2023

Why not another project?

Quite a long time ago (last decade) I brought a Trackgang UC-15 tank car as a start on a model of the well known tank train that ran regulaly between Wellington and Palmerston North last century. It has resided in the unmade kits pile untill I spied it a couple of weeks back and brought it out onto the workbench.

While theres really not a lot to it I think what had put me off a bit was mention of drilling holes in aluminium tubes and cutting to exact lenght etc etc. Holding it up to the plan it was 1mm over, so I imediately felt much better about not cutting it. The ends were glued on and sanded to tidy them up. And then we stalled. Not for the normal reasons of lazyness, but to somewhat expand the project. On my list of wagons that I came up with over a decade ago, I've got listed 12 UC15's and 2 Uc 4's. making them in metal is going to take a long time, and also a fair bit of money going to Russels model empire. What are the alternatives? 

At this point everyone would leap forward and cry "why not 3D printing?". Well, I'm not everyone fortunately (or unfortunately, its all a matter of your frame of reference). Being a bit more of an analog kind of modeler I've come at it from another direction.

16mm wooden dowel cut to length with the ends sanded to shape. sides sanded and a coat of paint on. Underframes cut from 2mm plastic to size with areas to grind out so that the wheels don't rub. Theres not a lot to the rest of the model that I can't do though I am going to need some brake cylinder's and ladders. I have a pile of old bogie castings sitting in a box and just need the wheels which are another issue. The bogies are brass castings that take US length axles ~14mm (not the UK 15mm). I look to be stuck with the 36" microtrains metal wheels at 5.5mm diameter (too small). If anyone knows where I can get US 40" wheels "at a reasonable price" I'd love to know.

Saturday, June 24, 2023

Saturday at the workbench

 A bit more work on the EMU set over the last couple of days. I've rounded the endswhile not removing any detail (I think...). I also sanded the round roof ventilators off and smoothed the sides down to remove the raised rim round the windows.


In an "hmm, thats odd" observation, the plans show that the corners of the windows were rounded for the 1949 stock (40 Dm and 71D's, surely Em/E would have made more sense?). However every photo I can find from the 60's and 70's shows the window corners to be square. 

UPDATE having a hard hunt I can now find rounded windows as well, but the square windows are too prevalent for it to be just the 1938 (6 Dm and 6D) or the 1946 (3 Dm and 2 D) stock. Plus both types of windows turn up with the 1949 EE bogies. Its all very odd.

It would be so much easier if we didn't do any research
The plus is that I was thinking about filing all the windows square, but now I can avoid that (and it was going to be a right pain to do)

Wednesday, June 21, 2023

3 foot 6 models review

Back in November last year 3 foot 6 models was created to break the Shapeways monopoly on 3D printing of NZ120 models. I've managed to hold off doing any shopping for quite a while now. However in May the English Electric Dm/D EMU set came onto the list. Now off and on for years I've looked at these models on Shapeways but the price has keep my credit card in my wallet. With the cost dropping to $80 for a 2 car set (or $100 for the 3 car set) I clicked on the button. While waiting for my turn in the print cue, the devilishly cunning Mr Holden listed the Ew on a list of test prints. Hoping to bump it to the top I offered to take to first test print. Click. I'm still wondering why I'm doing this as Paekakariki isn't moving off the back wall of the garage any time soon. Anyhoo...

Tonight the box was waiting for me. 

Maths is not his strong suit....

First impressions are good. The general dimensions are about right. The corners could be a bit more rounded, but thats more a function of the CAD programs limits. A little bit of work with a file and sandpaper with reference to photos of the real thing solves this.

The one comment is that (I think, looking at photos) the roof ventilators are the wrong shape, and should be square (in the early 1970's anyway).  Theres also a couple of very small spots on one model that need filling and a couple of gaps in the cowcatchers that will need filling. I'm also a bit stumped on how to glaze the windows (oh and if anyone has pictures of the area round the pantograph I'd be keen)

So, a solid 4 out of 5 and I'm planning to buy a second 3 car set at some point.

Second up is the Ew. Its a test print and the details on the sides seem a bit soft and could stand out a bit more. However looking at the CAD picture on Shapeways its in the CAD file. Again the dimensions seem to be about right. A 3 out of 5 at the moment but I've sent comments back to Lewis and the production models should be of a higher standard.

The printing lines in the photo don't show up at all in real life.

 Lewis was also able to send me a couple of pictures taken during the process.

Fresh off the press

Taking a spin on the UV curing turntable.

Finally, the bogies. These are simply detailed, with plenty of space to add the extra fiddly bits if you want. There are brake shoes added as well which fit 7mm wheels. The axle centers are 19mm, so 1mm short of the 20mm/8' of the real thing. The bogies are also printed just a wee bit wide so the Parkside-Dundas wheelsets are on the verge of dropping out of the pinpoints. If I cut a slice out of the ends and re-glue them together it should work out OK.

So overall I'm quite happy with these models. The D/Dm set particularly provide a good starting point for the more experienced modeler to go to town, but a also a "good enough" model for a keen beginner.

Monday, June 19, 2023

Book review time

A couple of weeks ago A PDF copy of a new book was shared with me. Its a surprise to find a railway in this country that I haven't heard of. In the late 1920's the Auckland city council built a dam in the upper Huia valley to supply water to the growing city. 

As part of this a tramway was built to transport building materials from The Manuka harbour 6 km up the Huia river to the dam site. The tramway then ran a futher 2.5km above the dam site to a quarry.

Unlike a typical bush tramway, the line was built to a much higher standard as it carried quite substantial loads of cement, sand and rock. Several bridges were required as well as a couple of tunnels.

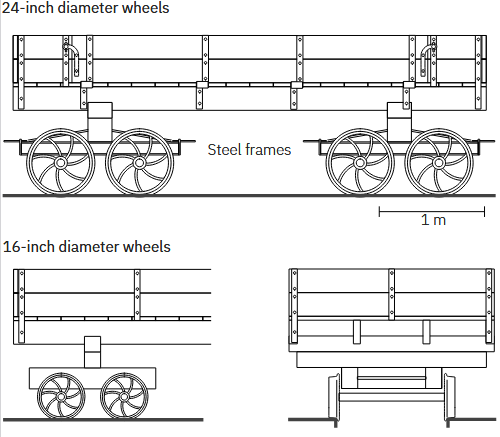
The line from the landing on the Manakau moved sand and cement brought in by barge with a typical days load being 120 tons in 4 trains. This was carried in bogie wagons built on log bogies. 

Several locos were used on the line. A Price Cb was purchased new in 1927, and a Gibbons and Harris 0-4-0 and a 9 ton Barcley 0-4-0 also worked on the project. The Cb was used to move trains from the landing to the dam site and the other 2 on the quarry line. When the dam was completed in 1929 the Quarry line was lifted and the line down to the Manakau was left for access to the dam untill it was lifted in 1959.

So, thats a rough summary of the history, whats in the book. Well, for once there's much more, and quite honestly its christmas for the modeler. A map of the line with all the interesting spots covered. Track plans for the landing, dam and quarry, along with a detailed discussion of how they were operated. There are plans for the locos (or close to) that ran on the line as well as a plan for the main type of wagon used. there are also plans (and detailed information) for the major bridges, tunnels and other locations of interest (including where the line ran across a rock shelf which had to be blasted).

Admittedly the book is writen from a historians view with detailed explanations about the difference between NZR and bush trams which for the average railway modeler are a bit long winded. Thats not why we are here. The rest of the book is absolutely brilliant and my hats off to Peter Hopcroft for writing a book which should be a blueprint for historical railway writing in this country.

Hiua Dam Railway.

Saturday, June 17, 2023

An Observation...

Something I've noticed while looking at 2 axle bogie options for NZR diesels is something that should have been screamingly obvious to me all the time.

Now we all know that the bogies under the De, Ew and D/Dm/D sets are (to all intents and purposes) the same. The scale bogie wheelbase is 20.2mm (2438mm) and the wheel diameter 7.7mm (927mm).

Next, lets have a look at other shunters measurements.

The wheel size is identical for all 4 locos 7.8mm or 940mm, and I'd defy any reader to pick the difference between 7.7mm and 7.8mm under a loco. The bogie wheelbase is 20mm (well, apart from the Dh at 17.3mm which is close to the Gp series bogies at 16mm), which is basically identical to the English electric bogies above. 

What about (most of) the rest.

Here we have a variation of 20mm to 20.8mm (again, try picking that under a loco from 2'). The wheel variation is a bit wider (9.2mm to 7.2mm).

The only other loco not on these pages is the Dj. 18.4mm with a wheel dia of 7.8mm. 

So, apart from 2, the rest of these loco's could be made from 1 bogie drive system with just a variety of wheel sizes.

Sunday, May 21, 2023

Out with the Iron

 A quiet afternoon due to rubbish weather allowed me some time pottering with the Johnston A and it was time to start cutting brass. I'm going to build the tops from as much metal as possible to get weight into the model. 3D printing scores huge points for detail and accuracy, but theres just not enough weight in it to be usefull for very small locos.

First was the boiler which was cut to length and then opened up to give the firebox and also to go over the gear tower. I then cut a couple of pieces of brass 6mm by 2mm for the sides of the footplate. The top of the footplate was cut from brass shim with a sharp knife. I then discovered that the way the mech was set up meant that I was going to have to make the footplate part of it. I was also only going to be able to solder one side to the shim and the other would have to be glued in situ.

And heres where we are up to (with the Cb for a size comparison). The boiler is a bit smaller than the photo makes it look. I've also cut out the cab sides after sweating some brass together.