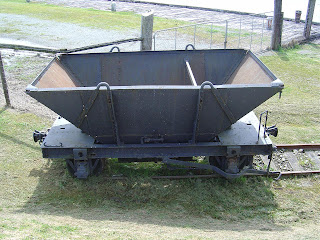
Further to my observations of the prototype last weekend, I have done some further experimenting.
On the left is Tamiya Nato brown, and on the right Vallejo leather brown. The Nato brown is not supposed to be that red, which is quite annoying as the colour on the lid that its supposed to be is pretty much what I wanted.
Its one of those annoying things that when you go into a model shop to buy paint, you are choosing based on colours that you can look at that are at best approximations of what in the tin/bottle, and you have to assume that exposure to light has not effected the display panel in any way. For this I am a fan of Humbrol who at least paint the tin lids so that you know what you are getting (well, mostly). Tamiya can be a bit hit and miss, Vallejo tend to be quite good 9but the paint does have adhesion problems which is another story), and Games Workshop will not be getting any money out of me until they ditch the printed colours on their displays, which just seem like they are asking for trouble.
And the answer? While its a bit dark, I prefer the leather colour and will probably stick with it. the Vallejo paint is also very easy to scrape of the rails.
Saturday, October 30, 2010
Friday, October 29, 2010
West coast update
Following on from my trip down south, I have recieved the following information from a well known Chch modeler.
Saturday was lovely and we spent all day at Rewanui. No problem getting up
there at all. Although we walked, the road is passable to a standard car
for 99% of the way. There are one or two sections that have washed out and
been repaired a bit roughly. I'd get a car up there, but you'd want a bit
of clearance. Although the entrance is gated, I'm guessing you'd get
permission easily enough as there is no reason not to give it.
There's very little to see railway wise. Its just a nice walk. Of course
we wanted to get a scenic flavour for the layout and it was good for that.
For the record the following are left:
* Tunnels 1/2
* The formation with the odd bit of centre rail in the bush if you look
hard.
* bridge 20
* Up to the first pier of Bridge 18 - but largely buried.
* The pattern shop
* Another building on the hill I've never seen. The roof is obvious, but
there is no clear way to it and I always forget to look as you cannot see it
from up close.
* Some power poles
* Spark and Party bins
* lots of tubs
* Some bin steelwork.
* Stacks of sleeper and rail embedded in gorse.
* The station and yard proper has completely gone. If you look really hard
you can find some platform edging.
He also has some photos up here which as an added bonus show Barry Fitzgerald in his natural habitat.
Wednesday, October 27, 2010
Wots that colour then?
While on my travels, I had the presence of mind to take some track photos for possible 'in the future' detailing (assuming my inner fine scaler is an excellent escapologist and can escape from the chains hes locked up in).
I had been wondering about what colour to paint my rail, and this has not really helped much. the mainline is coloured with brakedust etc, wheile the loop behind it is the more common 'rust' colour. I'm also wondering if I should paint the sleepers a different colour (Hmm, he's better than I thought...)
Tuesday, October 26, 2010
Tagged: finishing that ZH
DB says: Its about time I finished off that ZH...
A while back I stumbled upon AA654's photostream on Flickr, which now that I type this, makes me wonder what we ever did before Al Gore invented the world wide internets. I never used to be able to pick up this sort of thing on the wireless.
AA654 (a modeler I'm betting) has some really neat side-on detail pics of wagons in 'real-life' rather than 'ex-works' condition, and I hope he (or she (but he looks like a he)) doesn't mind if I borrow a few of them for this blog post and a ZH or two. I know that most modelers refuse on principle (or principal if you are a headmaster) to graffiti up their stuff, preferring to support up-and-coming taggers by knifing them, but the unfortunate reality is that most of the ZHs seem to carry unofficial paint schemes, and that's what I had in mind for this one. Being open minded and all. And I left my bayonet in my other trousers.
A little copying and pasting later had me printing a few ZH sides out, figuring this would make finishing the model super easy with a single decal containing Tranz Link logos plus graffiti plus built-in weathering. Ta-da:
Well, that looks like shite doesn't it. While the ALPS printers are pretty good at printing vector-drawings of logos and things onto decals, they're not that good at doing full-colour bitmappy style prints (remember my Kiwirail logo on the front of DX5293?)
After a bit of internet sleuthing, it seems that this dotty pixelated gritty grottiness is just the way things are with this printer and/or the XP drivers. So plan B had me thinking about removing the weathering from the pictures (which was where the graininess was showing up most) and just hanging onto the graffiti/logos. And then later I could weather over the top of them.
So after an afternoon at a bar eating nachos, drinking mimosas, watching sports I don't understand ("Hey, that was a forward pass!") and playing in Photoshop I was left with:
Hmmm, that looks a bit more promising. Which is a good thing as I'm out of decal paper...
And a little weathering later:
Yes, I know, there are different wagon numbers on each side for variety. I washed some brown on the ends and dark browny/back on the underbits, including the very bottom of the doors and then sprayed some 'dirt' on the top and sides.
The sprayed stuff probably should be a little less red and a bit yellower next time; I need to get into the beautifully lasered handgrabs on the door sides with some dark wash; and I might reapply some of the graffiti decals over the weathering if I can be bothered, to make it look fresh.
So the rating still stands: the laser cut ZH, while being a little scary and requiring some post-melt remediation to ends and unders, builds up into a very nice model for those into the modern scene.
Now to crank out a few more...
Send Evan some money to get one in its current state. If I have any unused decals leftover, I'll offer them up on the blog and/or nz120.org classifieds.
A while back I stumbled upon AA654's photostream on Flickr, which now that I type this, makes me wonder what we ever did before Al Gore invented the world wide internets. I never used to be able to pick up this sort of thing on the wireless.
AA654 (a modeler I'm betting) has some really neat side-on detail pics of wagons in 'real-life' rather than 'ex-works' condition, and I hope he (or she (but he looks like a he)) doesn't mind if I borrow a few of them for this blog post and a ZH or two. I know that most modelers refuse on principle (or principal if you are a headmaster) to graffiti up their stuff, preferring to support up-and-coming taggers by knifing them, but the unfortunate reality is that most of the ZHs seem to carry unofficial paint schemes, and that's what I had in mind for this one. Being open minded and all. And I left my bayonet in my other trousers.
A little copying and pasting later had me printing a few ZH sides out, figuring this would make finishing the model super easy with a single decal containing Tranz Link logos plus graffiti plus built-in weathering. Ta-da:
Well, that looks like shite doesn't it. While the ALPS printers are pretty good at printing vector-drawings of logos and things onto decals, they're not that good at doing full-colour bitmappy style prints (remember my Kiwirail logo on the front of DX5293?)
After a bit of internet sleuthing, it seems that this dotty pixelated gritty grottiness is just the way things are with this printer and/or the XP drivers. So plan B had me thinking about removing the weathering from the pictures (which was where the graininess was showing up most) and just hanging onto the graffiti/logos. And then later I could weather over the top of them.
So after an afternoon at a bar eating nachos, drinking mimosas, watching sports I don't understand ("Hey, that was a forward pass!") and playing in Photoshop I was left with:
Hmmm, that looks a bit more promising. Which is a good thing as I'm out of decal paper...
Straight outta the South Auckland paint booth
And a little weathering later:
Yes, I know, there are different wagon numbers on each side for variety. I washed some brown on the ends and dark browny/back on the underbits, including the very bottom of the doors and then sprayed some 'dirt' on the top and sides.
The sprayed stuff probably should be a little less red and a bit yellower next time; I need to get into the beautifully lasered handgrabs on the door sides with some dark wash; and I might reapply some of the graffiti decals over the weathering if I can be bothered, to make it look fresh.
So the rating still stands: the laser cut ZH, while being a little scary and requiring some post-melt remediation to ends and unders, builds up into a very nice model for those into the modern scene.
Now to crank out a few more...
Send Evan some money to get one in its current state. If I have any unused decals leftover, I'll offer them up on the blog and/or nz120.org classifieds.
Monday, October 25, 2010
On tour
I've been out and about this weekend, as I had to travel to Kaikoura for a work meeting (outside my normal job, so actually interesting). Again, I had access to 'train control' for live updates as to what was going on. Unfortunately I reported my original leaving time incorrectly, as so started receiving messages while I was still the wrong side of Havelock.
Thanks to the wonders of modern technology we can get an insite into the directed train chasing process.
'700/701 running, 734 heading north through Kaik about 1300, crossing 701 Parikawa. 700 due through Kaik about 10:00.'
'Both trains have their GPS switched on so should be able to give updates as required.'
'700 in Seddon'
'700 in Blenheim'
'700 Tuamarina, 734 Parnassus'
It was about this point I was able to reply. 'In Blenheim buying beer' ( In my defence I would point out that the Springlands fresh choice has possibly the best selection of beer in the south island. A pity its been sold to new owners).
Another slight technical hitch with this process is that when one receives a text message, one must pull off to the side of the road to read it, unless one has a left seat navigator type chappy. Thus I ignored these messages until I was actually in Blenheim. It seemed rather pointless to know the location of a train if one was 40km away from the railway line itself. I also feared getting stuck behind a camper van full of tourists on the hills. There is no worse road in the country to be stuck behind a camper van....
Back to the main story. Having missed the northbound express, the only other thing running was 734 heading towards me. I figured I'd meet it somewhere north of Kaikoura, but was not quite sure where. I then just headed south hoping to find a spot with a wee bit of planning.
'734 Oaro'
Hmmm, time to get out the map, where the hell is Oaru?
OK, way south of kaikoura, should be fine.
'701 away from Picton, 734 Kaikoura'.
At this point I'm between being actually able to see the railway line, and am starting to wonder if its all going to go pear shaped.
"701 Spring creek , 734 Hapuku crossing looks to be at Parikawa south of Clarence, and I'm off out for an hour...'
WTF? And where the hell is Hapuku? Ahh at least its on the map...
Hang on, Parikawa is north of Clarence. Does the Kiwirail map match the one sitting on the passenger seat?
Ok, so after all that, the most essential message was the first one...
Eventually I get to Parikawa, which is a nice circle on the map, but has no built up area of any sort. I still think they should hang cartographers. I continue driving south until I spot a likely spot for a picture. this involves driving down a farmers track with no space to turn round.
Since its by a stream there are some mounds of earth to stand on to get the standard 3/4 front on shot
Not a great shot. I guess that the 'gun' photographers have those sub machine cameras taking 10 shots a second, and they get to pick the shot with every thing composed right. I can't even see the screen on a bright day.
However, since I'm trying to start a trend, here's my signature 'going away shot'. Remember you saw it here first.
(I am starting to wonder however, why Kiwirail drivers have the need for 2 home distilling units next to the locos?)
Unfortunately I don't think that the 'pictures of the FRED'will take off.
So after the train chasing for the day, and with nothing else to try to catch, I had to do a couple of hours work, oh and eat a crayfish dinner. Bugger...
Next morning on the way home.
North end of Kaikoura yard. It sort of made sense at the time....
Sunday, October 24, 2010
Son of "DFT in a day" - part 2
Perhaps "DFT in a year" may be more appropriate.
And its not really the DFT this time either, well not the laser cut bits anyway.
After our Long Island branch kicked off with the impressive DX bogie sideframes, it was decided we had better follow suit with the DFT version (or DF if you prefer).
So after a bit of mucking around with CAD (and a few emails and some gold bullion later) we have some results.
These are designed to drop on top of the sideframes on the Kato SD40-2 using the same "file flat" method as Kiwibond's DX sideframe replacement.
As for cost we are potentially able to get it down to approximately $15-$18 per set if enough sets are ordered (I haven't done the exact maths as yet).
Anyone interested?
And its not really the DFT this time either, well not the laser cut bits anyway.
After our Long Island branch kicked off with the impressive DX bogie sideframes, it was decided we had better follow suit with the DFT version (or DF if you prefer).
So after a bit of mucking around with CAD (and a few emails and some gold bullion later) we have some results.
These are designed to drop on top of the sideframes on the Kato SD40-2 using the same "file flat" method as Kiwibond's DX sideframe replacement.
probably use sideframes as compensation
As for cost we are potentially able to get it down to approximately $15-$18 per set if enough sets are ordered (I haven't done the exact maths as yet).
Anyone interested?
Saturday, October 23, 2010
DB Rejoins the Druids Guild
DB says: Well for what it's worth, I signed up for what might be my third stint at NZ Model Railway Guild membership this week using the new website (much easier than sending a cheque and all that nonsense) and am looking forward to receiving my journal with CE wagon plans in it.
It's pretty easy to sort out a login and join up, and once you're in, what else is inside? There is a list of upcoming events, a fledgling photo gallery, the ability to buy Guild stuff, including back orders of journals which is pretty nicely done, click on a cover pic to see the articles inside or use a searchable list of articles in excel or PDF format.
It's all a work in progress I assume but a very good and well presented refresh of the Guild's online presence. There is no forum on the site and I (also) think it needs one - firstly to give people a reason to visit more than once a year, and more importantly, to strengthen the 'brand' of the Guild by building a community around the isolationist modelers of the NZ railway scene in a way that a periodic magazine and conventions can never. Not that they don't have their own role to play, but they can't build that instant access to information and fellowship across distances that forums can.
At the moment, the internet for the modeler of railway things New Zealandy is very fragmented with NZ120.org, several blogs/sites, various Yahoo groups and mailing lists providing sustenance to the unwashed masses and I feel the Guild should try to be that centerpoint. Maybe Wes could extend the NZ120 forum with boards for the 'other' scales and that could be plugged in...?
Almost all the the site content seems accessible whether you are a member or not, so why join? Well the Journals I guess, discounts off purchases might be another. If they build a forum or a classified ads section they can't make that for members only - that's not the way the internet works. Still I'm sure someone will come up with value-added services the site could provide for members. There have been so many nice modern image plans in the journal over the last 20 years that maybe it's time for a low-cost, low-effort Cedric Green/Fred Lee style hardcopy planbook for those of us who don't model steaming lumps of iron and wood. Photocopied and stapled with a cheap cover will be fine.
Anyway, I'm in. For now anyway. You can be too at http://nzmrg.org.nz/
Friday, October 22, 2010
The Quarterly review pt II
Well, I've been a bit sidetracked in the last week, but finally tonight I get on to review the Railfan.
The Cover features the new Dl class locos. Opinion I currently divided in the peanut gallery on the looks. Personally I think its a 'butterface ( as in 'nice body,....). The addition of the superhero mask around the windows is an interesting touch.
Right, onto the features. First up (after the sizable 'whats happening' section) is another photo essay, This time round its the Otira bankers (featured here last week). I must admit that these are still growing on me. They do make interesting reading. I wonder if Drew should do one on the 'milkies'?
The best one (for me anyway) is a collection of photos of mostly Ka's in the North island in the 1960's. This has 3 good pictures of the loco depot area at Paekakariki (maybe I need to contact the photographer for more info).
Last up is the ongoing series on New Zealand carriages. This has been going on for quite a while now (or it seems like it) and we are now up to 1884 stock, so there might be a few more issues to run yet. I find these interesting looking at the historic photos and what else is in the photos is often more interesting than the subject.
I've just noticed that there are only 3 feature articles, but this is more than made up for by the sizable amount of modern railway info present.
Wednesday, October 20, 2010
Trackmaking XIX
Well, there hasn't been much progress on this in the recent past. this was due to my complete inability to drill holes in sleepers to make throwbars using my Spanish wobbly drill (its like its spent the evening drinking margaritas before I get to use it). However a visit to Teach's workbench on the weekend and the use of a far more reliable (and possibly bourbon sipping) model made things all better.
I could then turn my attention to completing the points on module no 2. First up was the scissors crossover.
After adding the throwbars in, I could then go about tweaking some of the rails to get the clearances right for NMRA standard wheels. I only had to make some minor adjustments until I could push an Ed backwards through the points.
The next problem arose when my 2 year old soldering iron decided it had been hot for just too long on Sunday night, and decided to move to permanently cooled mode. Even trying to trick it by trying to touch it with my hand failed. Thus I was forced to take a trip to Dick Smiths to purchase a replacement. I managed to replace my old 60W with a 40W and so far it seems to be doing fine (ie not charring stuff like the old on did)
I could then get on with adding the brass end of module pieces that will hold everything in place till hell freezes over.
I've also discovered that I'm going to have to fudge the location of the outside inspection pit somewhat as examining photos reveals that it would run across the baseboard join, which is not really that ideal.
Tuesday, October 19, 2010
Its Alive!!!!
The all new NZMRG site is up and running.
can someone who is actuaklly a member sneak in behind the locked door and tell us whats there please?
Is there a user forum?
can someone who is actuaklly a member sneak in behind the locked door and tell us whats there please?
Is there a user forum?
Monday, October 18, 2010
Its all true, M'lud...
Am_Fet writes:
While wandering through the gargantuan web site that is FastTracks, I found that the chief purveyor, Tim Warris, has his own blog where he details what he is up to while modeling his CNJ Bronx Terminal layout. I have yet to delve too deeply into his blog, but the first up post was a bit of an eye opener.
He decided it was time to add the first building to his layout and chose the engine shed. Being the owner of a laser cutting business, it made sense to draw it up and cut it...which is what he did:
So alls well that ends well...but the bit that really hit home was his final comments:
"I often hear from modelers how great it must be to have a laser cutter, and well, it is! However, it doesn’t make the process of building models any faster, in fact it is much, much slower. To design a structure, with all the nuances of design, it takes a LOT of time. Far more than most people imagine. The advantage of the laser is that the parts produced, once the design is complete and tested and tested and tested, are very precise and go together easily. The finished models always look pretty good, if the design is done correctly. But it is by no means an easier or quicker way to get a model, just more precise."
And thats exactly what I'm finding, but until Tim articulated it so well I hadnt really thought of it. And thats the honest truth.
Saturday, October 16, 2010
Getting My Point
Am_Fet scribes:
My phone seemed to spend most of Saturday informing me that people were trying to get in touch via txt message. Hoping beyond hope that it was Courtenay Cox admitting she'd made a dreadful mistake picking up with that David bloke and she'd love to have me back (complete with suggestive photos), I was devastated to find it was just a bunch of drunken workmates reminding me that they were out "gooning" (The Royal and Noble Art of Chasing Trains) and I wasnt....luckily without the same kind of photos.
One txt was worth replying to, however...Cabbage had finished with his preliminary investigations into his "FastTracks" purchases and was ready to pass them on (Well, okay...I may have been badgering him for weeks on this...)
So this is what I grabbed from his place Saturday evening in return for a box of S scale stuff that I will never need/use/finish:
The parts are for an N gauge #7 point (enough bits to make 5) and for those who have spent the last 5 years under a rock/listening to Radio New Zealand, a quick rundown on the items supplied by FastTracks. Top left is the filing jig to create the correct angles on both the frog and point blades with the complete assembly/soldering jig below. The bag is full of PCB sleepers (to be cut to length) and to the right is a stack of laser cut wooden sleepers that get glued to the structurally completed point towards the end of the construction sequence.
I've just spent the last 45 minutes watching the construction videos here and very well done they are too....almost makes it look easy. But what in the name of Mary MacKillop is "Soddering"?? Coming from Lower Hutt with the unpleasantness in the hobby in the recent past you can understand my unease...
So the next step? Trying to smuggle all of this into work so a lunch hour can be devoted to "giving it a crack". The bits shown in the photo should prove easy, but its the metre lengths of code 55 rail I'm worried about. I might have to hide them inside a high powered rifle, or maybe with a Samurai Sword so they arent as conspicuous and embarrassing.....
Oh, and Courtenay? That boat has well and truly sailed, luv...
The Quartely review.
Finally, I get time to sit down and review the magazines from the last quarter.
The Journal (I should stop calling it the local rag but....)
First up there is an article on building a bridge scene for the one track minds modular group. This is a good article from one of the best scenery wonks in the country and a lot of his ideas and techniques can be ported across a variety of scales. Why they hand spike rail though is a mystery to me....
Next up is in staling a sound decoder into an 88 seat railcar. again a good article, but I'm constantly amused by S scale modelers who claim that they have so little room to fit anything into their models. Poor babies (if theres any of you out there with sound decoders fitted a couple of photos and a write-up on NZ120.org would be good to see. Likewise the S scale A from cabbage).
We then lead into a G scale narrow gauge layout by Paul Napier. Some beautiful modeling but not really my cup of tea.
I get thrown a dog bone with Grant Fletcher discussing building an Ew. he gets to cheat by using SPUD type units under the floor, but his thoughts on building the tops will be read very closely.
The modern image people get thrown a chicken bone (possibly in the hopes that they might choke on it) with plans and detail photos of the CE coal wagons. I knew that they were big, but they are nearly 10' wide and over 12' tall.
The ongoing saga on Inagahua junction continues and we are up to the 1950's. some historical info here (driving a truck carrying cement from Golden bay to Inagahua, then down to Reefton for coal and back to Golden bay would be a long day today, let alone 60 years ago!)
Then we get some photos showcasing Mr Fentons modeling and design skills, the finale to the NZ120 saga (finally with the web addresses and again featuring David Weedons sublime modeling skills), and the reviews and new products section.
Oh and the waste of space that is the area group reports. This should all be on the new all singing all dancing NZMRG website, but as of this morning its still 'Website coming soon'. There are some coding issues to deal with I believe.
I was going to write the review of the Railfan, but time has run out for me and the kitchen beckons, with the lady of the house demanding fried bacon on french toast.
Friday, October 15, 2010
Bit of a hickup
Sorry that things have been rather haphazard posting wise in the last week or so. Real life is intruding a bit and my mind is other places. Things should get back to normal this weekend. I have the quarters copies of the journal and the railfan to review, and I must start to do something for the layout in a boxfile challenge which currently will probably involve code 40 track to start with.
I have some plans for a smallish country station, but I'll see what pops out of my fertile mind (possibly cos its full of useless s**t).
Wednesday, October 13, 2010
ZH (H for "Here we go again")
Am_Fet writes:
After the last prototype run of the ZH, and following numerous soul searching and discussion sessions with the Inner Circle (SSAE for an Application Form), it was decided to change tack a tad....well, not quite so much changing tack as selling the yacht and buying a fizz boat.
I don't think we'll ever be able to fully get away from the issues of melt that seem to have stymied us, especially on the ends. The latest plan involves RP'ing up the ends for casting (possibly brass) followed by a resin one-piece casting for the body (but using the laser cut components for the master).
Sounds a tad easier to assemble for a start.
Cabbage has kindly donated this to the cause:
So the next thing will be for the file to go to MG for a quote.....and me rejigging all my estimates for when it might be ready.
Oh Darn...."
Tuesday, October 12, 2010
Somethings missing
Its been a week since the Journals were posted out, and I still have yet to see one in the mailbox.
I've got a sneaking suspicion that I'm no longer a member......
Monday, October 11, 2010
In the mail
The nice thing about going away is coming back to a full mailbox. Apart from the bills (and no Journal envelope) there was also a small envelope from mr McHarg with the latest order of plates. Last night I set about putting the first ones in place. These were for the Ed's, and I've recieved 104 and 109 (I had numbered mine 107 and 110). So, guess which numbers are hardest to paint freehand?(well, not quite true, but 0,1 and 7 are the easiest)
Unfortunately the artwork for the distinctive makers plates is lost, so I didn't get those. Guess I'll be making an attempt to do it myself.
The photo dirama is backed with a photo from some website and is a black and white shot of the main street of Paekakariki in the mid 1950's. It looks a bit odd, but when I switch to grayscale I think it will be very effective (well, when the road is in place as well).
Sunday, October 10, 2010
The West Coast, then...
As well as the modern trains that still seem to run with astonishing frequency (and there is talk of even more coal being shifted in the next few years), there are also plenty of historical sites to visit on the coast. possibly moreso than any other region in the country.
First up on our way south was the last surviving single Fairlie in the southern hemisphere, R28.
Its now under cover and at least has a fence around it, but its still only a matter of time before it rusts away to nothing. Surprisingly enough, there is a mention on the information board of the ferrymead railways failure to secure it for proper preservation.
Next stop on the list was Brunner. The site has been reclaimed from the bush, and features a large suspension bridge.
Also present is the standard West coast historical railway site marker, a Q wagon. in this case a Q5. This photo was taken by the lady of the house (I am told I have to point this out).
Further south and the next stop was the Greymouth waterfront. Most of this area has been 'improved' with a flood protection wall/walkway but there are still some areas left further towards the river mouth.
This appears to be part of an old loading bank.
2 of the old coaling cranes still in place.
Again a collection of old Q class hopper wagons, in this case a Q4.
A pair of Q 11's.
A rusty La and another pair of Q11's completes the ensemble.
The wharf can be viewed (from a distance) from the other side of the river. its not a great view though.
While I didn't take any pictures, the railway station yard has been replaced by a Subway and several large shed retailers, and all that is left is a single track by the platform.
Further south at Elmer lane all that is really left of the large loco depot is the turntable. The roundhouse is behind the camera to the right, and is only marked by a outline of earth banks.
I didn't stop at Shanty town.
Traveling north a few days later and a stop at Stillwater gave a rake of Yd's. not that much to report but they are over 50 years old.
Moana station I commented on yesterday, but here is a shot sans trains. It is a very pretty location.
Further up the valley to Otira and again while the split level yard is largely intact, the old electric loco depot is no more.
Next stop on the tiki tour is Westport. The find here at the local preservation society was an L5 ex an O class hopper wagon. These were the original wagons used to move coal until replaced by the Q class starting in 1898. The building wasn't open for me to inspect
Last on the list is Deniston. this site has been tidied up quite a bit in the last few years. The top of the brake head has a collection of Q wagons again (incuding a Q1 about to go over the edge just out of shot).
Looking down the incline you can just make out middle brake. This is now off limits but I have walked in to the area 20 years ago.
So, other areas that I attempted to visit.
Rewanui is owned by Solid energy and there are big gates at Dunollie at the foot of the incline.
(UPDATE: wrong, see the comments section)
The old station yard there is used as the main site office. Rapahoe is hidden behind large piles of coal on the side of the road. Ngakawau is again behind locked gates.
The other thing that I noticed is that everthing railwaywise on the coast isn't really that far from each other (ie its much smaller than I thought). Dobson, Brunner and Stillwater are right next to each other, as are Rununga, Rapahoe and Dunollie. Its only 40 odd Km further down to Hokitika and about the same to Ross. Even heading back up to Reefton is only a short jaunt. Westport and Otira are 100Km or so from Greymouth as well.
Saturday, October 09, 2010
The West Coast, now...
I'm just back from a Week long trip down the west coast. to those of you living down there, sorry I didn't visit anyone, but we didn't really know where we were going from day to day.
We started with a couple of days at Franz Joseph, then drove up to Moana (ostensibly for the fishing...)
At Hokitika a wander down some back streets gave these pictures.
Then it was on to Greymouth, and a visit to the old Elmer lane loco depot, where I found this rake of Yj's
We then headed to Moana, on the way finding this Coalie was sitting on the new Cobden bridge.
A pleasant drive down the scenic route lead us to Moana in the mid afternoon. A quick drive round the lake looking for good fishing spots was unrewarding as the lake was up about 3' from normal, so the best fishing was from holiday cottage front lawns.
Pausing at the Te kinga bridge, I figured I'd ring 'Train Control' to find out what was about. 'Theres a westbound train due at Moana in 15 minutes and another right behind it' was the news. Fortunately, nothing on the west coast seems to be far from each other (more on this tomorrow in the second post in the series) and in 5 minutes we were back at Moana station. The lady of the house decided it was all going to be too exciting so went down to fish off the lakefront. Now, I'll just comment here that the Moana station area would have to be one of the most picturesque in the country thats still in reasonably original condition.
10 minutes later a low rumble signaled the arrival of the first train. Oddly enough it seemed to be exporting west coast air back east of the main divide. I didn't know things were that desperate in Canterbury.
I decided to move position for the second train and moved east of the station. While waiting I observed that the local track inspection crew was hard at work.
I was just starting to wonder what sort of time period 'right behind' was in railway speak, when the signals reset to green and a horn indicated that the arrival of the second train was imminent.
After this we retired to the lodge for a fish and chip dinner, followed by another dusk fishing expedition. After a wander around the lake we wound up back by the station which seemed to be the best fishing area at the moment. 'Are you going to take the camera just in case there is a train?' 'No, there won't be any more trains for a bit...'
50M and 1 minute from the car and I was proved wrong as another coal train rolled through the station. I had given up trying to capture this when it stopped at the eastern signals. A crossing!
I had some time to take some shots in the fading light in a vague attempt to be arty-farty.
Unfortunately the crossing train was only a Dc running light. As the night closed in I got this last shot...
(and apparently I missed another train while eating tea, which would have been 4 trains in about 2 hrs)
The next morning again dawned fine, and we decided to drive up to Otira 'to have a look'. Again I texted 'train Control' to see what was moving.
'F**K all', was the reply,'theres an evacuation exercise in the tunnel.'
So, with clear skies all the way to Arthurs Pass (A rarity I'm informed), theres not even a jigger moving. Whatwhatwhatwhatwhatwhat?
The only thing to see at Otira was the 3 bankers sitting in the yard.
I also got a shot of the new fueling stand..
And the more jury rigged old fueling set up.
(or, is this the sanding tower?)
We then drove to the top of the pass (I have no idea how you would get a mini up this, my car struggled) and got some Kea shots.
Several days later on the way back from Karamea, we found this pair of locos at Sargent's hill just north of Westport.
Thus endith the modern section of this trip.
We started with a couple of days at Franz Joseph, then drove up to Moana (ostensibly for the fishing...)
At Hokitika a wander down some back streets gave these pictures.
Then it was on to Greymouth, and a visit to the old Elmer lane loco depot, where I found this rake of Yj's
We then headed to Moana, on the way finding this Coalie was sitting on the new Cobden bridge.
A pleasant drive down the scenic route lead us to Moana in the mid afternoon. A quick drive round the lake looking for good fishing spots was unrewarding as the lake was up about 3' from normal, so the best fishing was from holiday cottage front lawns.
Pausing at the Te kinga bridge, I figured I'd ring 'Train Control' to find out what was about. 'Theres a westbound train due at Moana in 15 minutes and another right behind it' was the news. Fortunately, nothing on the west coast seems to be far from each other (more on this tomorrow in the second post in the series) and in 5 minutes we were back at Moana station. The lady of the house decided it was all going to be too exciting so went down to fish off the lakefront. Now, I'll just comment here that the Moana station area would have to be one of the most picturesque in the country thats still in reasonably original condition.
10 minutes later a low rumble signaled the arrival of the first train. Oddly enough it seemed to be exporting west coast air back east of the main divide. I didn't know things were that desperate in Canterbury.
I decided to move position for the second train and moved east of the station. While waiting I observed that the local track inspection crew was hard at work.
I was just starting to wonder what sort of time period 'right behind' was in railway speak, when the signals reset to green and a horn indicated that the arrival of the second train was imminent.
After this we retired to the lodge for a fish and chip dinner, followed by another dusk fishing expedition. After a wander around the lake we wound up back by the station which seemed to be the best fishing area at the moment. 'Are you going to take the camera just in case there is a train?' 'No, there won't be any more trains for a bit...'
50M and 1 minute from the car and I was proved wrong as another coal train rolled through the station. I had given up trying to capture this when it stopped at the eastern signals. A crossing!
I had some time to take some shots in the fading light in a vague attempt to be arty-farty.
Unfortunately the crossing train was only a Dc running light. As the night closed in I got this last shot...
(and apparently I missed another train while eating tea, which would have been 4 trains in about 2 hrs)
The next morning again dawned fine, and we decided to drive up to Otira 'to have a look'. Again I texted 'train Control' to see what was moving.
'F**K all', was the reply,'theres an evacuation exercise in the tunnel.'
So, with clear skies all the way to Arthurs Pass (A rarity I'm informed), theres not even a jigger moving. Whatwhatwhatwhatwhatwhat?
The only thing to see at Otira was the 3 bankers sitting in the yard.
I also got a shot of the new fueling stand..
And the more jury rigged old fueling set up.
(or, is this the sanding tower?)
We then drove to the top of the pass (I have no idea how you would get a mini up this, my car struggled) and got some Kea shots.
Several days later on the way back from Karamea, we found this pair of locos at Sargent's hill just north of Westport.
Thus endith the modern section of this trip.
Subscribe to:
Posts (Atom)