Monday, April 06, 2009

Awwww, chute. (DX part 2)

When we last met, the Dixie was quite off her face, so this was quickly manufactured on-site using the plan as a guide and attached with copious amounts of filler. For thirty years I’ve read about Squadron Modeling Putty in the British magazines and purchasing some a few years ago was quite a revelation. I think mine is from Testors or some other brand. It’s the one with the “this product contains chemicals known to the State of California to cause cancer” label, so don’t eat it all at once.

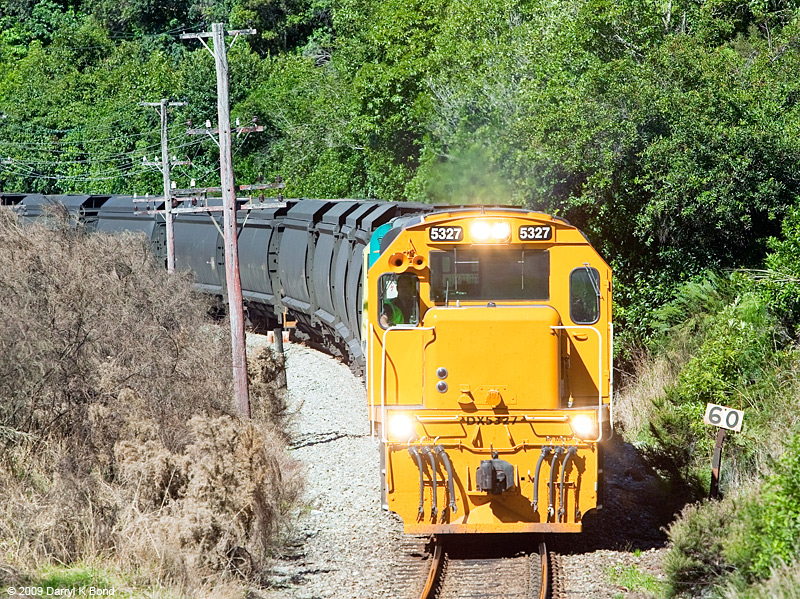
DX cabs to a simpleton like myself, are pretty much curvy on top with the two angled side pieces. So I filed the cab stolen from the Chosen Scale shell slightly to suit. Phase ones (the batch with lower numbers) have the black rubber headlight surrounds rather than the cast light fittings (although all the rebuilds over the past few years have been to phase 2 specs), and those that have been fitted with replacement cabs in recent years have large tinted side windows that replaced the previous three windows in the old cabside and a little lip across the top of the front (see the shadow beside the numberboards http://www.kiwibonds.com/2009FebNZ/F51T5233.jpg ). I used superthin plasticard to create a top surface with the lip. A lot more effort than the results justify! The main spotting feature between the phases used to be the dynamic brake grilles behind the cab (side and roof differences) and the front sandboxes from memory. Enough already. On with a nasty pic of a nasty cab front. Bruce Patterson's superb nose lives on, as do the headboards from the CC shell.


For something different I thought I’d have a go at a modern coal route DX, which meant fabricating the side suckboxes, starting with the forward engine intakes. Although the first chutes that were made almost 20 years ago in the blue-DX days were simpler, the newer ones are full width on the offside and a little narrower on the driver’s side except at the bottom, where there is also a small round fan grille. I made mine from Plastruct square rod and sheet, and they were a bit of a pain to get nice and tidy. Both sides also have grilles on their main faces now to allow air to come from the side (normal) or from beneath the running board in the Otira tunnel. Mine came from the Dash-8 shell and yes, I did cut one a little short…. Rear chutes were made from square rod with some slightly-too-tall side flares, filled with the magic putty.

Note the rear grilles blacked out with a marker just in case my impatience deems the mesh should be fitted early.
The roof was next. I filed it to give a slightly more rounded profile on the corners and PVA’d paper rectangles (some sophisticated techniques this week folks!) in place to represent the panels as is clear on the pics. In the pic below, you can see that I carefully used a drill bit to craftily represent the small fan grille on the lower part of the driver's side air chute.
Finally, and rather absurdly, I built an exhaust stack with superthin ribs of plastic sandwiched between thicker ones. All was going well until I over-glued one of the ends and melted some of my ribs on one end. Dammit. Still, I think it worked out quite well. Close enough for Government work. Hey, that phrase is valid again in the KiwiRail era

Next edition should cover how not to paint and handrail a DX, so tune into our next exciting episode. Same Bat time, same Bat channel.


Sunday, April 05, 2009

It is alive!

Major milestone today, probably the most important one for the whole project. The chassis is together and it moves under its own power.


the lethal spaghetti was a bit of a challenge; mostly finding bits of wire that were flexible enough to pass between the 2 cars. I'm also going to have to do a bit of insulating on the connections to the bogies at some point. Judging from the wiring I think that the detailed interior might be out.


The motor bogie mount has come out pretty much as I had intended it. Its about as simple as one can get and even looks quite tidy. It needs some weight in the gap at the front of the bogie, but still manages to pull the whole model back and forward on the test track. It even makes it round a 15" radius curve in one direction. This will all change when the top goes on though.

A Genetically Engineered GE

OK, so it would seem fairly obvious that I should put some sort of DX top on my new DX chassis, especially as I’ve spent some time hunting the real ones out on the safari plains of the Otira valley recently.

Feeling a little lazy, I reached into my box of dusty 10 year old bits and to my surprise found two cast resin DX tops. One may have been an ancient creation of the Druffmeister, so I’m going to gloss over this so that I might continue to frequent this site. Let’s just say that its graceful arch made the Hunchback of Notre Dame look like the straight man here. The other one was this gray number that may well have been made by Cross Creek Models a long, long time ago.
On the plus side, it’s nice and straight, matches the blueprint, and it certainly looks DXish from four feet away, or in this terrible picture (sorry about that), but applying a more critical eye to it… The top of the nose could probably be fixed with some sanding, but the cab is more troubling. The sides are perfect, but the roof is too tall, which translates into strange angles and a cab front profile that looks more Chinese GK than Dixie to me. Hey, maybe that’s what the Dalian DKs will end up looking like. The long hood is well proportioned and nice and square but it‘s letdown is in some of the panel detailing, especially the mesh grilles. The hood doors are unusual, but I reckon they’d look ok painted up. The frame, headstocks and steps look fine. Overall, this is probably a good place to start DXing from.

So lets put some lipstick on these pigs. That’s a bit harsh. Make a polyester purse from a pair of sow’s ears? Hmmm....

I began by carefully shaving off the raised details that I wanted to replace from the back of the long hood with sandpaper stuck flat to blocks of wood.

Next up, I pruned off the nose, cab and forward section of the long hood containing the dynamic brakes with a knife and a razor saw. Rather than rebuild the dynamics grilles and the panel detail below, I thought I’d steal that section, as well as the cab and nose, from the Druffster Top. Straightened out a bit of course. I did want to update the cab sides with the latest single sliding window rather than the original DX 3-hole config, but while performing the cabinectomy, I ended up demolishing most of it, so ended up retaining only the roof and nose, both of which were pretty spot on. To this I started making new cab pieces from thin styrene, which was then backed with clear plastic.

And then....
(cliffhanger ending)

Saturday, April 04, 2009

Mmmm, Beer...

Finally tonight, we have something from my other favorite topic, beer. This one is more special than most due to its railway association. Richard Emmerson's late father George was a major player in setting up the Taieri gorge railway, and every year Richard releases a special beer on his dads birthday to celebrate his memory. Rumor has it that it was supposed to be Taieri gorge but there was a printing error in the first batch, and the name has stuck. It would be nice to have a beer named after oneself.


I think this is the only beer brewed in the country at present that has a railway link. The old brewery (now closed) in the Lower Hutt station made 'Stoker dark' but this is going back 15 years or so.
Right, off to make my wife a Margarita, before I get a Fat lip, which is actually the name of the beer I'm drinking this evening courtesy of Founders brewery, which is the best local brewery by a wee margin at present. Plus they have a great beer garden at their brewery where you can watch the trains run past from on an open day)

So who am I today?

Being a somewhat isolated scientist I tend to try to keep up with the 'real world' ( if there is such a thing, then just where am I at the moment?) by reading a selection of blogs online. In the comments section you always see the same names posting stuff ( sort of like here really). last week several of the blogs i look at occasionally turned out to have been written by the same person. If you go here you can see that this person managed to create 6 different online personalities. Now you, dear reader, like me probably find just 1 is enough to manage most days. Also, where the hell they find the time to keep 6 blogs going while having a husband, kid, and an academic job is quite beyond me. Maybe sleep is optional or something.

I suppose I should probably comment at this point about having an 'online' persona and a real life one. Writing this blog under a pseudonym means that I write things I probably normally wouldn't in real life, even though most of you know who I really am. Likewise I know who most of the regular commenter's are (posting under anonymous and signing your name is not a great plan to keep things secret).
If anything, I should have chosen a cooler moniker to start with shouldn't I. Show's how much advanced planning goes into this whole setup doesn't it :v)

Off the high horse.

Its been suggested that I regard low melt solder as an invention of the devil (though how he discovered it in a hot environment like hell is anyones guess. Maybe theres a special spot in hell where modelers are forced to try to assemble white metal kits). It requires some special kit ( ie a controllable temp soldering iron) that my 'make models with sod all tools' approach finds somewhat alien. I've therefor made the attempt to put together the railcar using a variety of glues; superglue for tacking things together, and 5 minute alraldite for strengthening the bonds. this has worked fine up untill this morning, where my 2 part mixing skills seem to have completely deserted me. the glue is brand new (special for this project) and its the Sellys stuff and not some cheap Chinese '5 tubes for a buck' product. Its all rather vexing, as is the problem of cleaning unset glue out of the recesses to have a second (and third) unsuccessful crack at gluing bits together.

However, its not all doom and gloom here at Chateau Dandruff. I have managed to get the 2 unpowered bogies more permanently attached to the underframe. A piece of 6mm wide brass had the holes drilled and then the bolts (care of Dick Smith electronics) were soldered into place. the holes in the underframe were enlarged and then everything was assembled. The center bogie required 2 bolts the correct distance apart, and required a bit of filing to get to fit in the gap in the GP-30 bogie.


Now that the bogies are on, I think it was the right decision to use the Gp30 bogies instead of those supplied in the kit. I have power pickup on all wheels, and they roll 'spurbly'.


The powered bogie is still unattached at this point, but I have a basic plan to achieve this. I'll build a brass frame on the chassis, and also one on the bogie, then just screw the 2 together and use some washers to get the height correct. there might have to be a bit of metal removal to get the whole thing round corners. I suppose I'll have to work out what the minimum radius is going to be.

Friday, April 03, 2009

Friday night layout idea

This in from amateur fettler. A shunting layout based on the Kingston wharf.


"Okay, here is one that is really worth modelling. Pic is by Barry O'Donnell from the March 97 Railfan. Layout is purely shunting, and I would use either the stern or bow of the Earnslaw as a view block on the right hand side. Left hand side view block would be willows or some other sort of tree. Figuring that a chain is a foot in 3/16ths, this could be modeled to scale in about 5 feet in Nz120"