Well some things are happening, even if it is slower than a snails pace.
I've finally got around to mounting the DFT sideframes onto a Kato SD40-2 bogie, notice I said "a bogie", the other one still has it's original N scale HTC sideframes.
See the photos below for a comparison of NZ120 and N scale sideframes, it makes you wonder how we suffered with the "N scale bogies are near enough" theory for so long.
Hmmm, I think I need Z scale couplers, and yes I know the cab area needs some remedial work, buts that's not what we are here to see now is it?
I have also done the preliminary CAD work for the mark II version, the plan here is to add the "rodding" between the axleboxes to the sideframe. This will hopefully allow more of the N scale sideframe to be removed and let the DFT sideframe sit a little closer to the wheels.
With any luck, one day soon, work related study may not take up so much time and things may even accelerate to a turtle's pace...
Wednesday, December 15, 2010
Monday, December 13, 2010
Confession time
Last night, after a week of not really achieving much, I decided to have a crack at connecting up the 2 modules and at least see if I could run a loco the full length of both of them. So, after hooking all the wires up, of course I had a short didn't I. so, i go back and check everything, disconnecting as I go. Eventually I think I narrow it down to one of the frogs. It seems like the gap isn't wide enough to insulate the damn thing from the rail behind it. I then absentmindedly check the frog to the point blades.
Hello.....
A closer inspection reveals that I have neglected to cut a gap between the frog and the point blades.This is a bit of a bugger as I've glued most of it down haven't I. I then further examine my handwork (or lack of it). The affect total rises very quickly to 6. I decided to fire up 'El Homicido' the mini drill. Ahhhh, I seem to have no cutoff disks left. Bugger
So, this week there needs to be a trip to buy some more discs, or I have to undo the PVA (water works wonders) and cut the gaps using the good old saw.
The moral of the story here is 'check everything on the bench first you slack bastard'.
Hello.....
A closer inspection reveals that I have neglected to cut a gap between the frog and the point blades.This is a bit of a bugger as I've glued most of it down haven't I. I then further examine my handwork (or lack of it). The affect total rises very quickly to 6. I decided to fire up 'El Homicido' the mini drill. Ahhhh, I seem to have no cutoff disks left. Bugger
So, this week there needs to be a trip to buy some more discs, or I have to undo the PVA (water works wonders) and cut the gaps using the good old saw.
The moral of the story here is 'check everything on the bench first you slack bastard'.
Friday, December 10, 2010
A Reader Writes:
"Dear MD,
I'm hoping you can help. I have a love of DA locomotives and Tank Wagons, but cant for the life of me make decent foliage (grass, trees, etc) that just screams "New Zealand Native Bush" to save myself. Can you help?
Signed,
Yellowed Thumbs"
Dear Yellowed Thumbs,
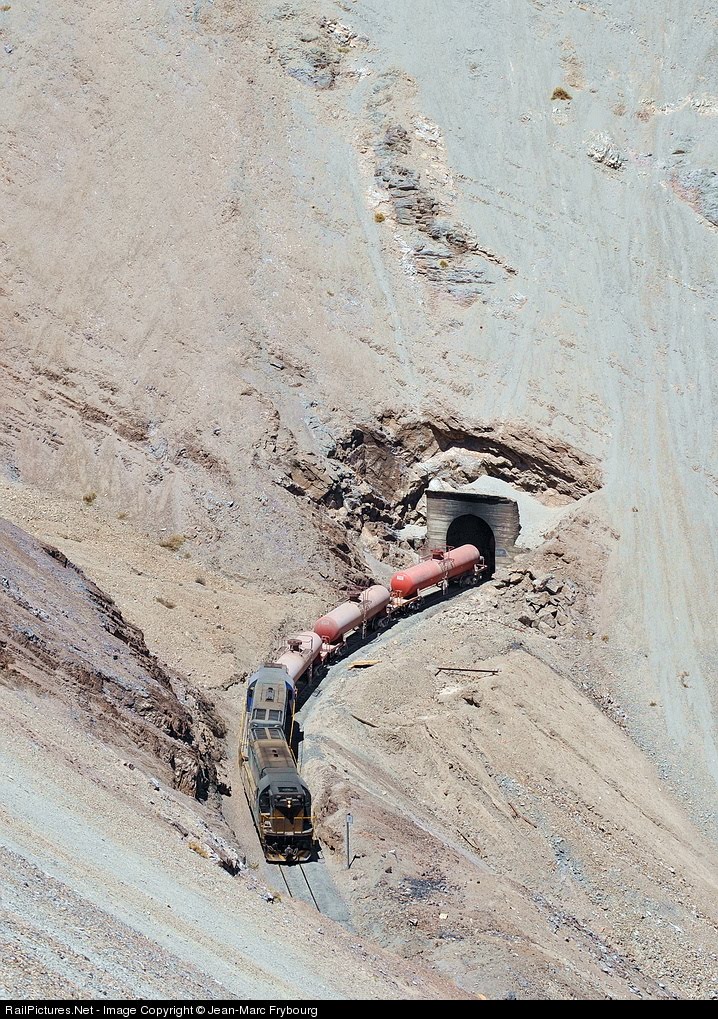
Youre modelling the wrong country. Can I suggest you try Chile?
Love,
MD.

I'm hoping you can help. I have a love of DA locomotives and Tank Wagons, but cant for the life of me make decent foliage (grass, trees, etc) that just screams "New Zealand Native Bush" to save myself. Can you help?
Signed,
Yellowed Thumbs"
Dear Yellowed Thumbs,
Youre modelling the wrong country. Can I suggest you try Chile?
Love,
MD.

Thursday, December 09, 2010
Aging Nicely
Am_Fet writes:
I was just looking at this pic while idly scrolling through “My Pictures” here at work, and it struck me how nicely the KR colours are aging. Sure, it’s the KR1 scheme…and it could just be the lighting…

But all the colours are starting to be evened out; the red is going darker, the grey is getting lighter, the yellow is getting that lovely “rust” look on the roof…
Yummy.
(Big thanks to Drew for his continued documenting of the South Taranaki Milk Scene)
I was just looking at this pic while idly scrolling through “My Pictures” here at work, and it struck me how nicely the KR colours are aging. Sure, it’s the KR1 scheme…and it could just be the lighting…

But all the colours are starting to be evened out; the red is going darker, the grey is getting lighter, the yellow is getting that lovely “rust” look on the roof…
Yummy.
(Big thanks to Drew for his continued documenting of the South Taranaki Milk Scene)
Monday, December 06, 2010
Pick up line
At the monthly support group meeting I had a chat with teach about putting some more pickups on some of his S scale steam locos. Several of his locos have the archaic 'one side of loco, other side of tender' system, which I think was invented as a medieval form of torture.
So yesterday I sat down with the first victim, an Online J. A first examination revealed a split frame mech, which was a pleasant surprise pick up wise. However since I was there 'we' decided to fit some more pickups to the tender anyway.
The first step was to solder some phosphor bronze spring wire to some thin PCB strips (well OK, sleepers). I then through a series of origami moves managed to fit the damn things and get them to work (well, rub without seizing the wheels up). Unfortunately we didn't have any thin flexible wire on hand (it was at home) so a full test was out of the question.
I should have got a photo....
One thing I did notice was just how much space there is on an S scale model to fit these sort of things. They are absolutely huge. I'm now looking forward to have a crack at some of the other locos.
So yesterday I sat down with the first victim, an Online J. A first examination revealed a split frame mech, which was a pleasant surprise pick up wise. However since I was there 'we' decided to fit some more pickups to the tender anyway.
The first step was to solder some phosphor bronze spring wire to some thin PCB strips (well OK, sleepers). I then through a series of origami moves managed to fit the damn things and get them to work (well, rub without seizing the wheels up). Unfortunately we didn't have any thin flexible wire on hand (it was at home) so a full test was out of the question.
I should have got a photo....
One thing I did notice was just how much space there is on an S scale model to fit these sort of things. They are absolutely huge. I'm now looking forward to have a crack at some of the other locos.
Saturday, December 04, 2010
Support group meeting
That time of the month again, and the last one for the year.
A good turn out again, but with 1/2 of the attendees not having done much. Still, summer isn't really good modeling time, its more 'try to get photos for modeling projects while convincing the wife that these locations are a good place to visit' time. This would be easier if the railways had put their yards in more scenic spots and not run down industrial estates.
Anyhoo. thanks to the chap I normally get a lift with, I was able to to take my first 2 modules out to show off my track making. Another chap brought along some pencil drawings that his father had done based on the photos of the Rimutaka incline in the October 2009 Observer. these are nothing short of stunning. The man is a true artist and I can't believe that he doesn't do prints.
Another local modeler/engineer had been reworking an S scale Ja Kit that had been assembled wrong. the model was well put together, but it wasn't 'straight'. There were also problems with the height of the cab. There were comments raise by another modeler that these faults had also been observed in a well known modelers assembled models, which had necessitated a lengthy and fiddly rebuilding process.
This sort of raises another question that I always ponder. what do we expect in a kit, and what are we prepared to 'live with'? From reading the British forums, the answers range from 'it must be perfect, but I'll never assemble it' to 'Its not even close, but if I toss away the chassis and most of the body and add a stack of other parts then it should be fine'. I've never really understood the second one, as surely a manufacturer who wants you to part with your hard earned cash should have done his homework up front.
the evening finished with a beer and some discussion on using servos to mechanise line side models ( A compressed air coaling crane was the intended target)
A good turn out again, but with 1/2 of the attendees not having done much. Still, summer isn't really good modeling time, its more 'try to get photos for modeling projects while convincing the wife that these locations are a good place to visit' time. This would be easier if the railways had put their yards in more scenic spots and not run down industrial estates.
Anyhoo. thanks to the chap I normally get a lift with, I was able to to take my first 2 modules out to show off my track making. Another chap brought along some pencil drawings that his father had done based on the photos of the Rimutaka incline in the October 2009 Observer. these are nothing short of stunning. The man is a true artist and I can't believe that he doesn't do prints.
Another local modeler/engineer had been reworking an S scale Ja Kit that had been assembled wrong. the model was well put together, but it wasn't 'straight'. There were also problems with the height of the cab. There were comments raise by another modeler that these faults had also been observed in a well known modelers assembled models, which had necessitated a lengthy and fiddly rebuilding process.
This sort of raises another question that I always ponder. what do we expect in a kit, and what are we prepared to 'live with'? From reading the British forums, the answers range from 'it must be perfect, but I'll never assemble it' to 'Its not even close, but if I toss away the chassis and most of the body and add a stack of other parts then it should be fine'. I've never really understood the second one, as surely a manufacturer who wants you to part with your hard earned cash should have done his homework up front.
the evening finished with a beer and some discussion on using servos to mechanise line side models ( A compressed air coaling crane was the intended target)
Thursday, December 02, 2010
Ballasted
I've reported a while ago about the new Yd kit from Trackgang. I've now had a chance to actually have a go with he bits. First up a reminder of how it all looked freshly unpacked.

The castings are crisp (as you would expect). There is a small amount of flash present. the only real problem is that the air cylinders are not quite square, due to an odd choice by the caster on how to put them in the mould. However its nothing that can't be solved by a bit of filing.
Assembly is by glue (I still can't master soldering anything that melts if i screw up. give me a brass etch any day). The only problem I encountered in the early stages was attaching the sides. They have a small pin that locates them under the floor. Unfortunately this means that they are about 1mm below the ends.

I simply solved this problem by removing the pins and gluing the sides level with the top of the ends which is where they should sit. If I had taken clearer pictures at the time it would all make sense.
I altered the construction order slightly by attaching the 4 cylinders to the floor first. This then gave a reference point to fit the underframe spine. Due to some error along the way this piece has to be modified by removing some of the end platforms and adding 3mm into the center of the part. Its no big problem, just something to be aware of.
And so, what does it look like together?

The kit has captured the look of the prototype, which is all we really want at the end of the day. I've always had a soft spot for these wagons since Mr Bond built a couple 25 odd years ago in S ish scale. I may well acquire 2-3 more as they were never seen alone in the wild.
The castings are crisp (as you would expect). There is a small amount of flash present. the only real problem is that the air cylinders are not quite square, due to an odd choice by the caster on how to put them in the mould. However its nothing that can't be solved by a bit of filing.
Assembly is by glue (I still can't master soldering anything that melts if i screw up. give me a brass etch any day). The only problem I encountered in the early stages was attaching the sides. They have a small pin that locates them under the floor. Unfortunately this means that they are about 1mm below the ends.
'I can read the paint label....'
I altered the construction order slightly by attaching the 4 cylinders to the floor first. This then gave a reference point to fit the underframe spine. Due to some error along the way this piece has to be modified by removing some of the end platforms and adding 3mm into the center of the part. Its no big problem, just something to be aware of.
And so, what does it look like together?
The kit has captured the look of the prototype, which is all we really want at the end of the day. I've always had a soft spot for these wagons since Mr Bond built a couple 25 odd years ago in S ish scale. I may well acquire 2-3 more as they were never seen alone in the wild.
Subscribe to:
Posts (Atom)