Monday, October 14, 2024

Christchurch Big Train Show visit

DB is barely holding the fort while Dandruff-San visits the far east.

The Christchurch Big Train Show was last weekend. There were plenty of layouts, stalls and chat to be had, so myself and a fellow modeller from Oamaru ended up staying four hours and we both had our wallets lightened by the cunning salespeople and their shiny trinklets.  


And wow! There was some unexpected (unexpected by me!) NZ120 presence there, with Ian Perry, who lives near Kaikoura, showing his model of scenes that are, unsurprisingly, from near Kaikoura. 

Rolling stock was from Trackgang, and all airbrushed - some of the most 'professional' looking finishes I've seen in NZ120. This all ran perfectly (even with multiple tracks across angled module joins) and looked great, with the scenes and bridges being great representations of either actual scenes, or of the general feel of the place. 

Ian and his wife spent a lot of time traveling around NZ in their caravan, and most of this was built during their journeys!


He had a Faller car or two running around as well to add to the interest. 

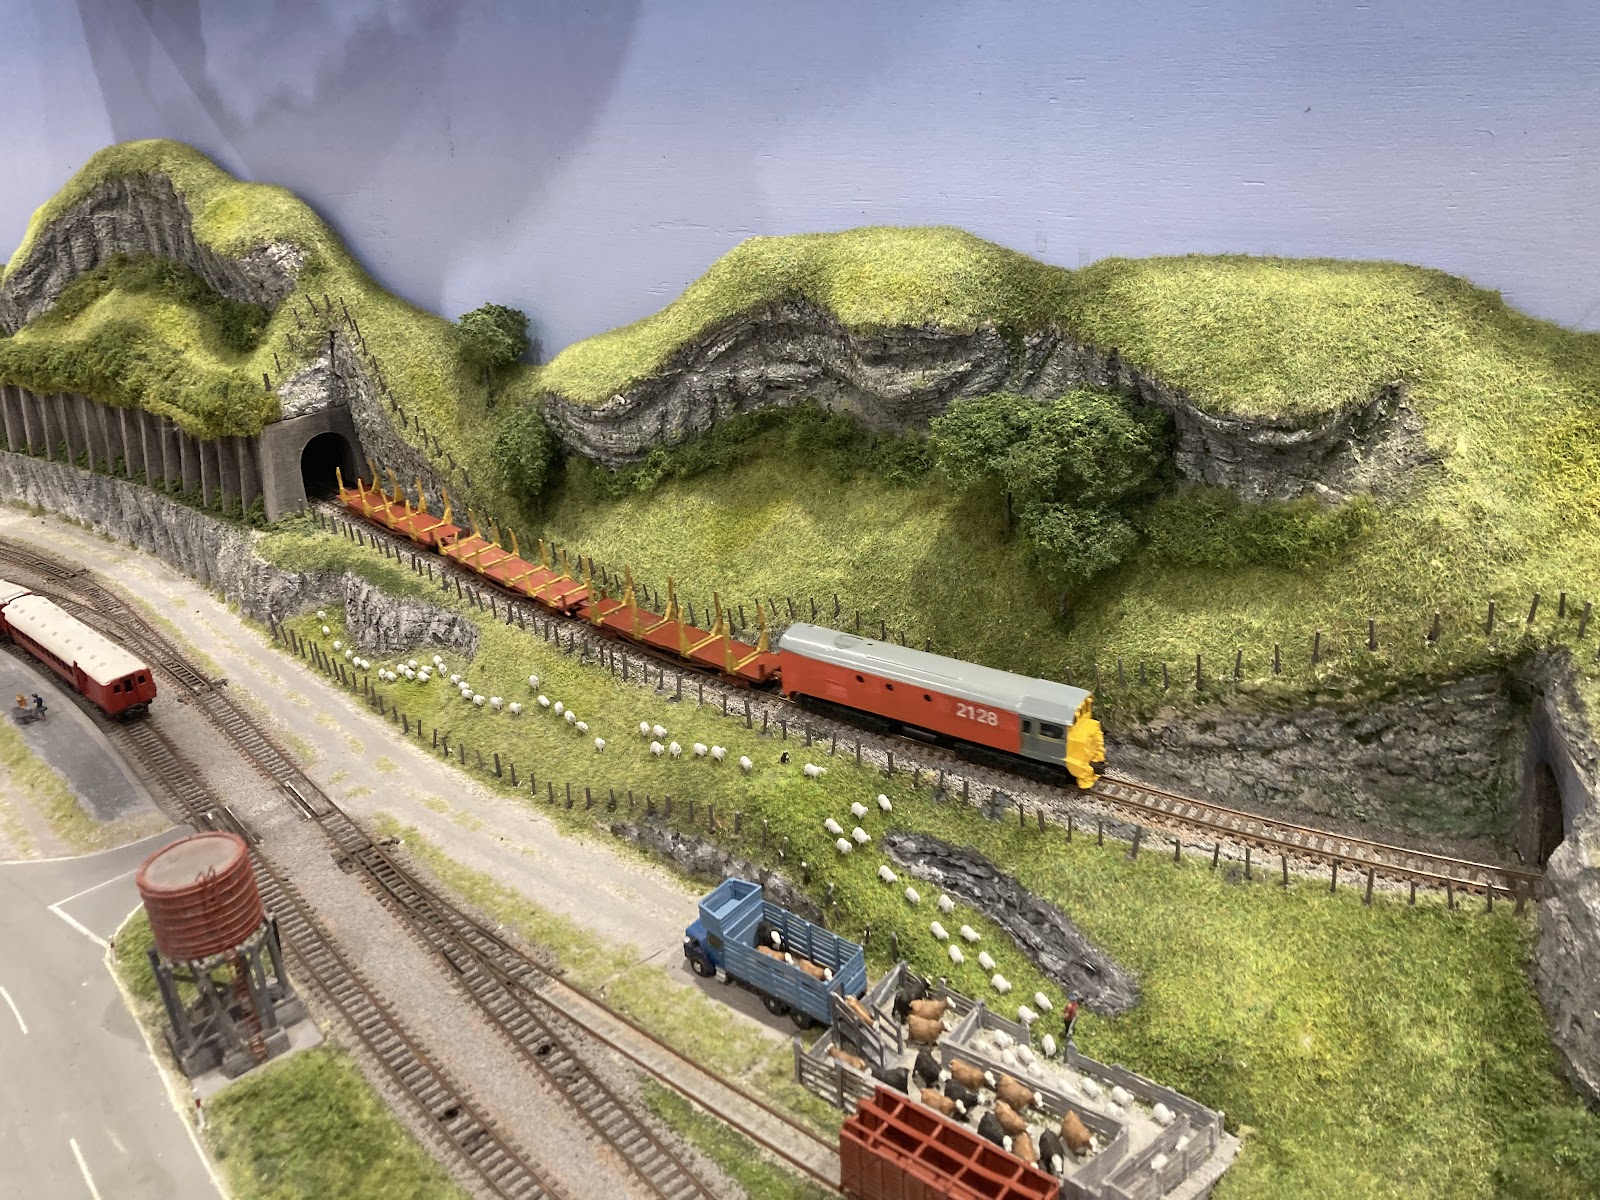
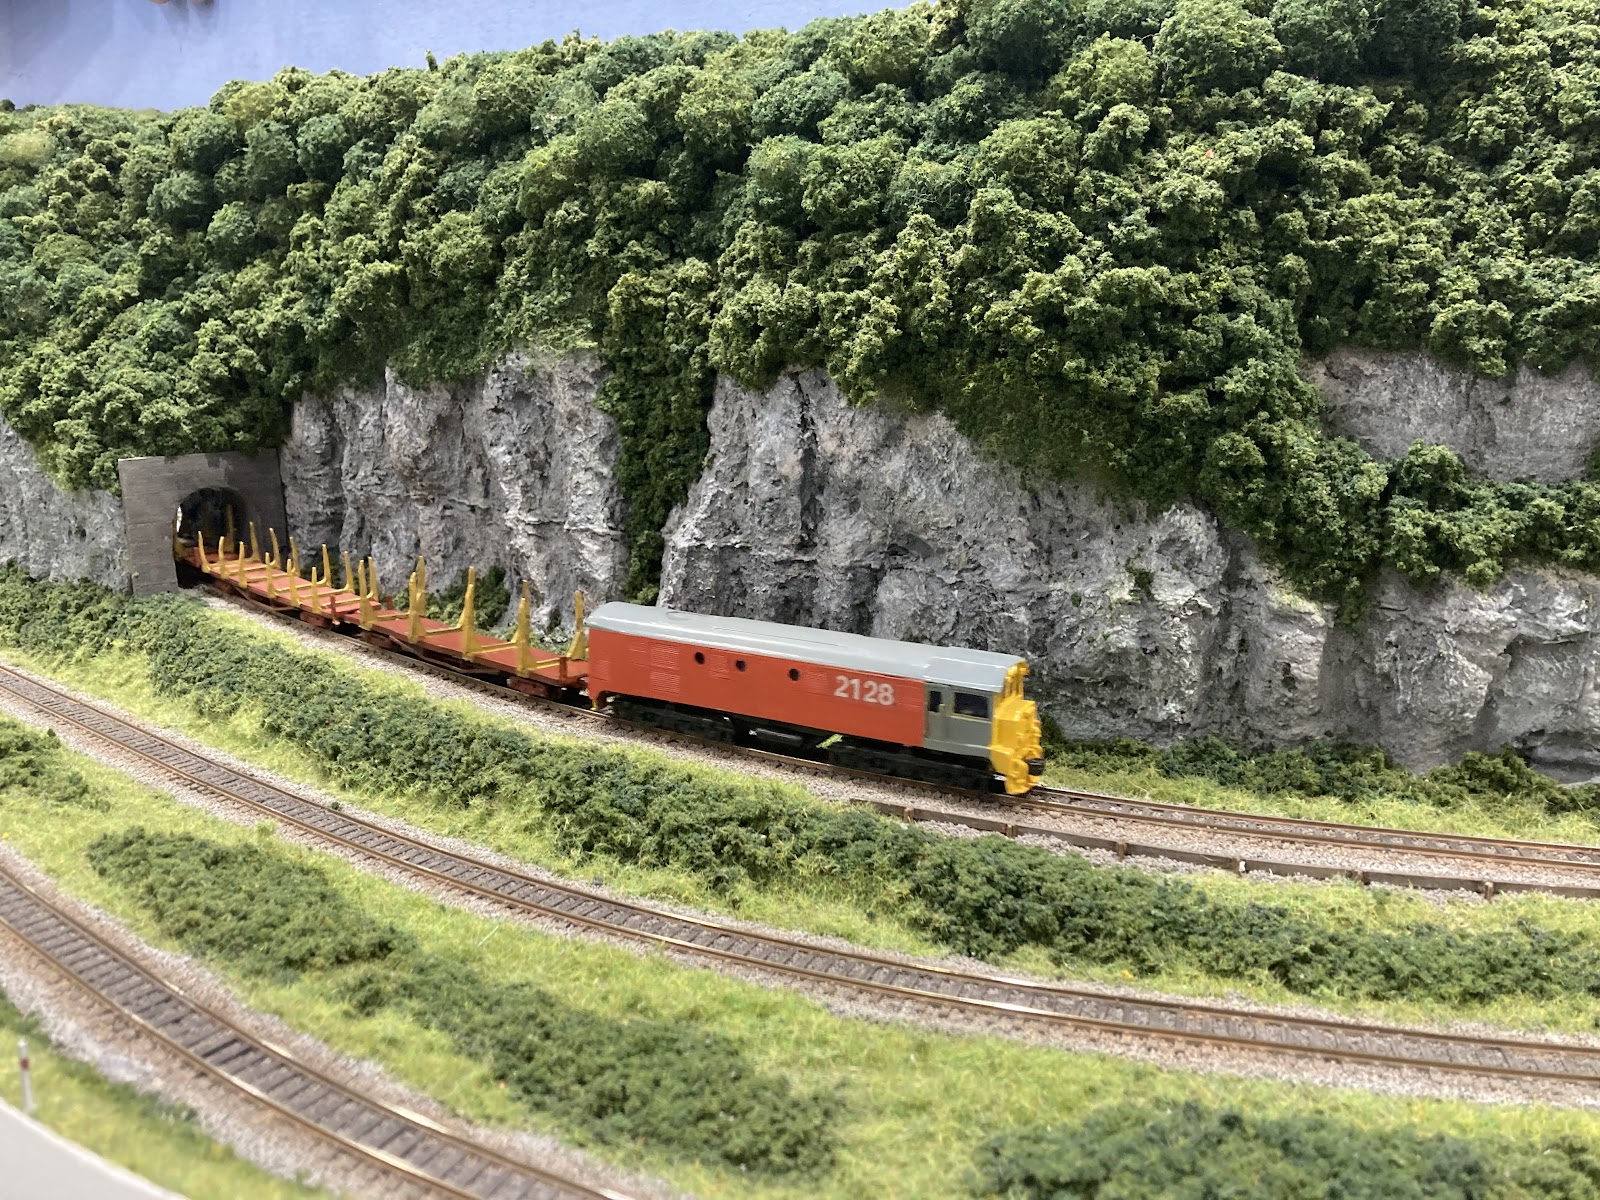
'Kaikoura' looked great,  ran flawlessly, and was the well-deserved winner of 'layout of the show'. The recabbed DGs didn't hurt either, although there was a TMS red DF there as well...

Regular S scale attendee 'One Track Minds' were there with some lovely models, although some of my favourite modules from last year were not in the layout this time.  This simple one below has nice undulation and shows that a module doesn't need to be in any way complex to be very effective.


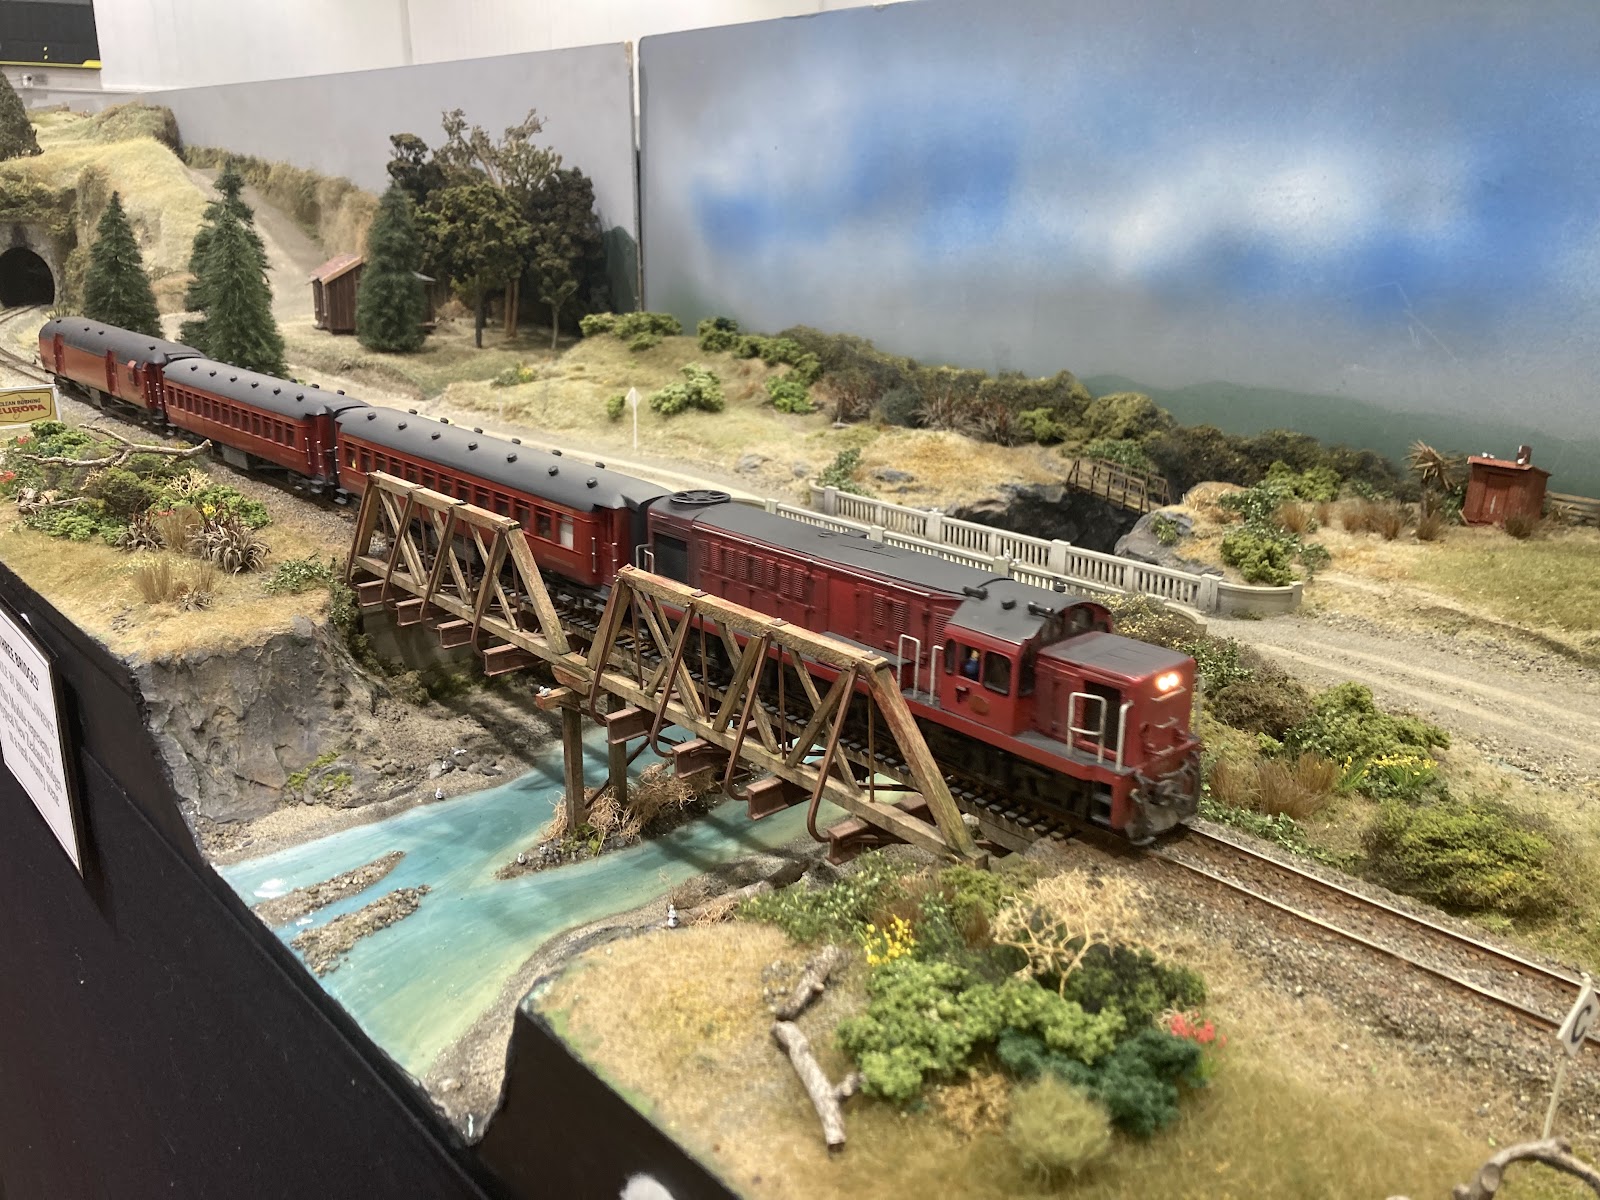
Many of the locos on this layout had some superb sounds. The sounds for the DGs were recorded by Peter Ross when the DTG's DG 772 was undergoing load bank testing. A video may appear below if Blogger will publish it:


There were plenty of other US and European layouts and trains in S, HO, N, 009, Z and G, but I didn't end up taking many more pics.

Something that did catch my eye on local purveyor Ironhorse Hobbies' table were these 'ready to run' modules intended to jump start some local OO/HO modular efforts.  There are no legs for these yet, so you'd have to make your own.

I might be tempted to pick one or two up (sans HO track, and locating magnets in the ends) to try out as an add on to Studholme.  Especially as they are considering offering various lengths (these are 300mm x 560mm), and 'curved' and 'drop' versions so you could model a river or undulating scenery if you get bored with  modeling the Canterbury Plains in flat rectangles of land.

In a similar vein, the NZ Model Railway guild just reviewed some laser cut modules from Hamilton-based Craftmaster. Theose may be lighter (being made of thinner plywood) and fancier but I'm rarely passing Hamilton, and I expect postage might be painful. Review of Craftmaster modules

For those of us who are challenged by being located in the Mainland Island may find it easier to arrange (info@ironhorsehobbies.co.nz) to pick one of these "IHH-Trak" modules up from Ironhorse ones if they were passing Christchurch. I'm going to drop ironhorse an email to see what the go is.

Friday, October 04, 2024

An update of sorts

Theres been a bit of radio silence from La Casa Dandruff over the last couple of months. I was made redundant at the end of July (becase the Pharamaceutical industry doesn't need research scientists according to the ICE bean counters). 

Now theres a few of you that might point out that this seems to be a dream come true. I'm finding its not. a couple of hours a night modeling relaxing from a stressful job is quite nice. When theres no job, no stress and infinite time, one tends to drift somewhat. I'm still in the 5 stages of grief, but they all seem to be piling in at the same time. Plus theres a current dearth of scince jobs in this country, and I'm down to single figures for retirement which never bodes well. I got asked at a support appointment "so what do you see as your dream job". My reply was "I've just been fired from it." I suppose I could try Bunnings given I already know exactly where everything is located in their stores. A plus is that the lady of the house is currently enjoying having a "Homme d'Maison"

So tomorrow the lady of the house and I are off to Japan for 3 weeks (planned in March and a break for both of us will be nice). I hope to come back somewhat healed and releaxed as its time to find a new career.

Wednesday, October 02, 2024

Studholme 9 - tracking it down

 DB says:

Studholme took a pause while life got in the way again, and also because of yet another mental block: how should one affix the track at the ends? My initial intention (and implementation) was to glue it down with contact glue, and the ballast glue would further lock things in place - as it seems unlikely that this will be dismantled or set up that often. 

Or would it? There would be nothing worse than showing up at an exhibition to find the track had been banged up. 

So I thought for a few weeks about soldering each rail to a brass screw and eventually decided to use the old PCB method, even though its a bit ugly. I still have one little rectangle of PCB left over from Otaki (!), but fortunately Jaycar still sells this stuff.

So let the next round of trials and tribulations commence. The first challenge is to cut the big square of PCB into more useful strips of the stuff. I vaguely remember scoring this in the past with a Stanley knife (a million times) and then snapping it off. I think Rhys said this stuff isn't great to power-saw because of the dust.

With the help of a few C clamps and some bits of wood I was able to snap off a few sections about 1 cm wide. A few some strips were then prepared for the first module join to be tackled, and the plastic flextrack sleepers cut away. This was challenging as I'd already glued the track down on this module end, and its always more fun on code 80 Peco track due to the way the lower half of the rail it set into the plastic sleepers. In addition, the PCB is slightly thicker than it should be, but I'm not going to let that bother me. In fact I liked the little undulations as the trains moved through Otaki.

I held the strips up to the track layout and marked the length and where I'd drill and countersink screw holes to fix them to the modules, and cut shallow insulation gaps through the copper with a razor saw.

And then screwed them down...

The near ones were subsequently removed and the holes countersunk a little deeper to hide the screw heads more. I hope ballast will cover the rest - I'm sure I did a worse job on Otaki.  Note the cardboard slivers between the modules in the above pic, we'll come back to them in the next issue.

This post was supposed to end with the joins all soldered up complete and cut, but this has been weeks in the making already, so I'll leave the soldering for now and get this posted. 

The final thing I did today though was to fill all the screw holes and paint the fascia. I went down to Mitre 10 looking for the Resene 'Bokara grey' recommended in the NZ120 Fremo specs and found two test pots, but that's $12 for 120 mls of paint. That won't last long. I then remembered we had some Friars Grey left over from roofing jobs. When I got home I also found we had some non-roofing interior paint in a similar shade so decided to use that instead. Its obviously a slightly different shade to Bokara, but I decided to waste that $12 on coffee and a scone tomorrow instead.


Will give it a second coat tomorrow.