Wednesday, March 31, 2010
Ew project pt IV
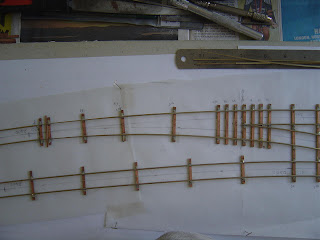
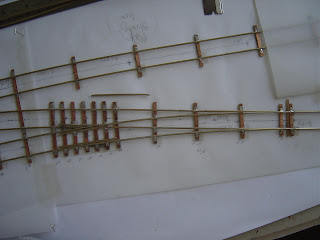
The center bogie will hold the motor mount and also pickup power (one can never have enough pickups, which the S scale guys don't quite seen to understand yet). This is a check to see that the drive shaft offsets are not too extreme when running round a curve (I think about 600mm radius, the template just below it is 1750mm and its quite a bit tighter. There is also enough space to add some flywheels at each end of the motor.
(I spent 10 minutes hunting through boxes tonight for the 2nd worm drive I had purchased for the first iteration of this project. The penny finally dropped and I remembered that it was in the twinset railcar. Bugger)
Tuesday, March 30, 2010
Quarterly magazine review
First up on my doorstep (or rather the book shop display) is the Railfan. This months features are;
-The variations on the Kiwirail colour scheme. Lots of pictures of modern era trains. Not my thing, but still very well done (and Drew gets a picture on the back cover).
-Dq's banking out of Picton and over the Dashwood pass. Another Andrew Gorrie photo essay. I'm still not sure about these but they are oddly compelling, and do tell a good story.
-An update on the Auckland suburban area upgrades. I'm starting to think that This would make avery good layout idea. The track layout at Newmarket is very modelable, and the trains look interesting. Plus I think they still have freight movements through there as well.
-Noted historical photographer J.A.T Terry presents an album of his favorite photos. These include the Wd and R that ran on the Timaru harbour board line that I believe that my grandfather may have drove (we still have his steam tickets somewhere).
-Pt 2 of the NZR bogie carriages. This series is a great idea, and now that we have vans out of the way..
Then we look at the Journal;
-A large article on Glenn Anthonys Gn15 gold mining layout (plus both covers).
-An article from Les Downey on building a UG horsebox from the old Branchlines G etch (plus an article on the prototype). I have a vague memory of a similar article in the journal in the early 1990's?
-Peter Ross ongoing saga of how to make smooth running steam engines. I should really pay more attention to this but Iain Rice sums it up very nicely in his book on locomotive chassis construction, and I think a bit more concisely to.
-Plan and potted history of Auckland D class cars. These were locally built.
-Inagahua Junction from 1914 to 1940 (with a second part to come).
-A first part of an article on the history of NZ120. The 'to be continued' part means that the remainder of the article will be published at a later date. If I had known it was going to be spit into 2-3 parts I would have written it completely differently. the photos don't seem to have come out as well as they looked on the computer (maybe its time for Mr Bond to complete his magnus opus on photographing models so that we can get better at it) I also note that there has been no mention yet of the re-availability of the Trackgang kits.
-Area group reports (grrrrr)
As an interesting aside it was pointed out to me yesterday that the most modern item that appears in the journal is my pair of Dc's from the mid 1980's. For the modern image modeler there is a bit of a drought of material.
So, for this reviewer, the Railfan has some bits of interest(lots if you are a modern image fiend), but once again the Journal seems to miss the mark for me. The last 5 issues have had large layout spreads (~8 pages) of layouts that while very well made and detailed, tend to have limited appeal to most New Zealand modelers. I'm not saying that they should not be there, just that maybe not quite so much of them should be there.
I have heard rumors that some alterations to the Guilds information communication and publishing strategy will be rolled out/discussed at the Convention this weekend. it will be interesting to see what happens.
Monday, March 29, 2010
Railway history
For those of you unfamiliar with the story; When the railway was being removed in 1956, One night some locals nipped out and purloined the station sign and railway crossing sign. These were stashed up in the hills until the police had stopped looking for them, and one night were re-erected into this sign.
While on my travels I also set out to photograph an interesting old bridge that can bee seen from the main road south out of town.
This appears to be a remnant from the old railway and one I have not seen mentioned anywhere with remains of the railway. It certainly looks like the piers of a railway bridge (the foot bridge on top is an addition, and its right where it should be on the old trackbed.
As a bonus, here's an old house I found on my travels. Worth a crack modeling something like this if you have an open field.
'Chateau Druff had seen better times...'
Sunday, March 28, 2010
Sunday morning cooking
Saturday, March 27, 2010
The Times they are a changin'....
Some of you will remember that I have put together a wish list of locomotives that will fit on my a-building Patea layout, namely:
DFB: 7348 (Green), 7241 (TR Blue), 7200 (Black)
DXB: 5074 (Green), 5108 (KR Phase II), 5137 (KR Phase I), 5120 (TR Blue), 5166 (Black), 5143 (KR Phase I)
DC: 4110 (TR Blue), 4191 (NZRC Blue), 4409 (FS) 4438 (Black)
This list was first concocted last year after my first ride with Drew and so accurately reflects how things were over the 2008/2009 Milk season.
Just over 12 months on, and things have changed more than youd think! The DX's have seen the most changes; 5074, 5120 and 5166 have all been outshopped in the latest KR scheme....5120 and 5166 have both been in for overhauls, but 5074 was only in for remedial work and quickly reappeared only a few days later. Similarly, 5114 and even DXR8007 have suffered a similar fate, which looks like a plan to eradicate the old "Corn Cob" scheme as quickly as possible.
Admittedly, this "Repaint it all" movement had me worried for my fave 7348, and everytime I saw her in the paddock in Wellington I wondered if it was about to disappear....possibly to come out in MAXX blue and disappear to Auckalnd! HORROR!!!
Unfortunately, I've just had it confirmed.....both 7348 and 7200 from the wishlist (plus 7104) are about to get the MAXX treatment over the next few months (I have registered my displeasure with those concerned!!).
Sigh....already I'm an historical modeller, but luckily I made it a priority to track down and photograph all these locomotives THE WAY I WANTED THEM in case they changed quickly while I wasnt looking. Lets face it, we live in interesting times, and with the arrival of the DL class later this year, we will see the biggest main line locomotive shake up since the arrival of the EF's caused the withdrawl of the Dj's.....so what will all this mean for the DC's? So, RECORD IT NOW!!!! Who knows where we will even be in a month, let alone 6?
P.S LAST CHANCE to get photos of 5304 in blue....
Friday, March 26, 2010
Not done yet
The answer to this is not overly simple. From a fair bit of reading It seems to depend on where you live. The British exhibition circuit revolves around good quality layouts showing several times a year in different places. Given that the British isles seem to be easier to get across than Auckland at rush hour, plus the large base of layouts, this works fine for them. I think the local eccentricity of the natives helps too (Its probably the weather. Global warming should make them as mad as the Italians in 50 odd years). People seem to have these vast collections of extremely specific knowledge, and will speak out if your midland red is not the correct shade, or the luggage trolleys are wrong for that particular station in winter. I'm still surprised that more/any murders are reported at British exhibitions.
Having some modeling attractions other than the railways, such as some impressive buildings
'Its not Frankenstein, its Franckensteen!'
New Zealand (as I've said before somewhere) does not have the large exhibition base. We are lucky if we get a local one once a year (and that's a 'pick any city in the country' thing). The punters don't have the detailed knowledge of prototype, they prefer to see things moving, and especially if they are Thomas and friends.
In my opinion, the most important things are a reliable layout and one that keeps the operators entertained. These mugs are the ones that will have to keep things going for 12-14 hours over the course of a weekend, and their enthusiasm is what will keep the public entertained. if it is possible, have someone on the outside of the layout to talk to punters (some are better than others, and some revel in the job).
The layout in the show last weekend that won exhibitors choice was a short German branch line with the name 'Damph Farten'. Maybe the name is important too?
(Please no other layout names, we've heard them all)
Thursday, March 25, 2010
How not to do it
When exhibiting a a train show, many visitors want to take pictures. here is a right way or wrong way to do this. The more correct way, and more civilized to boot, is to ask 'can I take some photo's'. Almost all exhibitors will be happy to oblige. if there is a special shot that you would like of a particular loco/train/scene, there's few who will not go out of their way to arrange this. As the old saying goes 'courtesy costs nothing'. There's always others who merrily snap away, but there's not much one can do about this.
Contrast this with an experience on the Saturday last weekend. A chap with a camera with a lens that could have taken pictures of Mars turned up. We assumed he was from a paper of some sort, but it was just his manner and tone that ticked us off a bit. 'I'd like this here, and if you could just crouch there a bit'. 'Whats your name, how do you spell it'. There's ways and ways of doing things, even if you are being paid to do them.
As a counterpoint to this, before publishing this picture I showed my friend the picture and asked if it was alright to publish this on the blog. If he had said no, I'd be writing a different blog post today.
Wednesday, March 24, 2010
Moana 11: Getting it up
Thanks to the foamboard construction, the whole thing is super light and could be hoisted up with one hand if it wasn't so long. It will be interesting to see if the thing warps at all over the hot and humid summer.
So the obvious question on everyone's keyboards would probably be - how silly would it be to have the track sitting about 6 and a half feet up in the air. Well here's the view from the far side of the room which is about 13x13 feet or so:
Note the green Flufosaurus from the Otaki to Cass exhibitions. And from up on a chair:Practical? well, we'll just have to see. Moana is quite a 'flat' scene with a lot of hills/trees etc in the way of a clear view, but the next modules are intended to be a little more ledgey (like the Manawatu Gorge) so it should be a little easier to see the trains while standing on Terra Shagpile. Now you know why I didn't model a third loop through the goods shed and insisted on a motorised point...
Now that the layout is up out of the way, it might be time to back up a miniskip and have a bit of a clean-out. Items of comic interest from right to left: exercise bike used to store track and safety vest, my private-label Spring/Summer collection, a Speights clock that my brother bought me 20 years ago, PC keyboard boxes full of NZ120 trains, the last piece of NZ wire-netting left in America, an incredibly messy modeling desk, a 9mm DG untouched from the last time you saw it, a temporary shelf with a nicely weathered BNSF patched SD40-2 on it (the DFT thanks you for your DCC decoder), the pink foamboard table that Moana has been sitting on, and the back of a tatty tan chair bought from Paraparam for $5 in 1990 that has been used for modeling ever since (making things, not posing) and also it would seem (based on the visible evidence) for painting lots of ceilings in shades of white.
While not everyone will be jumping in the air over high-rise layouts (except perhaps periodically to see if their train is still moving), I can see this sort of lightweight scenario thing working for the Fetid_Antler's 8 foot Patea quandary. If this was a stand-alone roundy/roundy, it could be brought down and placed on a bed or kitchen table and plugged in for a play when the family is out and then safely returned to this storage position in a minute.
Tuesday, March 23, 2010
Its all in the wrist
In related topics, how does one differentiate DCC controllers on a club setup so that you always get your own back. The answer is quite simple.
Monday, March 22, 2010
An Exibitors dairy pt II
9:55. Arrive at venue, park and walk extra 20M to door. Drop gear off, deliver more locos to Belgrove N gauge layout. Wander round absent mindedly and do some operating on the S scale layout. Have a look at some pictures of Paekakariki and Palmerston north in 1960's. Get some more information to store for future use.
11:00 AM. Finally make it all the way across the hall to Robin Knights emporium. A modern day version of Alladins cave (but without the swords and gold and jewels, though I wouldn't bet against there being some of them in there). Purchase a second can motor (you can't have too many at this price) and some universals for drive shafts. Comment on how this may force me to eat toast for the rest of the week. He manages to shed a tear quite convincingly...
1:45. Relief turns up late again, but he was printing out some flyers to give away for the group. Let him off with some sarcasm. Tea tasting funny. Maybe its the bromine...
3:00 PM. Another local modeler turns up with some S scale models to try. The Vulcan railcar works beautifully. The Kb is not so good, but some surgery on the motion yields good results, and it runs very nicely.
'How fast did she go before?'
'She ain't never been before.'
4:00 PM. Move over to the N gauge layout, and try running some of my other locos apart from the Da's (which have performed well despite their 20 years of age). The railcar refuses to go round the tight curves, and I fear some surgery may be in order. The Ed's perform above expectations, taking tight corners in their stride.
4:45. Once again its time to pack up. After everything is tidied off, its up and onto the truck. Done in 10 minutes. Maybe there is something to this one piece idea after all.
Sunday, March 21, 2010
J - Low.....
Am_Fet writes: Yes, yet again another update in this deathless epic. I have put together the Mk III version of the J5 as a bit of a reminder as to what was happening, as the Mk IV is already at the etchers. Unfortunately, it didnt go together as planned (Hence the "low" in the title).....
I think I may still have some geometry problems, especially how the ends go together. Trying to jam in the two end layers, the sides, floors and inside planks...it all gets a bit convoluted. The mylar side and end strappings are the original ultra thin ones, the next ones on the Mk IV are thicker and easier to handle. Still needs the wires on the sides and top of the doors.
And the less said about the roof, the better....I think it will be saved if I can get the grain of the ply to run lengthwise. Cabbage has suggested making up a gluing jig so bits of wire can be glued in, then the whole shebang is bent to shape and dropped on.
Things I'm pleased with: The mylar strapping defintely looks the part on the sides, and the gratings on the top level have come out great.
So the final rating will probably be "Tricky, Yet Achievable".
I'm pushing hard to have some for sale (with all the kinks ironed out) with Cabbage at the convention, hopefully around the $25 mark.
Saturday, March 20, 2010
An Exhibitors diary
9:50 AM arrive at hall on bike, to find layout owner just arriving as well. Plenty of parking space, but I'm right next to the door, so I saved a 20M walk. Drop off Da's plus some wagons with other local NZ120 modeler. Get set up on the S scale layout and started. Do some track cleaning. Start shuffling wagons around, and work out what shunting moves work and what don't. Set up where one person drives on the back side of the layout, while the other operates points, uncouples/couples and chats to punters. This works quite well. Try to work out how to use screwdriver to uncouple kadee couplers. Discover that its 'hit and hope'
11:00 AM. Feet starting to remind me why I was going to bring along the bar stools. Realise it would have been quite hard to do so on the bike anyway.
1:00PM. Afternoon relief running late. When he does turn up, wander off to have a look round the rest of the hall, telling him just to make it up as he goes along, as that is what I've been doing all morning. Quickly discover that hardly any traders will get my money. Robin Knight one of the lucky ones as I score a can motor from him quite cheaply (but slightly larger than I really want ( never mind, you can't have too many spare motors and it is one that Ian Rice recommends). Have a discussion with him about powering Ew's and Ka's. Wander off wondering about changing my plans for powering this. Also find a copy of 'Engine Pass' by D.B. Leitch for $5. A very good score.
2:00 PM try mornings arrangement with afternoon assistant. Discover that he is far better talking to the punters than helping me run the layout. Still, someone has to do it. Spell NZ120 layout operator, and take chance to put all the wagons on that I brought along. Still not as long as the Cass trains, but its a start. Chat with another modeler who has similar feelings to mine about the journal. Wonder where to go from here to change the world. Eat an apple instead.
4 :00 PM, Suddenly wonder where the afternoon has gone. Feet tell me they have been there all the time and its dragged. Tell then they don't have a vote and I'll do it all day tomorrow as well if they don't shut up.
4;50PM. Park up the layout for the day. There's still 10 minutes to go, but I'm done. Talk to an old chap who has been videoing all day and discover he worked for NZR in Palmerston north in the 60's. He might have some pictures fro me as well. A good score.
Bike home, stopping only to purchase $10 bottle of Pinot noir....
Friday, March 19, 2010
Day 1
So far today I've been playing round with the track layout. the south end and the area around the station at the north end have come together quite easily. the problems have really started around the loco depot, and more precisely the turntable. I've been trying to stick to a 750mm minimum radius so that the Ka's don't look completely silly running around the curves, but its become almost impossible to fit the track arrangement in, so I'm going to have to go down to either 650 or 600mm. Or come up with something even more cunning.
Things will be a bit slow here over the next couple of days, as there is a model train show this weekend and muggins will be playing trains (S scale for some of it unfortunately, but hopefully some NZ120 stuff. I'll have a fuller report Sunday night with pictures as well.
Thursday, March 18, 2010
Nothing to see, move along
Also, in light of the article on space for layouts, I guess its time to do some more work on plans for smaller spaces, even though it goes against everything I believe in. However, this will not stop me from planning an otago central layout...
Wednesday, March 17, 2010
'It wasn't me officer..'
Being a home caster and one time kit maker I've always been interested in copyright issues ie how much does one have to alter a master before it becomes another's property. New Zealand, being at the arse end of the world, has always had a 'do it yourself' streak, which has resulted in local home rip offs of overseas models (primarily in the overpriced wargaming figure area). I'm also aware that it's happened in the local model railway industry over the years, as the price of kits is perceived to be very high, to which I'd reply 'have a look at the British kit prices and then tell me we are expensive.'
I think its also because by-en-large, we tend to be tightwads when it comes to parting with money (and this is a charge that has been leveled at NZ120 on more than one occasion by major players in the NZ model scene. I guess its probably true.:v)
Anyway here are some interesting threads from England here and here.
I'd just like to finish up by saying that its not OK at any time to make direct copies of someone else's work. I'm also rather dubious that its OK to modify parts from a manufacturer and then on-sell them (I wouldn't feel right about it, and I also probably believe I could do a better job anyway). I always think that if I did something like that, and the kit maker gave up as a result, then the hobby would lose any new kits he may have produced.
Tuesday, March 16, 2010
Space....The Final Front Ear....
*old joke...How many ears does Captain Kirk have? Three, you forgot his final front ear....sigh...
Am_Fet writes: Just lately his Royal Druffness and I have been conversing about layout space and how it equates with our dreams (or at least, thats what I think we've been talking about). Living in a small 3 bedroom box in a back section with no garage, I am well qualified to talk about lack of space....with a wee bit of ingenuity I dont think it needs to be a hurdle however. Looking around, there are numerous spaces in the house that could be used (obviously with domestic approval).
- Under the Bed: Obviously just for storage, I dont think anyone could successfully operate down there...vertical height becomes an issue, and cleanliness as well. Still Doable, however.
- Closet/Alcoves: Some larger closets may be able to be rejigged for a small shelf layout around three sides. Wouldnt work in my closet though, I'd just be dodging business shirts I never wear...
- Book case: For a small shunting layout, just the ticket. Not so great if you want to model the Spiral full size, but maybe you need to re-evaluate your goals? (pic is from http://carendt.com ...best model railway site on the planet)
- Above doors: This one looks promising, and I'm waiting for KiwiBonds to write about his experiences with Moana. By mounting a layout above the door line of a room, you get full length walls and it stays out of the way of domestic activities.
- Spare rooms: Speaks for itself....I think you are exceptionally lucky if you have the chance to build in a nice warm carperted room...lucky blighters.
- Outside Shed: Cold draughty unlined unpowered.....no one else is bound to want it, so its perfect, really....
- Garage: Usually has to share with smelly cars, lawn mowers, gardening stuff, bikes, camping gear....if there is any room left (preferably walled off from the rest of the chaos) its by far the best option.
In our current digs, I'm investigating using an outside shed with is around 3.3 x 1.8. It currently has no power and an absurdly low headroom, but in my minds eye I can see a small shelf running above a workbench at one end and behind the beer fridge a the other. Build it in a modular way and it can be rejigged for a bigger space once we move house (which is possibly on the cards...a curse on school zoning).
Das Shed
Right, your turn....what spaces have you currently got that youve often thought about expanding into? And for extra marks, whenever you plan your "dream layout", what size space do you design it for? (Personally, I dream of a 20' square shed....)
Monday, March 15, 2010
And so it begins
I've spent last night sorting out the track layout for the south end of Paekakariki. A local modeler was kind enough to make me some tracklaying templates in several radii (750, 1200 and 1800mm) and I used these to sort out just where everything went. The most important bit here is the crossover that all the loco movements are going to go through for southbound trains. I started off with a 750mm radius, but then decided that I could fit in a1200mm instead. The balsa shape is Ka sized and is being used to check clearances with the electric stabling siding, and also that there won't be too much overhang .
The curves on the town side of the layout look very sexy....
I'm quite lucky here in that the tracks at the north end of this board are all parallel so its very easy to lay them out. it will get harder from here on it as the loco depot has a stack of tracks that will take a fair bit of thinking about how to do them. Fortunately the lady of the house is away next week and I will get to 'expand' for a few days. Now all I need is a package from Woodsworks to turn up, and we are in business (well, plus some more tools...)
Saturday, March 13, 2010
On points
Yesterday I spent a pleasant afternoon sitting at a desk while the sun shone outside completing the S scale crossover that I have been working on (I think its sort of like detention but while getting feed and with cups of tea). Unlike previous work sessions, I remembered the digital camera and so can now shed some light on this dark art.
Here's where I got up to previously.
The 2 outside rails have been filed where the point blades come in to contact and the throwbar end. The frog has also been positioned with the aid of various track gauges. Note that this is being built as a crossover unit and all the other rails have been soldered into place.
Here is a close up of the frog area. Things to note are that one should not solder all the sleepers at this point as you may/will have to make adjustments later.
Here is the second point where I have shaped and installed the point blades. Note that these are one piece including the wing rails. It takes a bit of careful measurement to get it all right. The ends are created by cutting through the rail web (the bit at the bottom) on both sides at the correct spot and then carefully bending in a vice to get the correct angle. Also one of the check rails on the outside has also been positioned. To solder these in I used a 'dodge' that a local modeler has come up with. Make a piece of brass about 40mm long that is the correct width for the flangeways (NMRA standard). To solder the guard/check rails into place just drop this into position and push the guard rail up next to it. then just solder the guard rail into place. Its a piece of cake.
Here's the frog end of the point with everything soldered in. At this point the fun really starts as you get to run a wagon through to see if there are any tight spots etc. On one point it revealed that the guard rails were quite tight even though the back to back and there was a fair bit of bumping at the nose of the frog. Further investigation revealed that the wagon I had been using had old English finescale wheels from about 30 years ago. A switch to a wagon with North yard wheels then showed that all the problems were with the 1st wagon (I may have had to move the outer running rail in a wee bit, but this was not too hard).
Making the throwbar. 2 0.6mm holes have to be drilled 14.25-14.5mm apart. this made my inner finescaler quite happy, but the rest of me rather worried. The holes were drilled with a pin vise, with a drill selected with a micrometer from the many on offer. They were expanded slightly at the bottom to allow the pins that are to be soldered onto the point blades in. These are then bent to shape over a razor blade and cut short.
The whole thing installed and working. This is a fiddly job. First the web needs to be filed out so that the pin can lie flat against the rail. Then with a minimum of flux solder the pins to the inside of the point blade. I cut out a thin piece of paper and inserted it into the gap between the point blades and the throwbar ad this seemed to work well (ie I didn't solder it solid). Check again with a wagon to see if it all works OK.
I'm not waiting on my order of track and sleepers from Woodworks to see if I can step it up and scale it down. I think that the coarser clearances will make life a bit easier for me. The inner finescale is very excited to the point (haha) where I'm going to have to calm him down with the application of high strength beer I think.
Saturday morning again
For something interesting to read, heres something on Freemo from the British, who have never embraced a concept like this before (probably something to do with being invented on the continent).
Friday, March 12, 2010
On my workbench
The mech started life as an Sd40-2 bogie. If i was to place it the other way the wheelbase would be correct for an F, but I like the idea of an empty cab. I added Sd-70 wheels to get the right diameter. The brass frames are for pickup and to hold the axles in the correct place (this is normally done by the outside pickup thingies). The micro motor is from Nigel Lawton. Its a small 6v job with a resistor connected. I just soldered the wires onto the frames. The top is from plasticard and paper at the moment, I'll build a real one out of brass at some point. Still not sure if it will run, and I need to remove the pinpoints and add spoked inserts to the wheels. Oh, plus all the detail bits.
So whats on everyone elses workbench?
Thursday, March 11, 2010
An eye opener
I've met a fair few Europeans in my time, and found them to be by in large fairly level headed practical people. I am a scientist , so I tend to like that sort of thing (Its very annoying when you have a little lab fire and people just go into a panic, but I digress). However you can imagine my surprise on discovering that some German model railway scratch builders have discovered the true secret to powering small scale loco's, and it involves fitting the largest possible motor and flywheel into the locos tender that you can.
Mayne its just the way my brain works, but this suggests all sorts of possibilities to me. Getting a 1628 can motor into a Ka tender, or into an old Df chassis (that would indeed pull the skin off a rice pudding and then some) would be great for pulling power.
Have a look round the rest of the site, there's some very good modeling and it will give your high school German a leg stretch in places (unless you are German in which case you will be be in the same boat understanding this)
Wednesday, March 10, 2010
Confession time
Amateur fettler sent me some pre-war railcar plans a while ago, and last week I got to see some old prints from what I assume was the Wairarapa cars test runs (including Auckland I think). I've always wanted to make a model of RM10 Awara which was a freight version, and has a simpler body profile.
Then there's the track configuration and the layout possibilities of modeling the whole line (though it would take an age to run a train up as it would take far too long)
'If there is 1/2 way up a steep hill surrounded by smoke and gorse on a stinking hot day, then, yes, we're there.'
Its just so sodding tempting!
Tuesday, March 09, 2010
James you silly boy
James, if you come across this. I offer my services for any future record attempts that you might try in this field. I'll even bring a beer or 2.
Negative reinforcement
It was my first introduction to stripwood, and I've discovered that we don't really get along that well. Its a nice wee model, but I can't use any of the dodges I regularly employ in the chosen scale, and if I was going to build a detailed model it would be in 9mm.
Its nice to have your own personal preferences confirmed, even if its like being beaten with a mallet.
Monday, March 08, 2010
Time flies like an arrow....
Am_Fet writes:
One of my New Years Resolutions (remember those? No, I dont either) was to make more time for my modelling this year. Apart from someone selling me a defective calender that seems to have both January and February missing from it (I'm thinking of complaining), I think I'm well on the way to sorting out a daily timetable to maximising my modelling potential:
0500 - Alarm goes of, get up, work on CAD for an hour
0600 - Get ready for work
0630 - Leave for work
0730 - Arrive at work, check archives for plans and drawings for current projects
0800 - Start work day
1230 - Exercise over lunch hour (walking)
0130 - Back to work
0430 - Leave work, stop off at laser etchers to discuss latest projects.
0530 - Family stuff for the evening
1000 - Sit down at PC and do CAD work. Update project plans
1100 - Bed
After a week of fine tuning, I've streamlined the process to this:
0500 - Alarm goes off. Ask deep philisophical question along the lines of "Whos $$@#$% stupid idea was this?". Hit snooze button
0510 - As 0500. Repeat until....
0610 - realise how late it is. Panic.
0630 - Leave for work having got dressed hurridly in the dark. Regret sartorial decisions for the rest of the day.
0730 - Arrive at work. Surf the Internet and read emails.
0800 - Start work day
1230 - Buy large lunch from New World downstairs.
0430 - Leave work, stop of at laser etchers. Spend entire time talking about etching ideas for the splashback in our new kitchen.
0530 - Family stuff for the evening
1000 - Sit at PC and play a few rounds of Unreal Tournament. Start watching Movie
0030 - Realise what time it is. Bed
With the above timetable now firmly entrenched, I 'm sure most of the things on my to do list should be completed before the next Geological Epoch begins.....If I get my A into G...
"I love deadlines. I like the whooshing sound they make as they fly by" (Douglas Adams)
Saturday, March 06, 2010
Saturday morning
Interestingly enough, the scale seems to have been discovered by someone else here. Quite a nice wee write up, and even gives a passing mention to Sn3.5 at the bottom.
From the 'latest thing out of the workshops' we get this (photo from Andrew De Lisle).
I still think that the cab designer should be taken out the back and beaten with a T square. Its been described as a 'butterface', which I'll leave you all to do a web search on (it seems to be work safe).
The track building session went reasonable well yesterday. The system seems to work OK (I must convince the 2 chaps involved to put it all in a document on the web as it would take 6-9 months to appear in the journal, which should be arriving on my doorstep any day now I guess) and I'm looking forward to applying it to some NZ120 scale track. So whats everyone else up to?
Friday, March 05, 2010
Monthly support group
Busy today making more S scale track, though I'm being pushed into making some of my own sooner rather than later I think. I've also been asked to bring some beer....
Thursday, March 04, 2010
Making trees
Anyway, before I start off on a ramble so beloved of others in the local rag, today's topics is 5 minute trees. I recall reading somewhere about using seed heads from Buddlia shrubs. Now, it so happens that I have one of these sitting round out on the deck doing nothing but waiting for me to water it.
Apparently they are also common out in the bush round Nelson, and probably other places, though how someone gets out there to water them all is beyond me. When the seed head have lost their colour (or gone from purple to brown) they can be cut off (preferably when the lady of the house is not around). Try to take ones that are reasonably straight, and over 2" (a scale 20') long. Trim the bits from the bottom up for about 10mm to give a decent trunk. Liberally spray paint them green using cheapy paint from a hardware megastore.
Normally I hold them in one hand and spray with the other, but the special effects budget doesn't spring for a 3rd hand to hold a camera.
To finish up roll them in some woodland scenics ground foam of an appropriate colour.
Leave to dry, and there you have it; a simple thin straight pine-like tree.
It is possible to use other plants for armatures. One thats probably easiest for any Kiwi to get is gorse. This does however have a downside if one ever has to reach past it to get at something on the layout. The pine trees at Cass claimed many an unsuspecting victim (well, one in particular who seemed to do it on a regular basis). Best to trim the spiky points off first.
The only other problem with making trees is that regardless of how many you make, the miniature landscape swallows them up, utters a quiet burp, and demands more to satisfy your eyes. I remember John Rappard making 400 trees for his home layout, that just vanished into a small section of it. If you didn't look hard you wouldn't know they were there.
(Oh, and please, no questions on the colour of the woodlands scenics foam. I have absolutely no idea. I just go into the shop and buy the colours I want without really looking at the labels. Bad practice I know)
Wednesday, March 03, 2010
AO. A-a-a-a-O. Daylight come and me wan' go home
I figured I'd better get on to the latter given the real Tranz is getting replaced this year. Don't know why - the guts of those gross fenster 56 foot cars are only about 70 years old...
I want to have 8 of these puppies in my train so I'm going to cast them in resin. I think. I also think, that if that goes to plan, I'll need an end piece (2x required per car of course), and a central tubular section, and probably some underbits. Maybe. Perhaps with some stuck-on big windows. We'll just see how we go shall we?
I began by cutting some end sections out of plasticard, and joining them with some blocky 'doors'. This isn't going to be a terribly sophisticated model, as I'm relying on the 'whole train being more impressive than the sum of the parts' effect, so I somewhat embarassingly stuck-on squares of plastic to represent the door windows, which I'll later paint a dark gray colour rather than cutting out window holes. There'll also be no end doors either, as the corridor connections will hide those except for one at the far end of the train. I'm a bit red-faced over all this, but as long as you promise not to tell anyone, who's going to know?
The roof-end was then carved out of thick styrene block, stuck on top of the other assembly, and some time was expended sanding and filling this to shape as the real thing is quite complicated. While doing this I remembered an offer to buy some bits off Trackgang, but I figured the whitemetal roof and sides would take so much mucking around to fit the big windows, that it was probably easier to build it from scratch. An hour of sanding later and not even having proper windows to show for it, I'm kicking myself...
As I write this (post-picture), the guts of the central section's roof is pretty much done as well - being balsa wood covered in paper.
This may be the only modeling blog in the world where one is led down a meandering path that passes rapid prototyped, laser etched, fancy-dancy models one week and balsa wood and paper ones with no windows the next. Yes folks, there's something in NZ120 for everyone.
Tuesday, March 02, 2010
Questions
Another thing that struck (well, maybe nudged) me the other night while reading the back and forward on another developing project by 'the lads'. So where are all the S scale and 9mm modelers blogs? What sort of developments are they engaged in or looking forward to. It must be hard for the average S scale modeler to have to wait 3 months for the journal to be feed crumbs or information, and possibly a picture if you are lucky. Contrast that with the information pipeline that we currently enjoy with up to the minute updates on projects in the works. Wee Duggie has posted photo's and info this morning over at NZ120.0rg of a Farish08 mech for his Drewry Ds project. The photo's and data suggest that it will do the job very well, being almost spot on in all the important dimensions. We don't see this in the larger scales at all. Is it because the 'older' generation regard the new technology as 'can't see the point in it' sort of thing. Personally I would like to see the guild move more into the online age, with something similar to what we currently have. Its not overly difficult (Wes might have a differing opinion on this) and would add to a modelers resources in being able to ask questions. All it takes is a group of guys with plenty of new ideas. Is there a shortage of these in the larger scale?
Just as another question. What does our reader (Hi mum) think about the current mix of items we have here? Is there anything people would like to see more of?
Monday, March 01, 2010
Loco planning
On your steamers undergoing some kind of anthromorphology at present, what were/are you going to do about things like funnels, sand boxes, things-on-top?
Well, since its all in my head, they are made from fairy dust and moonbeams ( or more likely, beer and wine..). Seriously though, I guess I should lay out the plan.
Current thinking is to have the boiler done in one piece with all the attached structures. This would either be pewter or resin. Since its only 15mm by 90mm, I can't see why it can't be cast in one piece in either material. I've sen some enormous items cast in resin with no problems, and I've also been in touch with a caster in Australia who thinks he can do a similar size in pewter.
then its just a small job of attaching all the plumbing. The rest of the loco I think will probably be etched.
AND what would you consider to be the smallest NZR locomotive you'd build/own?
Well, I once built a dubs A on a Ibertren 0-4-0 that wasn't too much bigger than it should have been, as well as an F and a Canterbury J 2-6-0. Having said this, I do have some philosophical problems with 0-4-0 locos (in any scale really) due to a lack of pickups. I did catch myself looking at a drewry TR the other day and thinking 'that would be a cool model to do', so the philosophical 'me' is obviously the more practical and less fun side.
Maybe we could shift this thread over to NZ120.org to debate the pros and con's of small locos?
(Oh, and yesterdays post was number 600, just to check up on how many of you are paying attention)